Home ▸ Arduino ▸ Sensors Interfacing ▸
Updated On: May 9, 2026
SHT21 Arduino Tutorial: I2C Wiring, Temperature & Humidity Code & LCD1602 Display
The SHT21 is a high-accuracy digital temperature and humidity sensor from Sensirion. Unlike the DHT11 or DHT22 which use a proprietary single-wire protocol, the SHT21 communicates over I2C — the same two wires (SDA and SCL) that connect your LCD, OLED, and other sensors. Add it to the bus, call SHT21.read(), and you have calibrated temperature and humidity data with ±0.3°C and ±2% RH accuracy from a sensor that never needs manual calibration.
In this tutorial you will learn how to wire the SHT21 to Arduino Uno, Nano, and Mega over I2C, install the SHT2x library by Rob Tillaart, and write code to read temperature and humidity and print them on the Serial Monitor. You will then build a standalone display by adding an I2C LCD1602 to the same SDA/SCL bus — no extra pins — so the readings update live on screen without a computer. A full troubleshooting section covers every common failure mode: NaN readings, blank LCD, I2C address conflicts, and bus wiring errors.
If you need a refresher on I2C before starting, check out the Arduino I2C Tutorial — Wire Library & Master/Slave first.
Working with other temperature and humidity sensors on Arduino? Check out these related guides:
- DHT11 & DHT22 Temperature & Humidity with Arduino
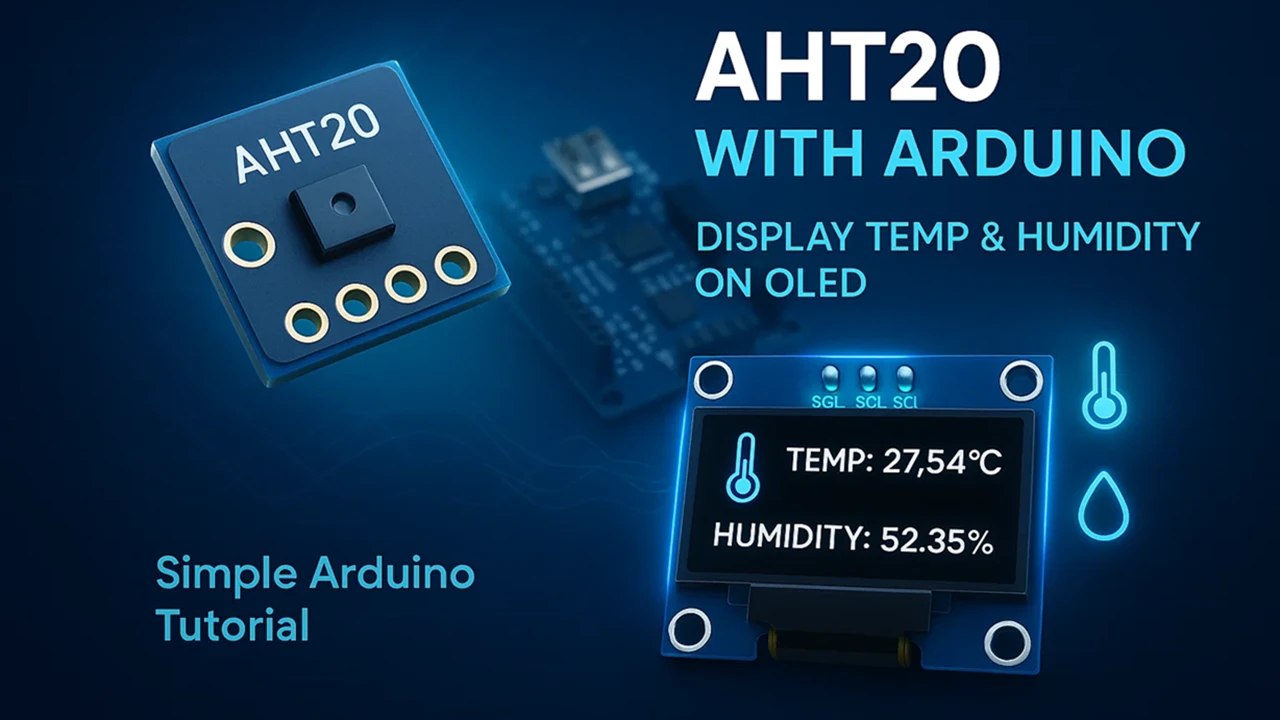
- AHT20 Temperature & Humidity Sensor with Arduino
- SHT3X Temperature & Humidity Sensor with Arduino
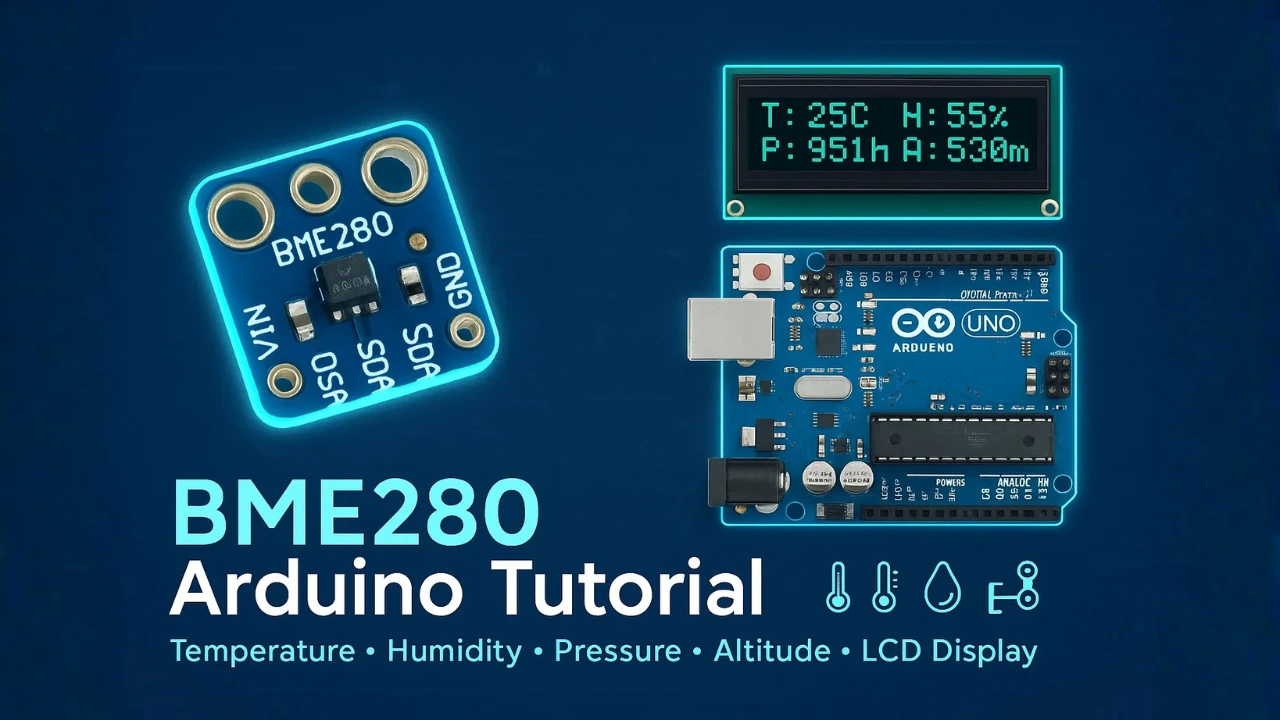
- BME280 Environmental Sensor with Arduino
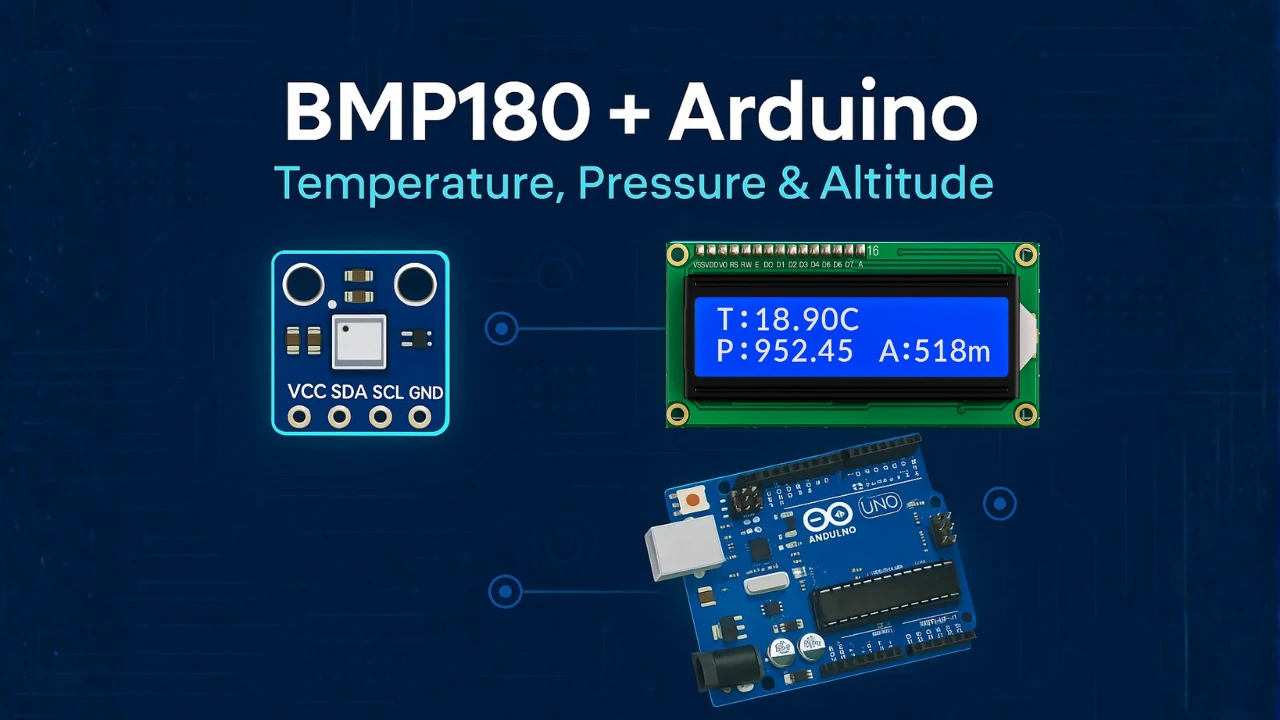
- BMP180 Pressure & Temperature Sensor with Arduino
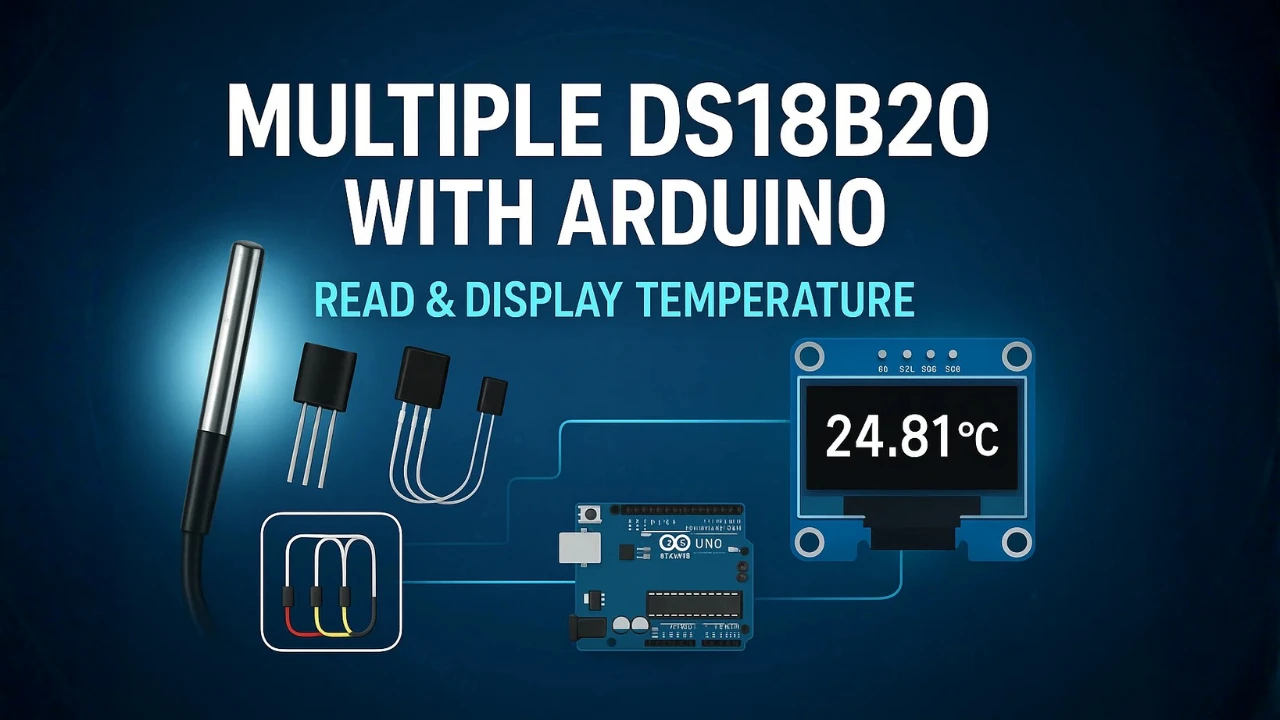
- DS18B20 Temperature Sensor with Arduino
Browse the full Arduino Sensor Interfacing tutorial collection for more.
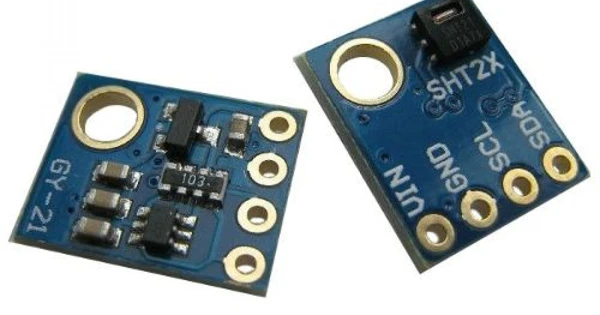
SHT21 Sensor Overview
The SHT21 is a digital temperature and humidity sensor developed by Sensirion. It is compact, highly accurate, and easy to use with Arduino or other microcontrollers. The sensor uses the I2C communication protocol, which means it requires only two data lines — SDA (data) and SCL (clock) — to transfer information.
Inside the sensor, a precise humidity and temperature sensing element is combined with an integrated analog-to-digital converter and a digital signal processing unit. This allows the SHT21 to deliver calibrated and linearized digital output, so there’s no need for complex signal conditioning or external calibration.
SHT21 Key Specifications
Here are some key features and specifications that make the SHT21 a popular choice for Arduino-based temperature and humidity monitoring projects:
- Operating Voltage: 2.1V to 3.6V (works fine with Arduino 3.3V or 5V via logic level conversion)
- Interface: I2C communication protocol
- Temperature Range: –40°C to +125°C
- Humidity Range: 0% to 100% RH
- Typical Accuracy:
- ±2% RH (Humidity)
- ±0.3°C (Temperature)
- Low Power Consumption: Ideal for battery-operated or low-power IoT devices
- Fast Response Time: Quick and reliable readings for real-time monitoring
- Factory-Calibrated: No need for additional calibration steps
- Compact Size: Fits easily in small enclosures and embedded systems
These specifications make the SHT21 an excellent choice for weather monitoring, data logging, and indoor environmental control projects.
SHT21 vs DHT11 / DHT22 — Why Use SHT21?
The DHT11 and DHT22 use a proprietary single-wire protocol that requires precise timing to decode. The SHT21 uses standard I2C — the same two wires your LCD and other sensors already share. But the more important difference is accuracy.
| DHT11 | DHT22 | SHT21 | |
|---|---|---|---|
| Temperature accuracy | ±2°C | ±0.5°C | ±0.3°C |
| Humidity accuracy | ±5% RH | ±2–5% RH | ±2% RH |
| Interface | Single-wire (proprietary) | Single-wire (proprietary) | I2C (standard) |
| Min sampling interval | 1 second | 2 seconds | No restriction |
| Calibration | Factory | Factory | Factory |
| Supply voltage | 3.3V – 5V | 3.3V – 5V | 2.1V – 3.6V |
| I2C address | — | — | Fixed 0x40 |
The SHT21 is more accurate than both, communicates over a standard protocol, and has no minimum sampling restriction — you can read it as fast as your code allows. The DHT22 is a reasonable choice for general hobby projects where ±0.5°C is acceptable. The SHT21 is the right choice when you need reliable, repeatable readings that match a calibrated reference.
SHT21 I2C Address
The SHT21 has a fixed I2C address of 0x40. It cannot be changed — there are no address pins on the module. This means you can have only one SHT21 on a single I2C bus.
If you need to verify the sensor is detected before running your full sketch, upload the I2C scanner below and open the Serial Monitor at 9600 baud. You should see 0x40 listed as a found device.
#include <Wire.h>

void setup() {
  Wire.begin();
  Serial.begin(9600);
  Serial.println("Scanning I2C bus...");

  for (byte address = 1; address < 127; address++) {
    Wire.beginTransmission(address);
    if (Wire.endTransmission() == 0) {
      Serial.print("Device found at 0x");
      if (address < 16) Serial.print("0");
      Serial.println(address, HEX);
    }
  }
  Serial.println("Scan complete.");
}

void loop() {}Expected output with SHT21 connected:
Scanning I2C bus...
Device found at 0x40
Scan complete.If you also have an LCD1602 on the bus, you will see a second address — either 0x27 or 0x3F — alongside 0x40. Both are valid: 0x40 is always the SHT21, and the LCD address depends on the A0/A1/A2 solder pads on your PCF8574 backpack.
If 0x40 does not appear, check your SDA and SCL wiring first, then verify the SHT21 module is receiving 3.3V on VCC (not 5V on a bare chip — see the voltage note in the wiring section above).
Applications of SHT21 in Arduino Projects
The SHT21 sensor is widely used in many Arduino IoT and automation projects due to its accuracy, small size, and simple I2C interface. Some common applications include:
- Weather Stations: To measure real-time temperature and humidity levels.
- Home Automation Systems: For controlling air conditioners, humidifiers, and ventilation systems.
- Greenhouse Monitoring: To maintain optimal growing conditions for plants.
- Data Logging Projects: To record environmental data over time.
- Portable Devices: Used in small battery-powered gadgets for climate tracking.
SHT21 Arduino Pinout, Wiring & Library Install
Let’s start by taking a look at the pinout of the SHT21 sensor to understand its available connections and functions. Once we are familiar with the pins, we’ll move on to the wiring part, where we’ll see how to properly connect the SHT21 to an Arduino board for data communication.
SHT21 Pinout — 4-Pin Description
The SHT21 sensor comes with a simple 4-pin interface, which makes it very easy to connect with an Arduino. Since it communicates over the I2C protocol, only two pins are used for data transfer — SDA and SCL. The remaining two pins are for power supply.
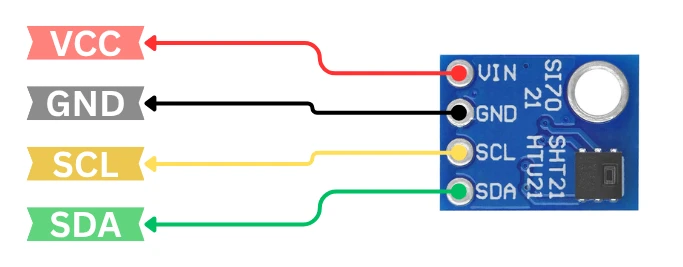
Here’s the pin description of the SHT21 sensor:
| Pin Name | Function | Description |
|---|---|---|
| VCC | Power Supply | Connects to 3.3V or 5V from Arduino (depending on module) |
| GND | Ground | Connects to Arduino ground |
| SDA | Serial Data Line | Used for I2C data communication |
| SCL | Serial Clock Line | Used for I2C clock signal |
Wiring Diagram — SHT21 to Arduino Uno
The circuit diagram for connecting the SHT21 sensor to Arduino is very straightforward. The image below shows how to connect the SHT21 sensor with Arduino UNO.
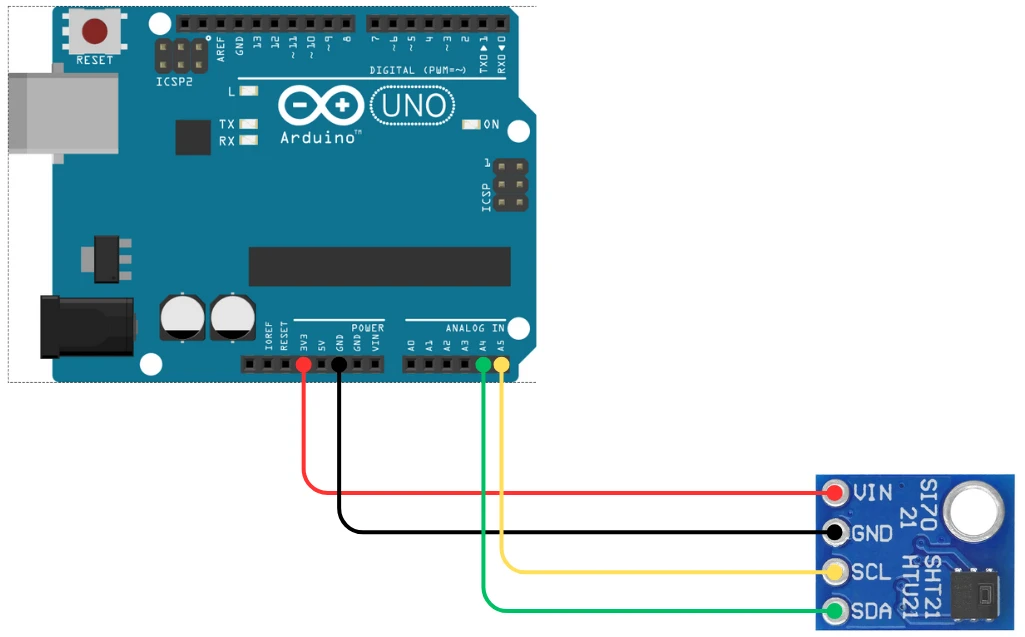
Below is a typical connection setup using the Arduino UNO:
| SHT21 Pin | Arduino UNO Pin |
|---|---|
| VCC | 3.3V or 5V |
| GND | GND |
| SDA | A4 |
| SCL | A5 |
I2C Pin Map for Nano, Mega & Leonardo
If you are using another board such as Arduino Mega or Arduino Nano, the I2C pins might be different. For example:
- On Arduino Mega, SDA = Pin 20, SCL = Pin 21
- On Arduino Leonardo, SDA = Pin 2, SCL = Pin 3
This connection allows the Arduino to communicate with the SHT21 sensor using its built-in Wire (I2C) library. Once the wiring is complete, you can power up the Arduino and start reading data from the sensor using the Wire library.
Install the SHT2x Library
To communicate with the SHT21 sensor, we’ll use the SHT2x library by Rob Tillaart. This library handles all the low-level I2C communication and provides simple functions to get accurate readings directly from the sensor.
Follow these steps to install the library:
- Open your Arduino IDE.
- Go to Sketch → Include Library → Manage Libraries…
- In the search bar, type “SHT2x”.
- Install the library named “SHT2x by Rob Tillaart.”

Once installed, you can use the library to easily read both temperature and humidity values from the SHT21 sensor.
SHT21 Arduino Code — Serial Monitor Output
In this section, we’ll write and test the Arduino code to read temperature and humidity from the SHT21 sensor using the I2C communication protocol. Once connected properly, the SHT21 provides precise and stable readings, which can be easily displayed on the Serial Monitor.
Complete Sketch — Read Temperature & Humidity
Here’s the tested and working Arduino code to read data from the SHT21 sensor periodically and display it on the Serial Monitor:
#include <Wire.h>
#include <SHT2x.h>

SHT2x SHT21;

void setup() {
  Serial.begin(9600);
  Wire.begin();
  Serial.println("SHT21 Temperature and Humidity Sensor");
}

void loop() {
  SHT21.read();

  float humidity = SHT21.getHumidity();
  float temperature = SHT21.getTemperature();

  Serial.print("Temperature: ");
  Serial.print(temperature);
  Serial.println(" °C");

  Serial.print("Humidity: ");
  Serial.print(humidity);
  Serial.println(" %RH");

  Serial.println("-------------------------");
  delay(1000);
}Code Explanation
- The
Wire.hlibrary enables I2C communication between Arduino and the sensor. - The
SHT2xobjectSHT21is created to access the sensor’s functions. - In every loop cycle,
SHT21.read()updates the sensor values. - The functions
getTemperature()andgetHumidity()are then used to read the latest temperature and humidity data. - The readings are printed on the Serial Monitor every 1 second.
This version of the code provides reliable and fast readings with minimal delay.
Output on Serial Monitor
Once the code is uploaded successfully, open the Serial Monitor from the Arduino IDE (Tools → Serial Monitor) and set the baud rate to 9600.

The values will update every second. You can test the sensor’s responsiveness by blowing gently over it or placing your finger on it. You’ll notice the humidity value rise quickly while the temperature also changes slightly.
This confirms that your SHT21 sensor is properly interfaced with Arduino and accurately reading environmental data.
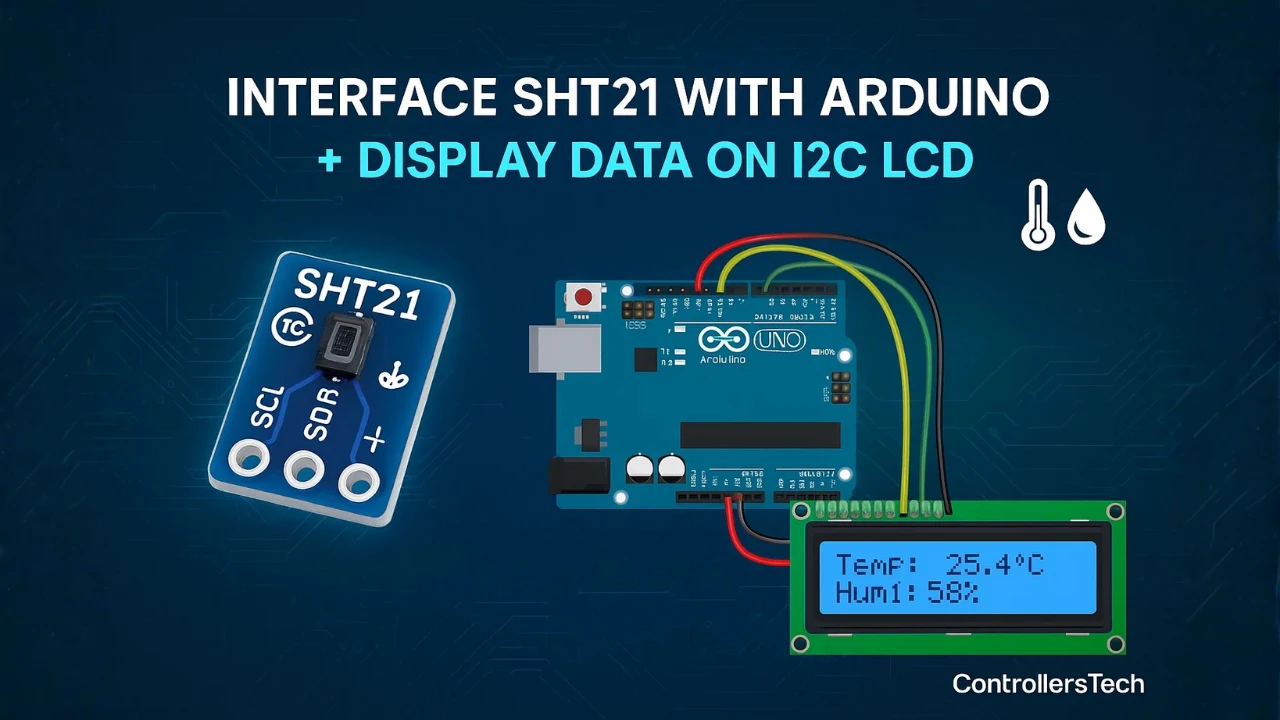
SHT21 with I2C LCD1602 — Standalone Display
Now that we have successfully displayed temperature and humidity readings from the SHT21 sensor on the Serial Monitor, let’s take the project one step further.
In this section, we’ll learn how to show the same readings on a 16×2 I2C LCD display. This makes the project more practical, allowing you to view real-time sensor data without needing to connect your Arduino to a computer.
Add LCD1602 to the I2C Bus — No Extra Pins
The I2C LCD1602 display uses the same SDA and SCL pins as the SHT21 sensor, which means both can share the same I2C bus. This setup is simple and efficient since I2C supports multiple devices on a single bus.
The Image below shows how SHT21 sensor module and LCD1602 are connected to the Arduino UNO using the same I2C pins.
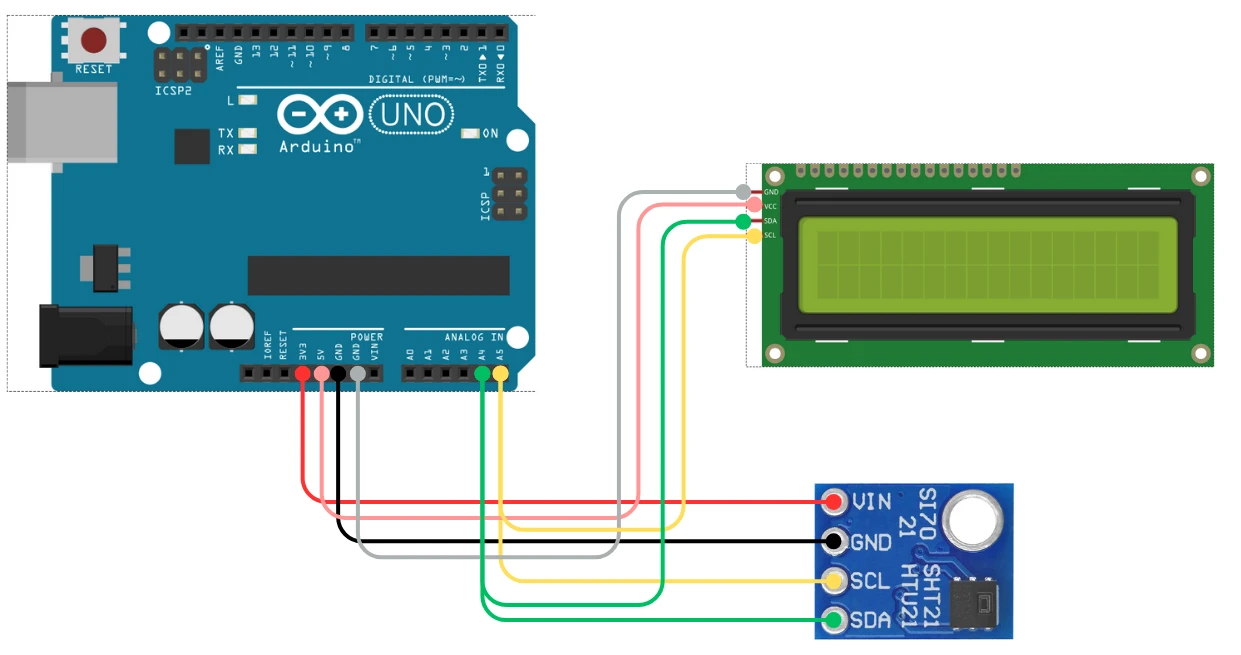
Here’s how to connect the I2C LCD1602 to your Arduino UNO:
| LCD Pin | Arduino UNO Pin |
|---|---|
| VCC | 5V |
| GND | GND |
| SDA | A4 |
| SCL | A5 |
Both the SHT21 and the LCD use I2C, so you can connect their SDA lines together and SCL lines together. Just ensure each device has a unique I2C address.
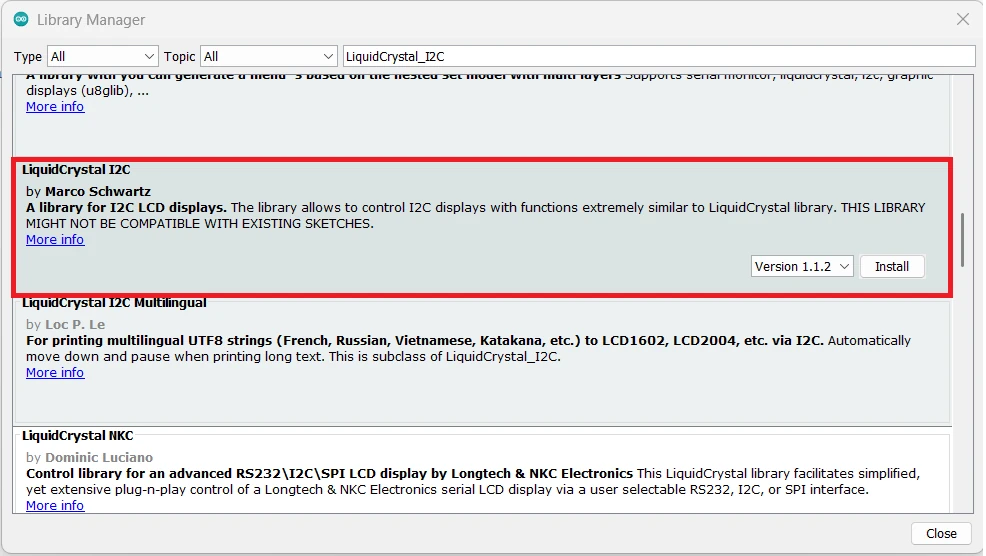
Install LiquidCrystal_I2C Library
Before running the code, make sure you have installed the LiquidCrystal_I2C library. You can do this by:
- Opening the Arduino IDE
- Going to Sketch → Include Library → Manage Libraries…
- Searching for “LiquidCrystal I2C”
- Installing the library by Frank de Brabander
If you want to learn more about how the I2C LCD1602 display works — including how to find its I2C address, create custom characters, or troubleshoot display issues — check out my full guide here: I2C LCD1602 Arduino Tutorial
This detailed post explains everything you need to know about using I2C LCDs with Arduino and will help you customize your display further for other projects.
Complete Code — SHT21 + LCD1602
We’ll now modify our previous SHT21 code to display the sensor readings on both the Serial Monitor and the I2C LCD. The LCD will show the temperature on the first line and the humidity on the second line, updating every second.
Here’s the complete and tested Arduino code that displays SHT21 sensor data on the Serial Monitor and I2C LCD1602 display:
#include <Wire.h>
#include <SHT2x.h>
#include <LiquidCrystal_I2C.h>

SHT2x SHT21;
LiquidCrystal_I2C lcd(0x27, 16, 2); // Change 0x27 to 0x3F if your LCD uses a different address

void setup() {
  Serial.begin(9600);
  Wire.begin();
  lcd.init();
  lcd.backlight();
  Serial.println("SHT21 with I2C LCD Display");
}

void loop() {
  SHT21.read();

  float humidity = SHT21.getHumidity();
  float temperature = SHT21.getTemperature();

  // Print data on Serial Monitor
  Serial.print("Temperature: ");
  Serial.print(temperature);
  Serial.println(" °C");
  Serial.print("Humidity: ");
  Serial.print(humidity);
  Serial.println(" %RH");
  Serial.println("-------------------------");

  // Display data on LCD
  lcd.clear();
  lcd.setCursor(0, 0);
  lcd.print("Temp: ");
  lcd.print(temperature, 1);
  lcd.print(" C");

  lcd.setCursor(0, 1);
  lcd.print("Humi: ");
  lcd.print(humidity, 1);
  lcd.print(" %");

  delay(1000);
}Code Explanation
- The LiquidCrystal_I2C library controls the LCD over I2C.
- The LCD is initialized using
lcd.init()and its backlight turned on withlcd.backlight(). - Inside the loop,
SHT21.read()updates the sensor data before printing. - The temperature and humidity values are displayed on both the Serial Monitor and the LCD screen every second.
- The I2C address of the LCD is set to 0x27, but some modules use 0x3F, so update it if your display doesn’t show text.
Output on the LCD1602
Once the code is uploaded successfully, the LCD should print the Temperature and Humidity values as shown in the image below.
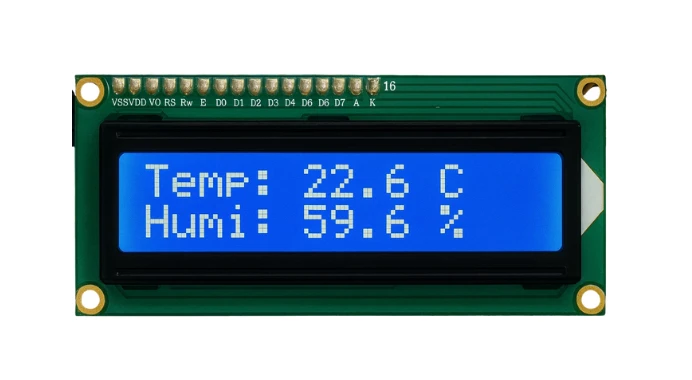
These values will update every second.
Troubleshooting SHT21 with Arduino
Even though the SHT21 sensor is quite reliable, you may encounter a few issues during setup or testing. Here are some common problems and quick fixes to help you troubleshoot effectively:
1. No Data or “nan” Readings on Serial Monitor
If the Serial Monitor shows “nan” or blank readings for temperature and humidity:
- Double-check SDA and SCL connections — they must match the Arduino’s I2C pins.
- Ensure the sensor is powered correctly (typically 3.3V or 5V, depending on module version).
- Make sure you have called
SHT21.read()before accessing temperature or humidity values. - Run an I2C Scanner sketch to confirm that the Arduino is detecting the SHT21 module.
2. LCD Shows Nothing — Backlight On
If your LCD1602 I2C screen lights up but shows no characters:
- Try changing the I2C address in your code from
0x27to0x3F, or vice versa. - Verify that the LiquidCrystal_I2C library is correctly installed.
- Adjust the contrast potentiometer on the LCD module until text becomes visible.
- Check that both the LCD and SHT21 share the same I2C lines (SDA, SCL) properly.
3. Fluctuating or Unstable Readings
If temperature or humidity values jump too frequently:
- Allow the sensor a few seconds to stabilize after powering up.
- Avoid touching or breathing near the sensor during testing, as it affects humidity levels.
- Add a small delay (e.g., 1–2 seconds) between consecutive readings.
- You can also average multiple samples in code to get smoother results.
4. I2C Communication Errors
If you get errors related to I2C communication:
- Use shorter wires (less than 20 cm) to reduce noise on the I2C bus.
- Add 4.7kΩ pull-up resistors on SDA and SCL lines if your module doesn’t already include them.
- Ensure there are no address conflicts between multiple I2C devices connected to the same bus.
5. Neither Sensor nor LCD Powers On
If neither device seems to be working:
- Check your Arduino’s 5V and GND pins with a multimeter.
- Make sure no wires are loose or connected to the wrong pins.
- Try powering the setup via USB directly instead of external adapters to rule out voltage issues.
SHT11 Arduino — Frequently Asked Questions
Conclusion
The SHT21 is one of the most precise and reliable sensors you can add to an Arduino project. Two I2C wires, three lines of library code, and you have factory-calibrated temperature and humidity data without any offset correction, reference sensor, or manual calibration step. The ±0.3°C and ±2% RH accuracy is measurably better than DHT11 and DHT22, and the I2C interface means the sensor slots directly onto a shared bus alongside your LCD, OLED, or EEPROM without occupying any additional GPIO pins.
In this tutorial you wired the SHT21 to Arduino Uno over I2C (SDA to A4, SCL to A5), installed Rob Tillaart’s SHT2x library, and read live temperature and humidity data on the Serial Monitor at 9600 baud. You then added an I2C LCD1602 to the same two-wire bus — no extra pins, no address conflict — and built a standalone display that shows temperature on line 1 and humidity on line 2, updating every second without a computer attached.
From here you can add a DS3231 RTC module to timestamp every reading, log the data to an SD card for long-term environmental monitoring, or swap the LCD for an SSD1306 OLED if you need a more compact display format. For higher-range sensing or when you also need barometric pressure, the BME280 adds a third measurement on the same I2C bus. Download the full project above and explore the Arduino Sensor Interfacing collection for the next sensor.
Download SHT21 Arduino Project Files
Complete Arduino project with two sketches: SHT21 Serial Monitor output using the SHT2x library (getTemperature() and getHumidity() at 9600 baud), and the full SHT21 + I2C LCD1602 display code showing temperature on line 1 and humidity on line 2. Compatible with Arduino Uno, Nano, and Mega. Requires SHT2x and LiquidCrystal_I2C libraries. Free to download — support the work if it helped you.
Browse More Arduino Sensors Tutorials
AHT20 Arduino Tutorial: I2C Wiring, Adafruit AHTX0 & OLED Display

SHT30 / SHT31 / SHT35 Arduino Tutorial: I2C Wiring, Code & LCD1602 Display
DS18B20 Arduino Tutorial: Single & Multiple Sensors, Serial & OLED Output
BMP180 Arduino Tutorial: I2C Wiring, Temperature, Pressure, Altitude & LCD1602
Arduino BME280 Tutorial: Wiring, Pinout, Code and LCD1602 Display Output

Subscribe
Login
0 Comments
Newest
