Home ▸ Arduino ▸ Sensors Interfacing ▸
Updated On: April 30, 2026
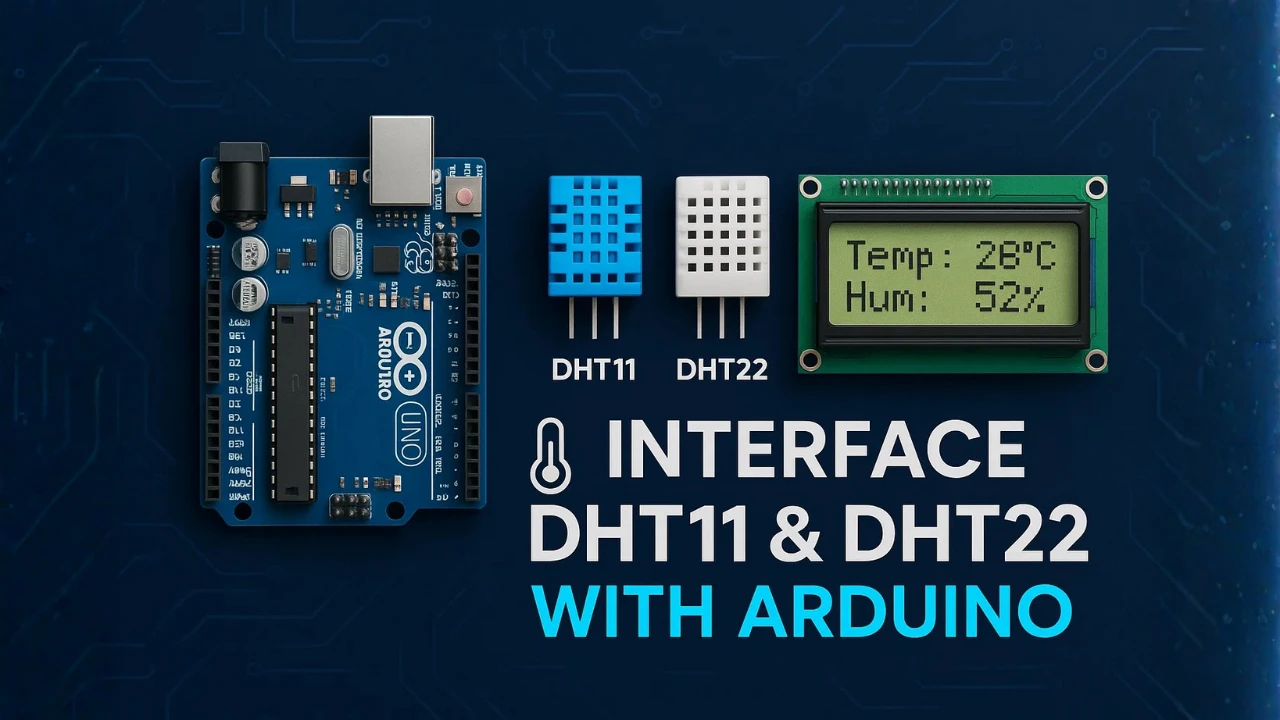
DHT11 & DHT22 Arduino Tutorial: Wiring, Code & LCD Display
The DHT11 and DHT22 are the most widely used temperature and humidity sensors in Arduino projects. Both sensors output calibrated digital data over a single wire — no analog conversion, no complex protocol. Connect VCC, GND, and one data pin, and you’re reading live environmental data in minutes.
In this tutorial, you’ll learn how to wire both sensors to Arduino, understand the key differences between DHT11 and DHT22 so you can pick the right one for your project, install the Adafruit DHT library, and write code to read temperature and humidity on the Serial Monitor. You’ll also go a step further and display live readings on an LCD1602 I2C display for a complete standalone monitoring setup. A full project download is included at the end.
Working with other temperature and humidity sensors on Arduino? Check out these related guides:
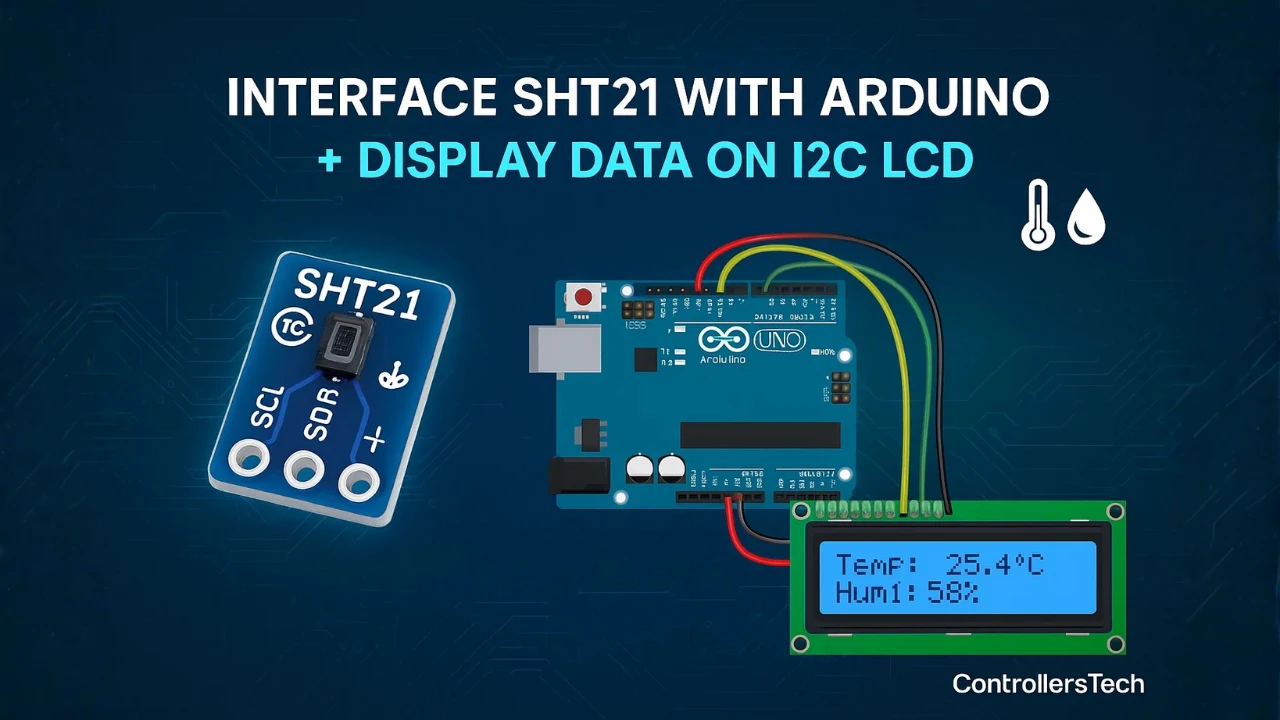
- SHT21 Temp & Humidity Sensor with Arduino
- AHT20 Temp & Humidity Sensor with Arduino
- SHT3X Temp & Humidity Sensor with Arduino
- BME280 Environmental Sensor with Arduino
- BMP180 Pressure & Temperature Sensor with Arduino
- DS18B20 Temperature Sensor with Arduino
Browse the full Arduino Sensor Interfacing tutorial collection for more.
DHT11 & DHT22 Sensor Overview
What is a DHT Sensor?
A DHT sensor is a low-cost and easy-to-use device that measures temperature and humidity. These sensors are commonly used in Arduino projects, IoT devices, and home automation systems.
The DHT sensor combines a humidity sensing component and a thermistor in a single package. It outputs digital data, which makes it very convenient to interface with microcontrollers like Arduino, without needing any analog-to-digital conversion.
Thanks to its simple communication protocol, the DHT sensor is perfect for beginners who want to start collecting environmental data such as temperature (in °C) and humidity (in %RH) for weather monitoring or smart systems.
DHT11 vs DHT22 — Key Differences
The DHT family mainly includes two popular versions — DHT11 and DHT22. Both sensors work on the same principle and share a similar design, but they differ in accuracy, range, and response time.
- DHT11 is the basic version. It’s cheaper and suitable for simple projects where extreme accuracy is not required.
- DHT22 (also known as AM2302) offers better accuracy and a wider measurement range, making it more suitable for advanced or outdoor applications.
Comparison Table Between DHT11 and DHT22
| Feature | DHT11 | DHT22 (AM2302) |
|---|---|---|
| Temperature Range | 0°C to 50°C | -40°C to 80°C |
| Temperature Accuracy | ±2°C | ±0.5°C |
| Humidity Range | 20% to 80% RH | 0% to 100% RH |
| Humidity Accuracy | ±5% RH | ±2% to ±3% RH |
| Sampling Rate | 1 reading per second | 1 reading every 2 seconds |
| Operating Voltage | 3.3V to 5V | 3.3V to 6V |
| Output Signal | Digital (1-wire) | Digital (1-wire) |
| Price | Lower cost | Slightly higher cost |
| Best Use Case | Simple indoor monitoring | Precise environmental sensing |
From the table above, it’s clear that DHT22 offers better performance in terms of measurement range and accuracy. However, DHT11 is a good choice when you just need basic readings or want to keep the project cost low.
Choosing the Right DHT Sensor for Your Project
When deciding between DHT11 and DHT22, consider these points:
- Use DHT11 if you are building a low-cost project such as a basic indoor temperature monitor, humidity logger, or classroom experiment. It’s affordable, easy to find, and works well in normal room conditions.
- Choose DHT22 if your project needs higher precision, faster response, or if it operates in extreme temperature or humidity conditions. It’s ideal for weather stations, greenhouse control, and smart IoT devices.
Both sensors are fully compatible with Arduino, and you can use the same code and library for both. So, even if you start with DHT11, you can upgrade to DHT22 later without changing much in your project.
How DHT Sensors Work (One-Wire Protocol)
The DHT sensor works by using two main parts, a humidity sensing capacitor and a temperature-sensitive resistor (thermistor).
- The humidity sensor measures the amount of water vapor in the air by detecting changes in the electrical resistance of a moisture-holding substrate.
- The thermistor measures temperature changes based on variations in its resistance with temperature.
- A tiny microcontroller inside the DHT sensor processes these signals and sends the final digital output to the Arduino via a single data pin.
The sensor sends data in a specific one-wire serial format, which allows the Arduino to read both temperature and humidity values easily. This simplicity, along with reliable performance, makes DHT sensors one of the best choices for environmental monitoring projects.
Why Use DHT Sensors with Arduino?
The DHT series sensors, especially DHT11 and DHT22, are some of the most popular choices among Arduino enthusiasts for measuring temperature and humidity. Their simplicity, accuracy, and digital interface make them perfect for both beginners and experienced makers.
Let’s look at what makes these sensors stand out from others and where they are commonly used.
Advantages of DHT Sensors Over Other Humidity and Temperature Sensors
There are many types of temperature and humidity sensors available, such as analog thermistors, capacitive humidity sensors, and more advanced digital sensors. However, DHT sensors offer several advantages that make them ideal for Arduino projects:
- Simple Digital Interface – DHT sensors use a single digital pin to send data, which means no complex wiring or analog signal conversion is needed.
- Built-in Signal Processing – The sensor has an internal microcontroller that converts analog readings into calibrated digital output, giving accurate results with minimal effort.
- Easy Arduino Integration – You can easily use the DHT library in Arduino IDE to read temperature and humidity in just a few lines of code.
- Low Power Consumption – DHT sensors consume very little current, making them suitable for battery-powered IoT projects.
- Cost-Effective and Widely Available – Both DHT11 and DHT22 are inexpensive and can be found in almost every electronics store or online platform.
- Stable and Reliable Performance – They work consistently over time and provide reliable readings for indoor and outdoor environments.
Common Applications
Because of their reliability and ease of integration, DHT11 and DHT22 sensors are used in a wide range of DIY and professional projects. Some common applications include:
- Weather Stations – Measuring local temperature and humidity in real-time.
- Home Automation Systems – Controlling fans, air conditioners, or humidifiers based on room conditions.
- Greenhouse Monitoring – Maintaining ideal environmental conditions for plant growth.
- HVAC Systems – Monitoring temperature and humidity for better air conditioning control.
- IoT Projects – Sending live sensor data to platforms like ThingSpeak, Blynk, or MQTT servers for remote monitoring.
- Educational Projects – Ideal for beginners learning about sensors, microcontrollers, and data logging.
With just a few lines of code and simple wiring, DHT sensors make it easy to collect environmental data and use it in smart systems or cloud-connected devices.
DHT11 & DHT22 Arduino Wiring & Pinout
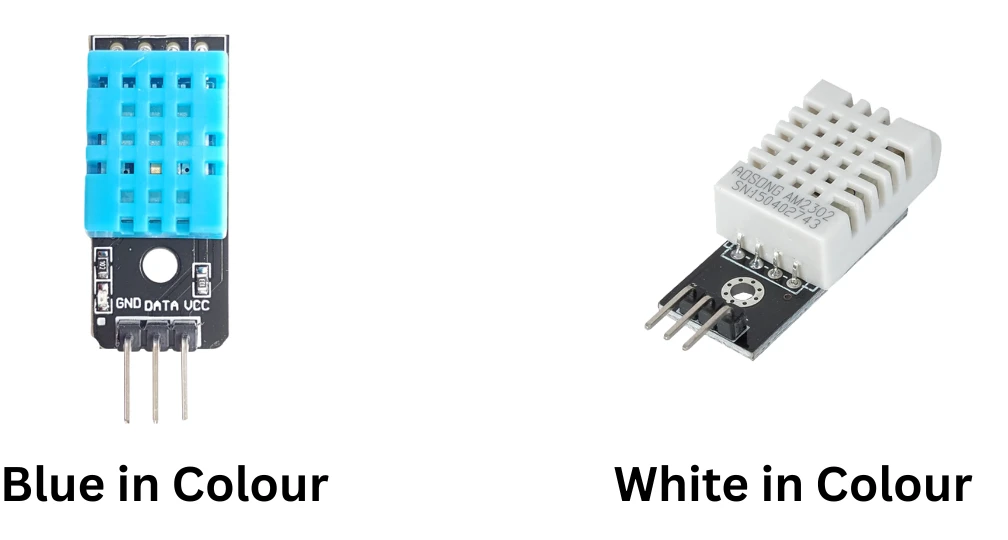
Before we connect the DHT sensor to the Arduino, let’s first look at the components we need and understand the pin configuration. Both DHT11 and DHT22 have the same pin structure, so the connection process is identical for both sensors.
Required Components
To interface a DHT11 or DHT22 sensor with Arduino, you only need a few basic components:
- Arduino Board (Uno, Nano, or Mega – any model works)
- DHT11 or DHT22 Sensor (either module or raw sensor)
- 10kΩ Resistor (for pull-up on the data line, if using raw sensor)
- Jumper Wires
- Breadboard
If you are using the DHT sensor module version, it already includes a resistor and sometimes even a power LED, making the setup even easier.
Pin Configuration (DHT11 & DHT22)
Both sensors have four pins, but typically only three are used: VCC, DATA, and GND. Below is the pin layout for both DHT11 and DHT22 sensors.
The pin function is shown in the table below:
| Pin Number | Pin Name | Description |
|---|---|---|
| 1 | VCC | Power supply pin (3.3V to 5V) |
| 2 | DATA | Serial data pin (connects to Arduino digital pin) |
| 3 | NC | Not connected (sometimes used for support or unused) |
| 4 | GND | Ground pin |
Note:
Some DHT modules come with only three pins (VCC, DATA, GND) instead of four. In that case, simply connect them directly as described — no need to worry about the missing NC pin.
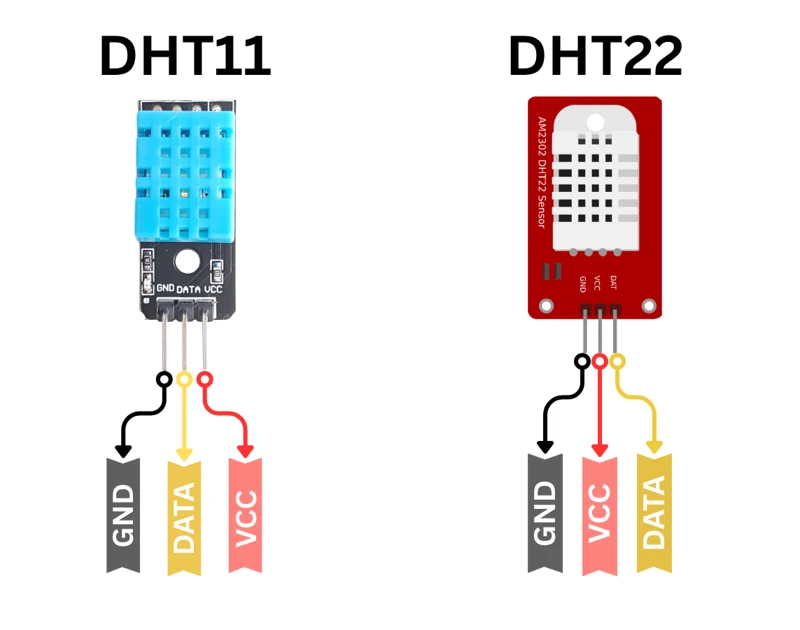
Wiring Diagram — Sensor to Arduino
The circuit connection is very simple. You can connect the DHT11 or DHT22 sensor to the Arduino Uno as follows:
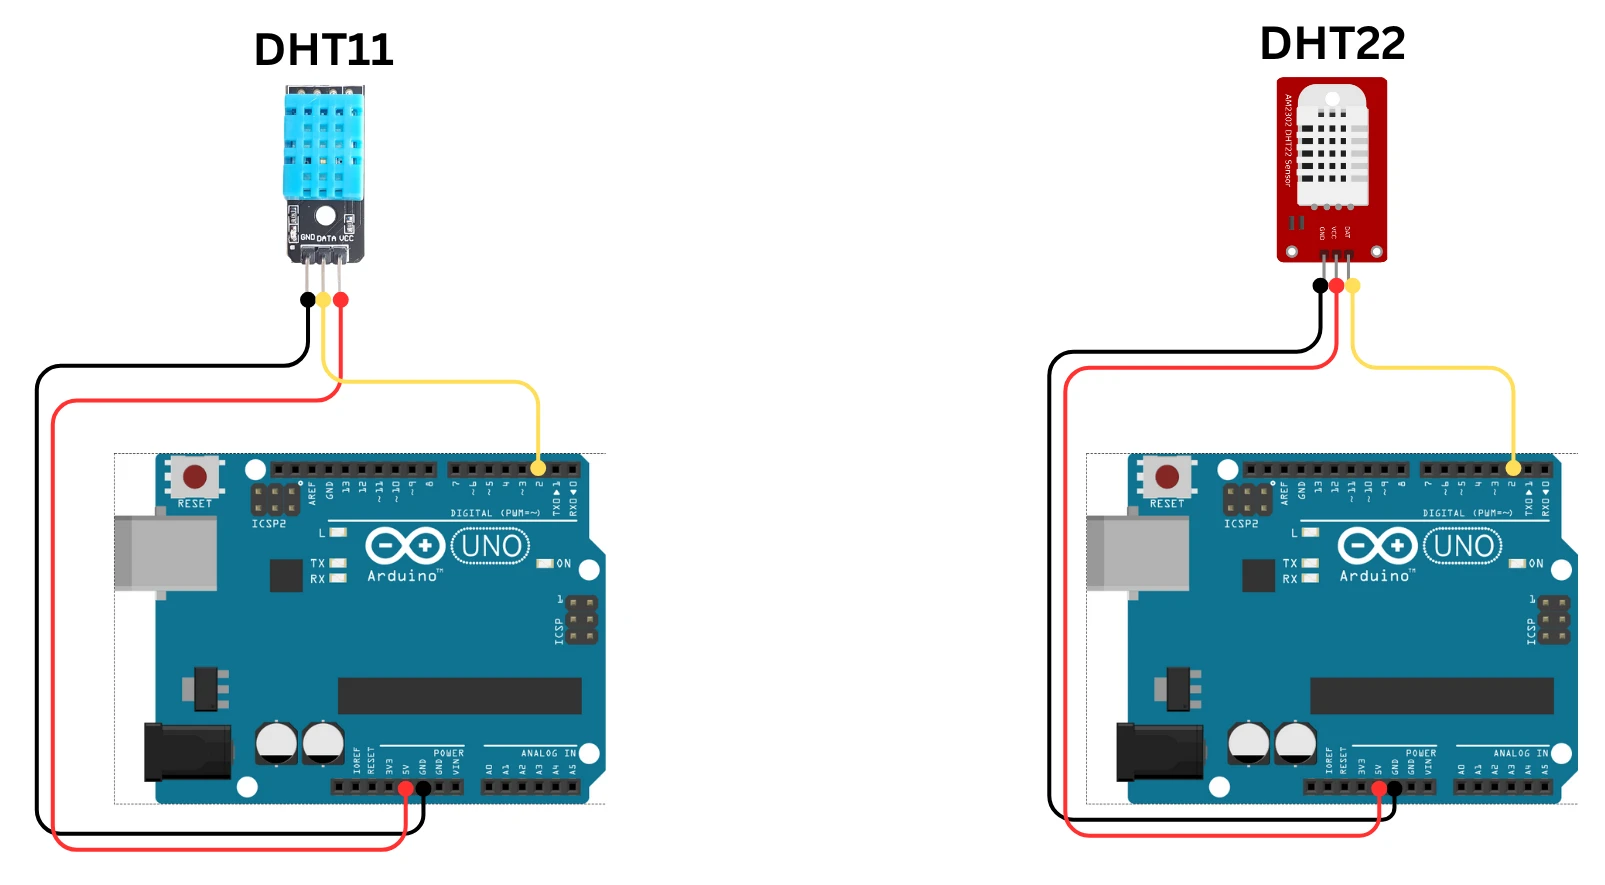
The connection is mentioned in the table below:
| DHT Sensor Pin | Arduino Pin |
|---|---|
| VCC | 5V |
| DATA | Digital Pin 2 |
| GND | GND |
If you are using the raw sensor (not the module), connect a 10kΩ resistor between VCC and DATA pins. This acts as a pull-up resistor, ensuring stable communication between the Arduino and the DHT sensor.
DHT Arduino Code: Library, Serial & LCD Output
Once you’ve made the circuit connections, the next step is to write and upload the Arduino code to read temperature and humidity from the DHT sensor. The process is simple and requires installing a ready-to-use DHT library.
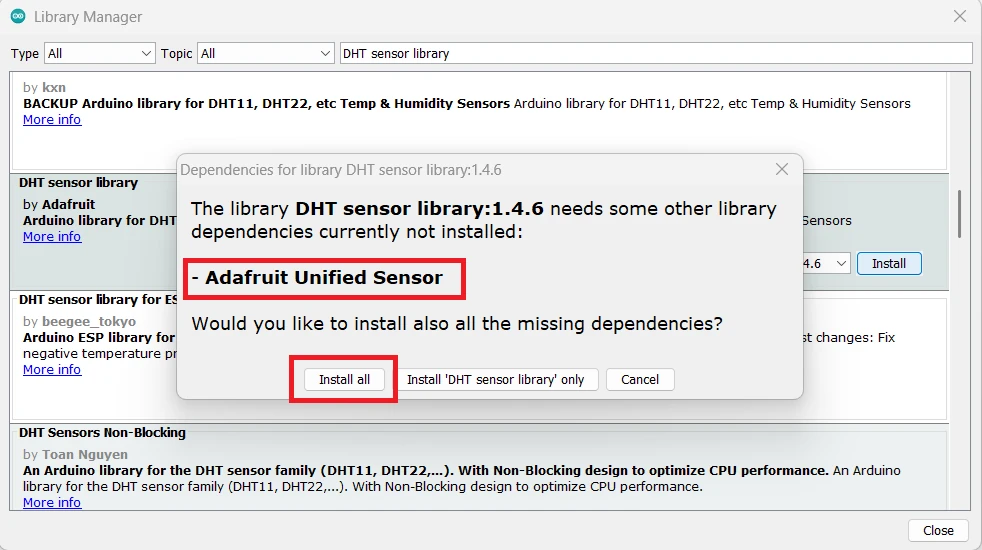
Install the Adafruit DHT Library
To communicate with the DHT11 or DHT22 sensor, you need to install the DHT sensor library. This library handles all the timing and data decoding automatically, so you don’t have to worry about the complex one-wire communication.
Follow these steps to install the DHT library in the Arduino IDE:
- Open the Arduino IDE on your computer.
- Go to the top menu and select Sketch → Include Library → Manage Libraries…
- In the Library Manager window, search for “DHT sensor library”.
- Find the one by Adafruit (author: Adafruit) and click Install.
- The library will automatically install along with the required Adafruit Unified Sensor library.

Once installed, you can include it in your sketch using:
#include "DHT.h"Read Temperature & Humidity on Serial Monitor
After installing the library, copy and upload the following code to your Arduino board:
#include "DHT.h"

#define DHTPIN 2         // Pin connected to the DHT sensor
#define DHTTYPE DHT11    // Change to DHT22 if using that sensor

DHT dht(DHTPIN, DHTTYPE);

void setup() {
  Serial.begin(9600);
  dht.begin();
  Serial.println("DHT Sensor Reading Started...");
}

void loop() {
  delay(2000);  // DHT22 needs at least 2s between reads; DHT11 needs at least 1s

  float humidity = dht.readHumidity();
  float temperature = dht.readTemperature(); // Default is Celsius

  if (isnan(humidity) || isnan(temperature)) {
    Serial.println("Failed to read from DHT sensor!");
    return;
  }

  Serial.print("Humidity: ");
  Serial.print(humidity);
  Serial.print(" %\t");

  Serial.print("Temperature: ");
  Serial.print(temperature);
  Serial.println(" °C");
}
Note:
To switch between DHT11 and DHT22, simply change the line #define DHTTYPE DHT11 → to → #define DHTTYPE DHT22.
Code Explanation
Let’s quickly understand how the code works:
- Include the library
#include "DHT.h"This line imports the Adafruit DHT library, which handles communication with the sensor. - Define sensor type and pin
#define DHTPIN 2 #define DHTTYPE DHT11Here, the DHT sensor’s data pin is connected to Arduino digital pin 2, and the sensor type is defined as DHT11. You can change it to DHT22 as needed. - Create the sensor object
DHT dht(DHTPIN, DHTTYPE);This creates an object calleddhtto access the sensor functions likereadHumidity()andreadTemperature(). - Setup function
dht.begin();Initializes communication with the DHT sensor. The serial monitor is also started to display the readings. - Main loop
Inside the loop, the Arduino reads both temperature and humidity every 2 seconds using:dht.readHumidity(); dht.readTemperature();The values are stored in variables and printed on the Serial Monitor. - Error handling
if (isnan(humidity) || isnan(temperature)) { Serial.println("Failed to read from DHT sensor!"); }This ensures that if the sensor fails to send valid data, the code won’t crash and instead shows a readable error message.
After uploading the sketch, open the Serial Monitor at 9600 baud rate to see the live temperature and humidity readings.
DHT11 Output
After uploading the Arduino code and completing all connections, it’s time to test the DHT11 or DHT22 sensor. The test will verify whether the sensor is correctly reading temperature and humidity values and sending them to the Arduino.
- Open the Serial Monitor in the Arduino IDE by clicking the magnifying glass icon in the top-right corner or using the shortcut Ctrl + Shift + M.
- Set the baud rate to 9600, as defined in the code (
Serial.begin(9600);). - You should start seeing real-time temperature and humidity readings displayed every 2 seconds.
Here’s an image of what the output might look like:

You can see the current temperature and humidity data being printed on the serial console.
DHT22 Output
Now, if you replace the DHT11 with the DHT22 sensor and update the line in your code to:
#define DHTTYPE DHT22Upload the sketch again and open the Serial Monitor. You’ll notice that the readings are not only faster to stabilize but also more accurate and detailed compared to DHT11.
Example output for DHT22 might look like this:
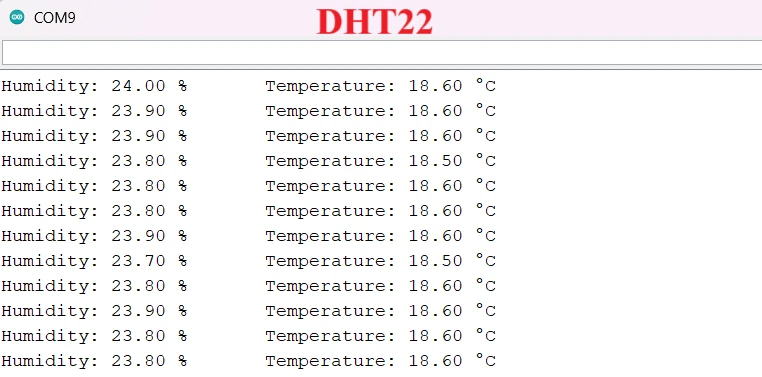
The DHT22 provides higher resolution and accuracy, especially for humidity measurements. While DHT11 is sufficient for basic indoor applications, DHT22 is preferred when precision matters, such as in weather stations, greenhouses, or IoT data logging projects.
Display DHT Data on LCD1602 I2C
In many Arduino projects, it’s more convenient to display sensor readings directly on an LCD rather than using the Serial Monitor. The LCD1602 with I2C interface is ideal for this task because it uses only two communication pins (SDA and SCL), leaving plenty of pins free for other sensors or modules.
In this section, we’ll modify our previous setup to show temperature and humidity readings from the DHT22 sensor on a 16×2 I2C LCD display.
Additional Wiring for LCD1602 I2C
Below is the connection table showing how to connect both DHT22 and LCD1602 I2C to your Arduino board.
| Component | Pin Name | Arduino Pin | Description |
|---|---|---|---|
| DHT22 | VCC | 5V | Power supply for the sensor |
| DATA | Digital Pin 2 | Data pin connected to Arduino | |
| GND | GND | Common ground | |
| LCD1602 I2C | VCC | 5V | Power for the LCD |
| GND | GND | Common ground | |
| SDA | A4 | I2C data line | |
| SCL | A5 | I2C clock line |
Note:
The I2C pins (SDA, SCL) can vary depending on your Arduino model. For Arduino Uno and Nano, SDA = A4 and SCL = A5. For Arduino Mega, use SDA = 20 and SCL = 21.
Once you’ve made the connections as shown above, you can move on to writing the code.
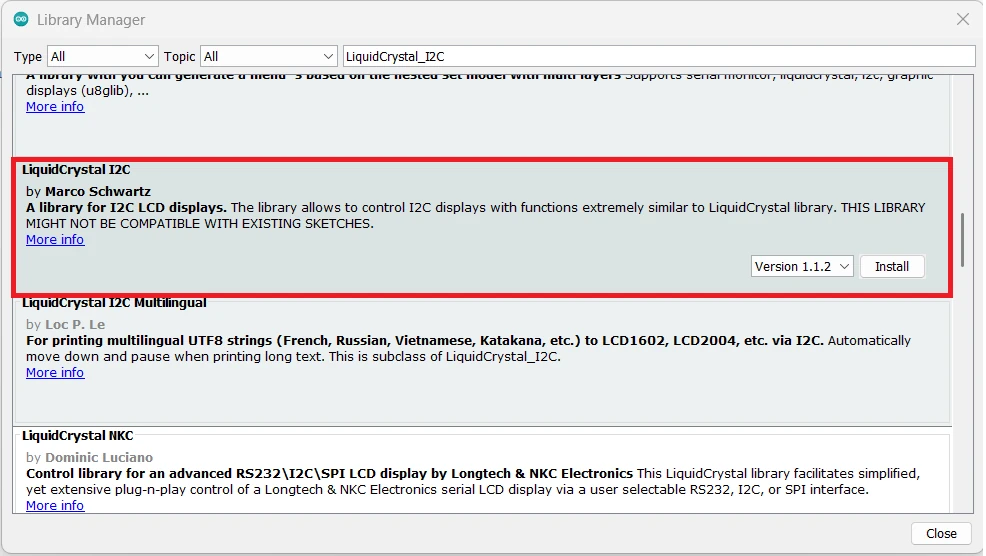
Install LiquidCrystal_I2C Library
Before writing the code, install the LiquidCrystal_I2C library:
- Open Arduino IDE.
- Go to Sketch → Include Library → Manage Libraries.
- Search for “LiquidCrystal_I2C”.
- Install the version by Frank de Brabander or Marco Schwartz.
Full Code for DHT22 + LCD1602 I2C
#include <Wire.h>
#include <LiquidCrystal_I2C.h>
#include "DHT.h"

#define DHTPIN 2        // Data pin connected to DHT22
#define DHTTYPE DHT22   // Define sensor type as DHT22

DHT dht(DHTPIN, DHTTYPE);
LiquidCrystal_I2C lcd(0x27, 16, 2); // LCD address 0x27, 16x2 display

void setup() {
  lcd.init();             // Initialize the LCD
  lcd.backlight();        // Turn on LCD backlight
  dht.begin();            // Start DHT sensor
  lcd.setCursor(0, 0);
  lcd.print("DHT22 Sensor");
  delay(2000);
}

void loop() {
  float humidity = dht.readHumidity();
  float temperature = dht.readTemperature();

  if (isnan(humidity) || isnan(temperature)) {
    lcd.clear();
    lcd.setCursor(0, 0);
    lcd.print("Sensor Error!");
    delay(2000);
    return;
  }

  lcd.clear();
  lcd.setCursor(0, 0);
  lcd.print("Temp: ");
  lcd.print(temperature);
  lcd.print(" C");

  lcd.setCursor(0, 1);
  lcd.print("Hum: ");
  lcd.print(humidity);
  lcd.print(" %");

  delay(2000); // DHT22 needs at least 2s between reads; DHT11 needs at least 1s
}Code Explanation
- Include libraries:
TheWire.handLiquidCrystal_I2C.hlibraries control the LCD, while theDHT.hlibrary handles communication with the DHT22 sensor. - Initialize objects:
We define the DHT sensor and LCD objects with their respective configurations —DHTPINfor the data pin and0x27as the typical I2C address for most LCD1602 modules. - Setup section:
The LCD and DHT22 are initialized. The LCD displays a short welcome message before starting data updates. - Loop section:
The Arduino reads temperature and humidity values using the DHT library. The readings are then displayed on the LCD, updating every 2 seconds. If the sensor fails to provide valid data, an error message appears instead.
LCD Output
Once you upload the code and power up your Arduino, you’ll see real-time readings displayed on the LCD screen like this:

This setup allows you to monitor DHT22 data live without needing a computer. The LCD updates automatically and provides a quick, clear way to check your environment’s temperature and humidity.
DHT11 DHT22 Arduino — Frequently Asked Questions
Conclusion
The DHT11 and DHT22 are the fastest way to add temperature and humidity sensing to any Arduino project. A single data wire, two lines of library code, and you have live environmental readings. The DHT22 gives you tighter accuracy and a wider range — worth the small price difference for any serious build.
In this tutorial you wired both sensors, compared their output side by side, and built a complete standalone monitor with an LCD1602 I2C display that updates every two seconds without needing a computer. The same code structure works directly on Arduino Nano, Mega, and most ESP32 boards with no changes beyond the pin number.
From here, you can log the readings to an SD card, push them to an IoT platform over Wi-Fi, or pair the sensor with a BME280 for barometric pressure data alongside temperature and humidity. Download the full project above and explore the Arduino Sensor Interfacing series for the next build.
Download DHT11 & DHT22 Arduino Project Files
Complete Arduino project with DHT11 and DHT22 serial monitor sketches plus the full DHT22 + LCD1602 I2C display code. Includes Adafruit DHT library dependency notes. Free to download — support the work if it helped you.
Browse More Arduino Sensors Tutorials
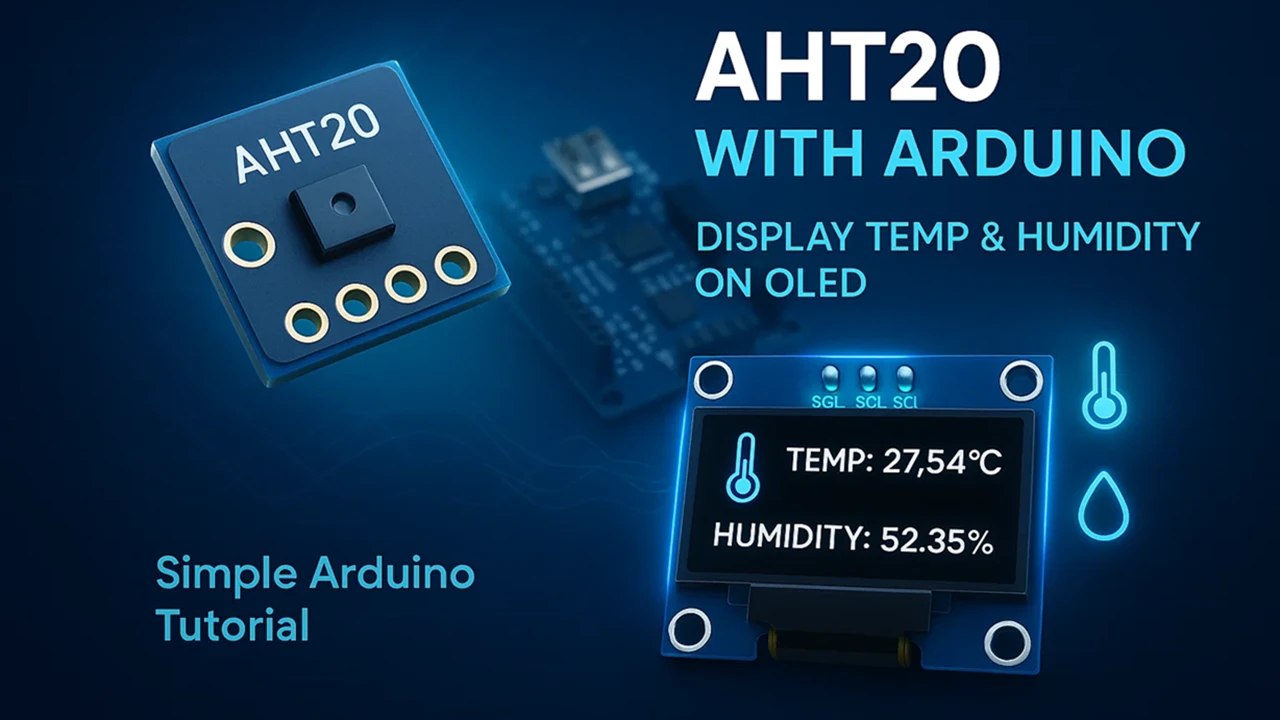
AHT20 Arduino Tutorial: I2C Wiring, Adafruit AHTX0 & OLED Display

SHT30 / SHT31 / SHT35 Arduino Tutorial: I2C Wiring, Code & LCD1602 Display
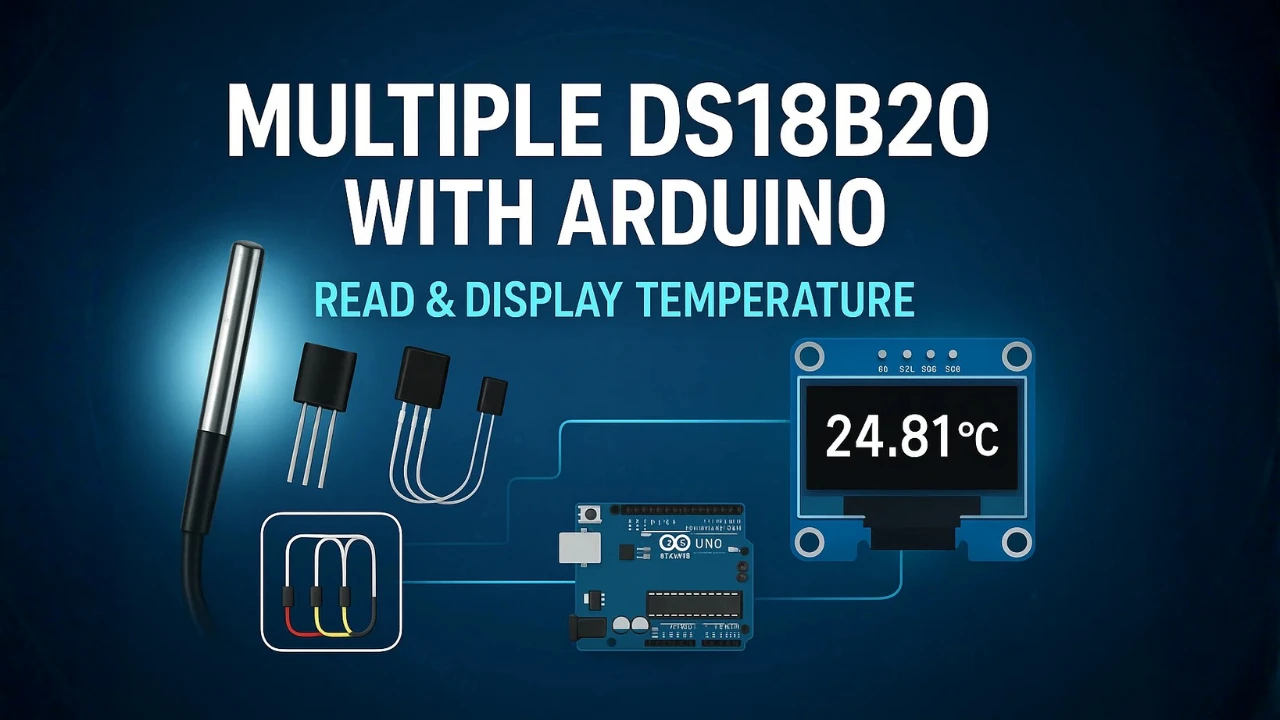
DS18B20 Arduino Tutorial: Single & Multiple Sensors, Serial & OLED Output
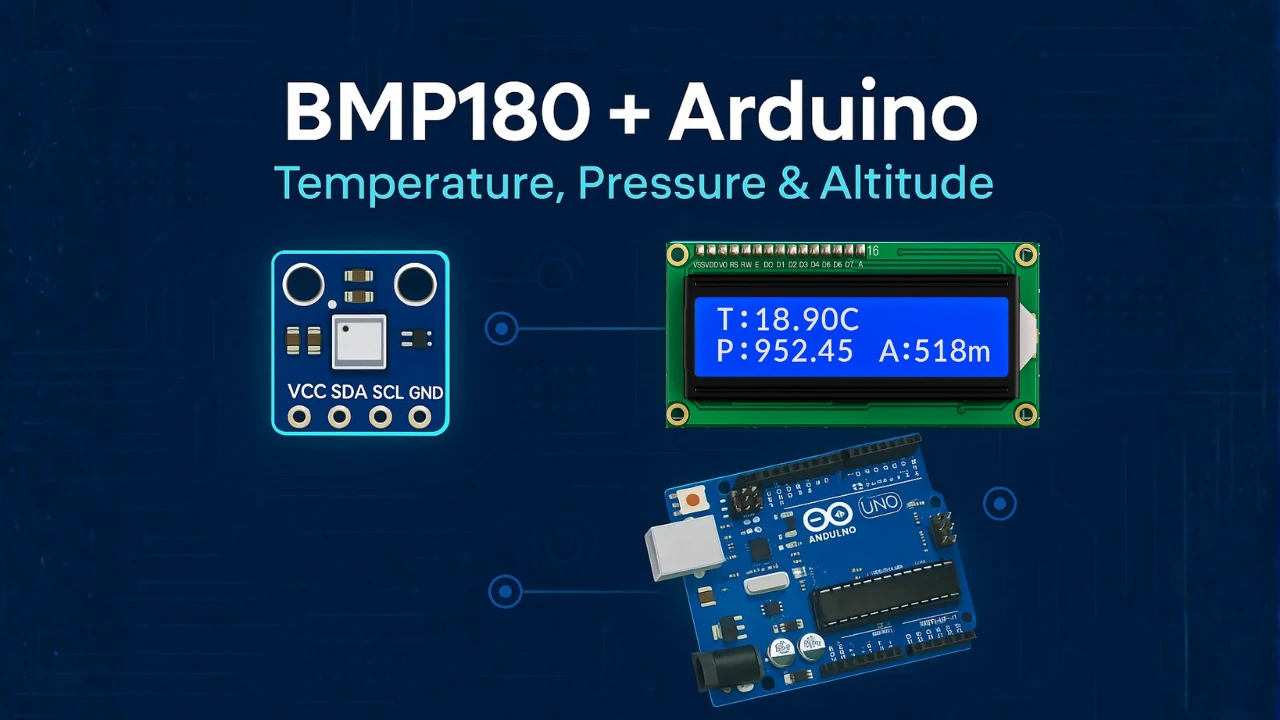
BMP180 Arduino Tutorial: I2C Wiring, Temperature, Pressure, Altitude & LCD1602
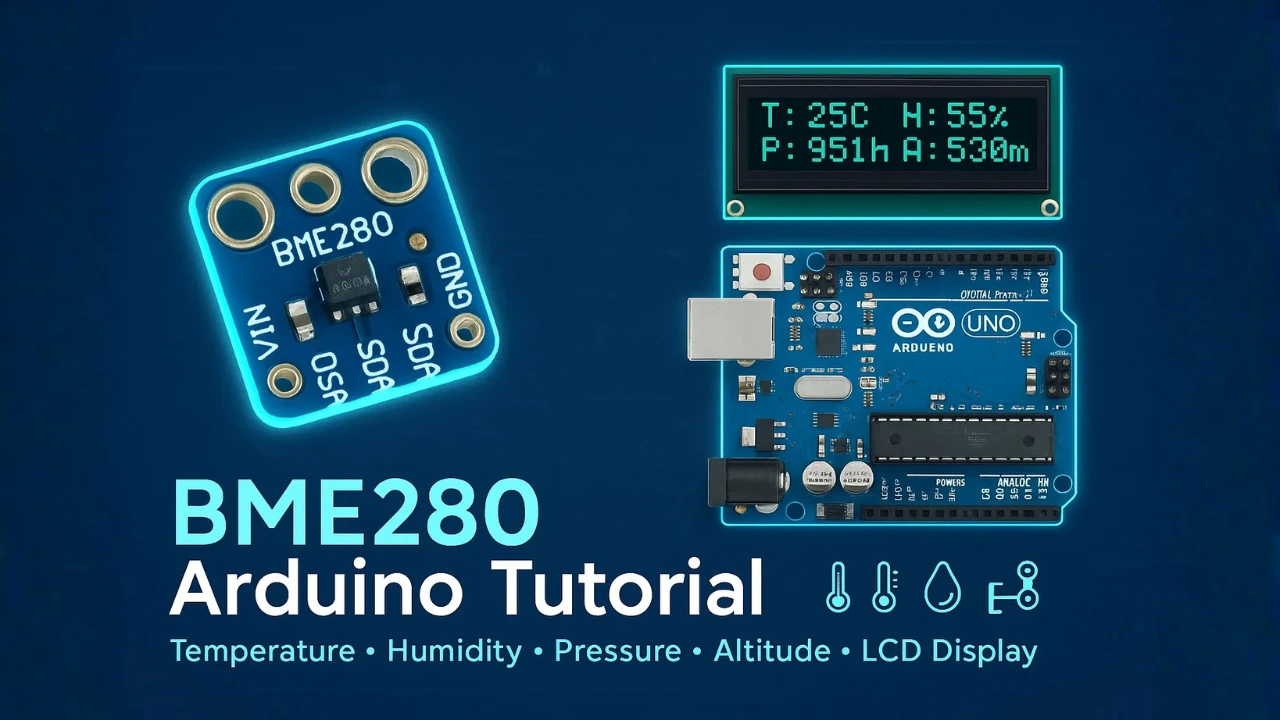
Arduino BME280 Tutorial: Wiring, Pinout, Code and LCD1602 Display Output

Subscribe
Login
0 Comments
Newest
