
Home ▸ Arduino ▸ Sensors Interfacing ▸
Updated On: February 6, 2026
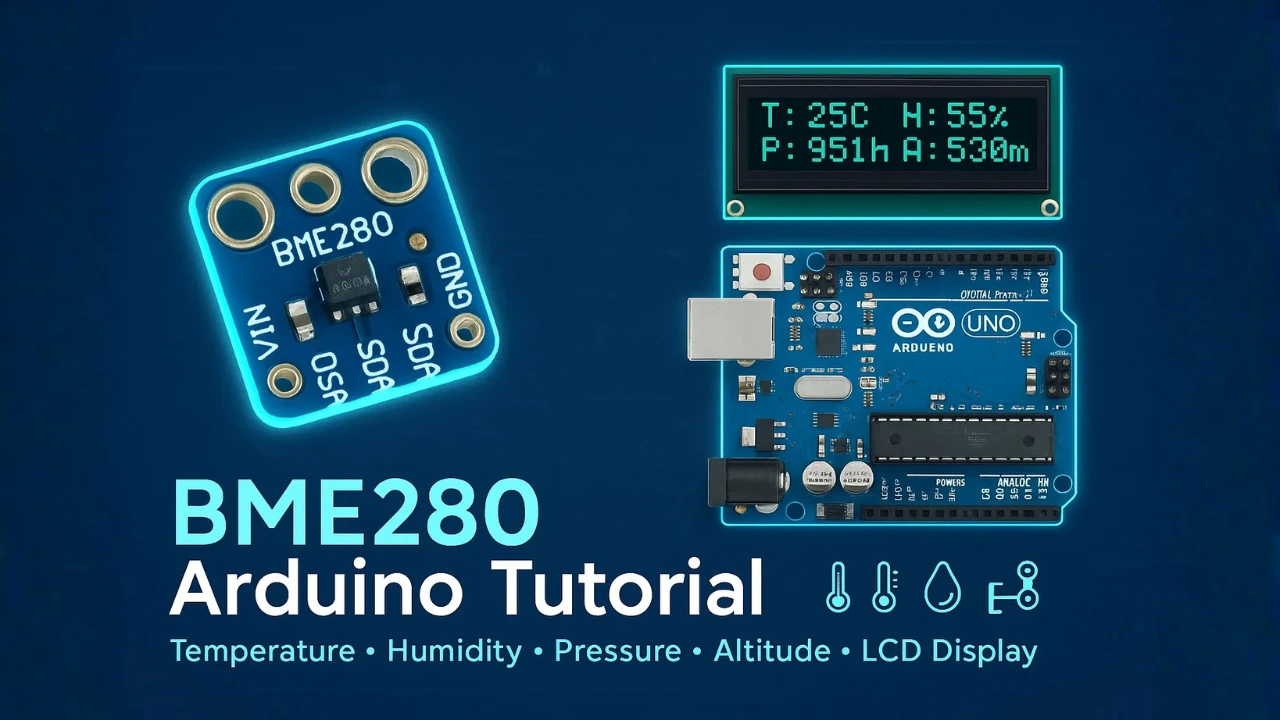
Interfacing BME280 Sensor with Arduino (Display Data on Serial Monitor + LCD1602 I2C)
The BME280 is one of the most popular sensors for Arduino weather and IoT projects. It can measure temperature, humidity, and barometric pressure with very high accuracy. This makes it perfect for home automation, weather stations, IoT dashboards, and many indoor monitoring systems.
In this tutorial, we will learn how to interface the BME280 sensor with an Arduino UNO using the I2C communication method. We will read all three sensor values and print them on the Serial Monitor, as well as on a 1602 I2C LCD display for real-time output. The wiring is simple, the code is easy to follow, and the entire project is beginner-friendly.
This project will use LCD1602 to display the Temperature, Pressure, Humidity and Altitude values obtained from the BME280 Sensor. You can check out the tutorial for more information about how to interface the LCD1602 with Arduino using I2C.
What is the BME280 Sensor?
The BME280 is a compact and powerful environmental sensor used in many Arduino and IoT projects. It can measure temperature, humidity, and barometric pressure at the same time. Because of its accuracy and low power consumption, it is widely used in weather stations, indoor climate monitoring, and smart home applications.
The sensor also supports both I2C and SPI communication, which makes it flexible and easy to use with different microcontrollers, including Arduino.
Features of BME280 Sensor
The BME280 comes with several useful features that make it suitable for real-time environmental monitoring:
- It measures temperature, humidity, and pressure using a single module.
- It works on 3.3V, making it safe for many Arduino boards and breakout modules.
- It offers high accuracy and fast response time.
- The sensor has low power consumption, which is ideal for battery-powered IoT devices.
- It provides stable and reliable readings, even in long-term applications.
These features make the BME280 the preferred choice for modern sensing applications.
Why Use BME280 in Arduino Projects
The BME280 is popular among Arduino users because it provides three important environmental readings using just one sensor. This reduces wiring, code complexity, and overall project cost.
Here are some simple reasons to use it with Arduino:
- It uses the I2C interface, so wiring takes only two data pins.
- It gives more accurate humidity readings compared to many other low-cost sensors.
- It is perfect for weather stations, indoor air monitoring, IoT dashboards, and data logging projects.
- The sensor works smoothly with Arduino libraries, so you can get readings in just a few lines of code.
Overall, the BME280 helps you build advanced environmental monitoring systems with very little effort.
BME280 Operating Modes (I2C/SPI)
The BME280 supports two communication modes: I2C and SPI.
- I2C Mode:
This is the most common mode used with Arduino. It needs only two pins, SDA and SCL, making wiring very simple. Most breakout boards of BME280 are configured for I2C by default. - SPI Mode:
This mode is useful when you need faster communication or when multiple sensors share the same I2C bus. SPI requires more pins (MISO, MOSI, CS, SCK), but it offers better speed.
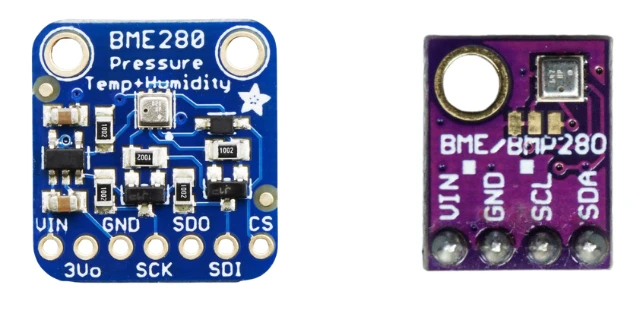
BME280 Pinout and Connection with Arduino
The BME280 comes with a simple and easy-to-understand pinout. Most breakout boards include 4 pins for I2C communication and 6 pins if the board supports both I2C and SPI. In Arduino projects, we commonly use the I2C pins, as they require fewer wires and are very easy to configure.
BME280 Pinout
Let’s start by understanding the pinout of the BME280 sensor, because knowing the function of each pin makes the wiring process much easier. The BME280 supports both I2C and SPI, but in most Arduino projects, we use I2C mode because it requires only two communication pins, SDA and SCL.
The other pins are related to power and optional SPI communication.
The image below shows the pinout of BME280 sensor breakout board.

Here’s the pin description of the BME280 sensor (I2C mode):
| Pin Name | Function | Description |
|---|---|---|
| VCC | Power Supply | Connects to 3.3V (some modules support 5V with regulators) |
| 3.3V | Voltage Output | 3.3V output to be used for other purposes. |
| GND | Ground | Connects to Arduino GND |
| SCK | Serial Clock Line | Used for I2C/SPI clock signal |
| SDO | I2C Address / SPI Data | LOW = 0x76, HIGH = 0x77 (selects I2C address) MOSI for SPI Mode |
| SDI | Serial Data Line | Used for I2C data communication (SDA) MISO for SPI Mode |
| CS | Chip Select (SPI only) | Keep HIGH for I2C mode |
BME280 Connection with Arduino
The circuit diagram for connecting the BME280 sensor to Arduino is very straightforward. The image below shows how to connect the BME280 sensor with Arduino UNO.
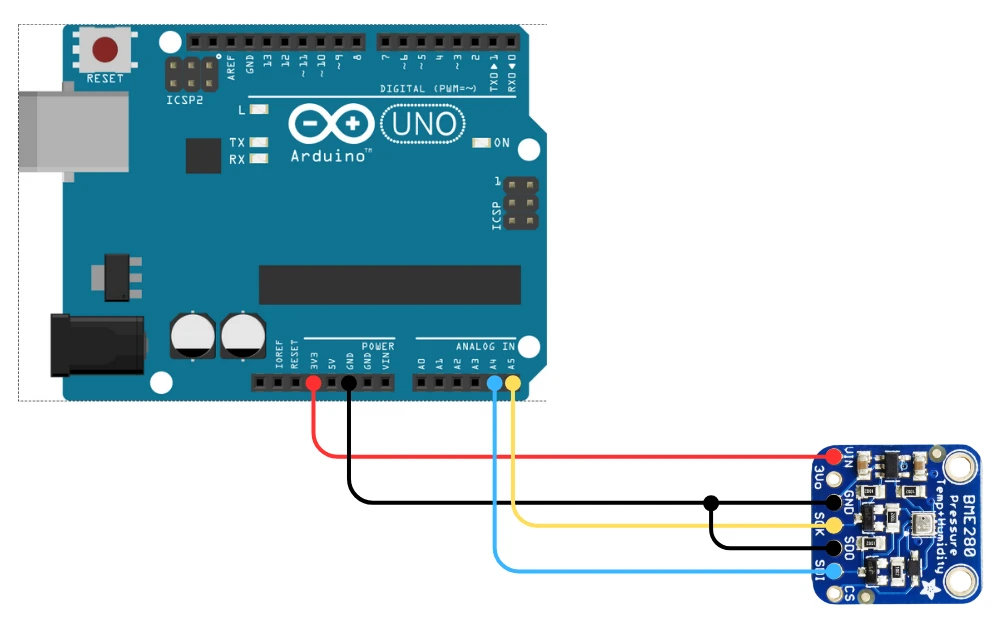
The BME280 sensor uses the I2C bus, which means it requires only two data lines, SDA and SCL, along with power. The sensor connects easily to any Arduino.
Below is a typical connection setup using the Arduino UNO:
| BME280 Pin | Arduino UNO Pin | Notes |
|---|---|---|
| Vin | 3.3V or 5V | Use 5V only if module supports it |
| GND | GND | Common ground is required |
| SDA/SDI | A4 | I2C Data Line |
| SCK | A5 | I2C Clock Line |
| SDO | GND | LOW = 0x76, HIGH = 0x77 (selects I2C address) |
If you are using another board such as Arduino Mega or Arduino Nano, the I2C pins might be different. For example:
- On Arduino Mega, SDA = Pin 20, SCL = Pin 21
- On Arduino Leonardo, SDA = Pin 2, SCL = Pin 3
Arduino Code to Read Data from BME280
Below is a simple and beginner-friendly Arduino code to read temperature, humidity, pressure and altitude from the BME280 sensor. The code uses the Adafruit BME280 library, which makes everything very easy.
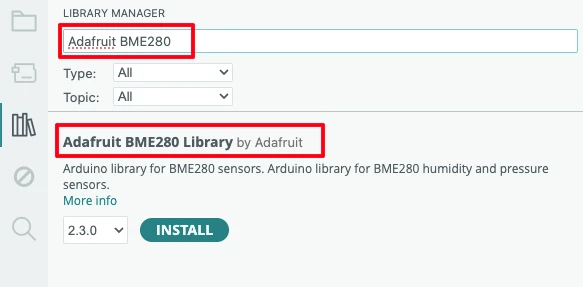
Required Libraries
To use the BME280 with Arduino, you need a few simple libraries. These libraries make it easy to read temperature, humidity, and pressure without writing complex sensor drivers. Installation is quick and can be done directly from the Arduino Library Manager.
Follow these steps to install the library in the Arduino IDE:
- Open the Arduino IDE on your computer.
- Go to Sketch → Include Library → Manage Libraries…
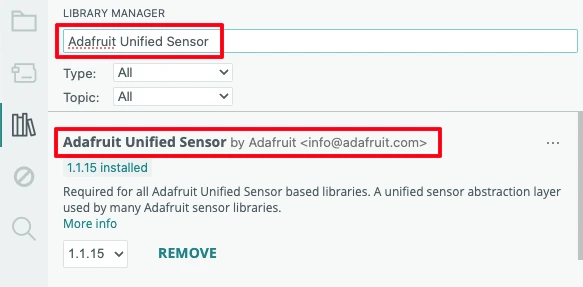
- In the Library Manager search box, type “Adafruit BME280”.
- Select “Adafruit BME280 Library” from the list and click Install.
- Now search for “Adafruit Unified Sensor”.
- Install the library “Adafruit Unified Sensor by Adafruit”.
Arduino Code to read data from BME280 and print on serial console
Here’s the tested and fully working Arduino sketch for reading temperature, humidity, pressure and Altitude from the BME280 sensor. This code prints the values on the Serial Monitor.
#include <Wire.h>
#include <Adafruit_Sensor.h>
#include <Adafruit_BME280.h>

#define SEALEVELPRESSURE_HPA (1013.25)  // Standard sea-level pressure

Adafruit_BME280 bme;  // BME280 object

void setup() {
  Serial.begin(9600);
  delay(1000);

  Serial.println("Initializing BME280 sensor...");

  // Initialize at I2C address 0x76
  if (!bme.begin(0x76)) {
    Serial.println("BME280 not found! Check wiring or try address 0x77.");
    while (1);
  }

  Serial.println("BME280 initialized successfully.\n");
}

void loop() {
  float temperature = bme.readTemperature();        // °C
  float humidity    = bme.readHumidity();           // %
  float pressure    = bme.readPressure() / 100.0;   // hPa
  float altitude    = bme.readAltitude(SEALEVELPRESSURE_HPA);  // meters

  Serial.print("Temperature: ");
  Serial.print(temperature);
  Serial.println(" °C");

  Serial.print("Humidity: ");
  Serial.print(humidity);
  Serial.println(" %");

  Serial.print("Pressure: ");
  Serial.print(pressure);
  Serial.println(" hPa");

  Serial.print("Altitude: ");
  Serial.print(altitude);
  Serial.println(" m");

  Serial.println("-----------------------------");
  delay(2000);   // Read every 2 seconds
}Explanation of the Code
1. Including Libraries and Creating the Sensor Object
The code starts by including the necessary libraries:
#include <Wire.h>
#include <Adafruit_Sensor.h>
#include <Adafruit_BME280.h>Wire.hfor I2C communicationAdafruit_Sensor.handAdafruit_BME280.hfor handling the BME280 sensor
Then a BME280 object is created, which allows the Arduino to read temperature, humidity, pressure, and altitude.
2. Setup: Initializing Serial and BME280
void setup() {
Serial.begin(9600);
delay(1000);
Serial.println("Initializing BME280 sensor...");
// Initialize at I2C address 0x76
if (!bme.begin(0x76)) {
Serial.println("BME280 not found! Check wiring or try address 0x77.");
while (1);
}
Serial.println("BME280 initialized successfully.\n");
}- The Serial Monitor is started at 9600 baud, so you can see the readings.
- A short delay ensures the sensor is ready.
- The BME280 is initialized using I2C address 0x76 (most common for this sensor).
If the sensor is not found, it prints an error message and stops the program.
Once the sensor is detected, the setup prints a “sensor initialized” message.
3. Loop: Reading Temperature, Humidity, Pressure, Altitude
void loop() {
float temperature = bme.readTemperature(); // °C
float humidity = bme.readHumidity(); // %
float pressure = bme.readPressure() / 100.0; // hPa
float altitude = bme.readAltitude(SEALEVELPRESSURE_HPA); // meters- Temperature is read in Celsius.
- Humidity is read as a percentage.
- Pressure is read in Pascals, then converted to hPa.
- Altitude is calculated using the standard sea-level pressure of 1013.25 hPa.
This gives you an approximate altitude above sea level.
These values update continuously, giving real-time environmental data.
4. Printing Sensor Values
Each reading is printed in a clean, readable format on the Serial Monitor:
- Temperature
- Humidity
- Pressure
- Altitude
The loop waits 2 seconds before taking the next measurement.
Output on Serial Monitor
Once the code is uploaded successfully, open the Serial Monitor from the Arduino IDE (Tools → Serial Monitor) and set the baud rate to 9600.
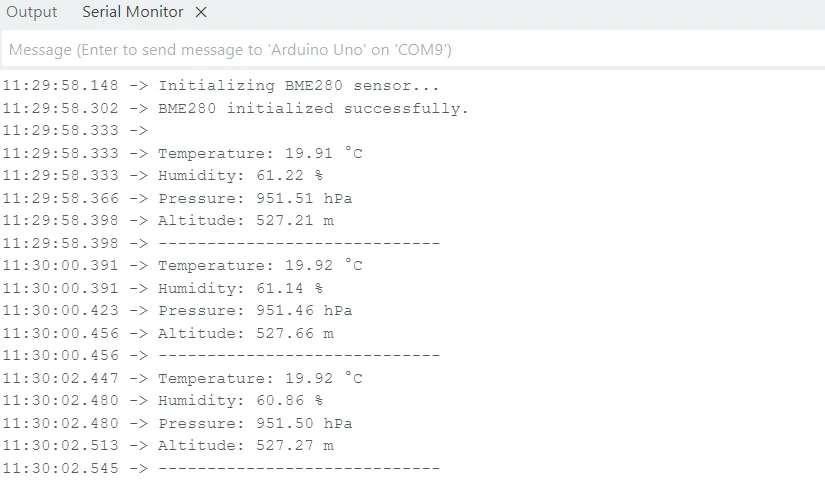
The data updates every 2 seconds.
Display BME280 Data on 16×2 I2C LCD
Now that we have successfully displayed temperature, humidity, pressure and altitude readings from the BME280 sensor on the Serial Monitor, let’s take the project one step further.
In this section, we will learn how to show the same readings on a 16×2 I2C LCD display. This makes your weather-monitoring project more practical because you can view real-time data without keeping your Arduino connected to a computer.
The I2C LCD1602 display communicates using the same SDA and SCL pins as the BME280 sensor. Because both devices use the I2C protocol, they can share the same bus without any issue.
This makes wiring simple and clean.
The image below shows how the BME280 module and LCD1602 display are connected to the Arduino UNO using the same I2C pins.
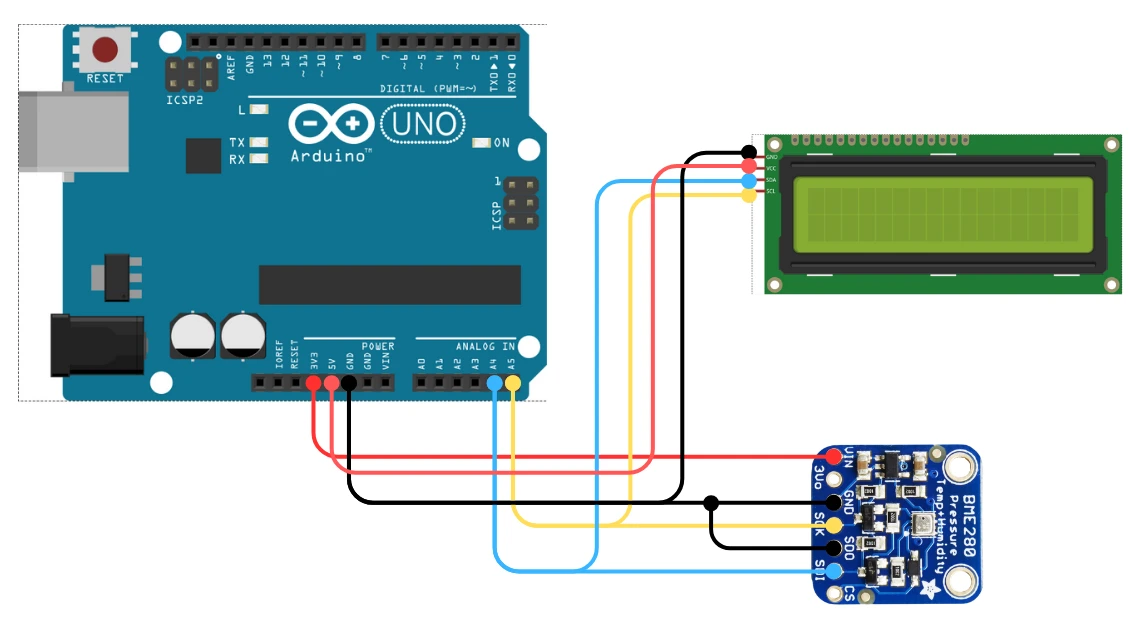
Here is the wiring table:
| LCD Pin | Arduino UNO Pin |
|---|---|
| VCC | 5V |
| GND | GND |
| SDA | A4 |
| SCL | A5 |
Both the BME280 and LCD1602 use the I2C interface, so simply connect their SDA lines together and SCL lines together.
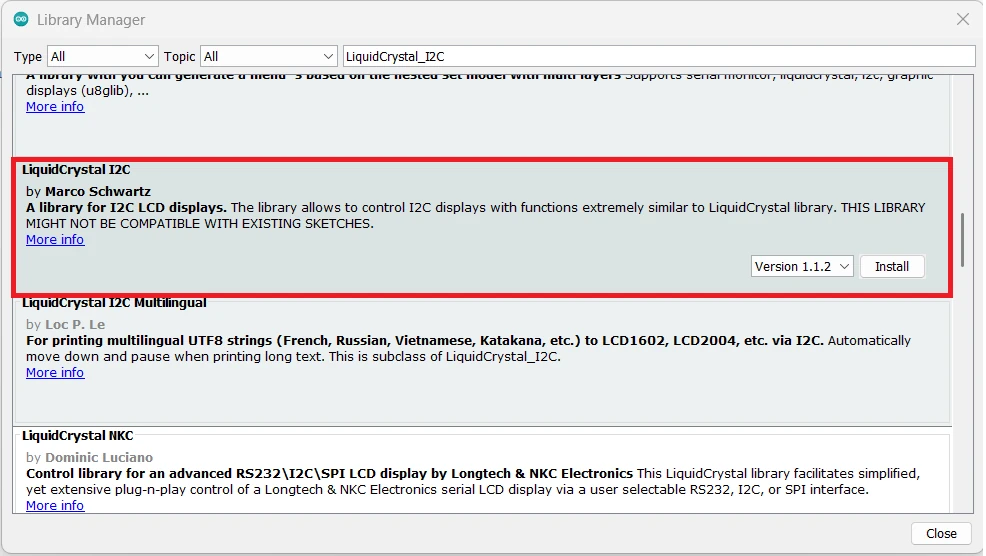
Configuring the LCD1602 Library
Before running the code, make sure you have installed the LiquidCrystal_I2C library. You can do this by:
- Opening the Arduino IDE
- Going to Sketch → Include Library → Manage Libraries…
- Searching for “LiquidCrystal I2C”
- Installing the library by Frank de Brabander
Arduino Code to print data on Display (BME280 + I2C LCD)
Here’s the complete and tested Arduino code that displays BME280 sensor data on the I2C LCD1602 display:
#include <Wire.h>
#include <Adafruit_Sensor.h>
#include <Adafruit_BME280.h>
#include <LiquidCrystal_I2C.h>
#define SEALEVELPRESSURE_HPA (1013.25)
// Create BME280 object
Adafruit_BME280 bme;
// Create LCD object (I2C address 0x27, 16x2 display)
LiquidCrystal_I2C lcd(0x27, 16, 2);
void setup() {
Serial.begin(9600);
// Initialize LCD
lcd.init();
lcd.backlight();
lcd.setCursor(0, 0);
lcd.print("BME280 + LCD");
delay(1500);
lcd.clear();
// Initialize BME280 sensor
if (!bme.begin(0x76)) {
lcd.print("BME Err!");
while (1); // Stop execution
}
}
void loop() {
float temp = bme.readTemperature(); // °C
float humidity = bme.readHumidity(); // %
float pressure = bme.readPressure() / 100.0; // hPa
float altitude = bme.readAltitude(SEALEVELPRESSURE_HPA); // meters
// --- Line 1: Temperature + Humidity ---
lcd.setCursor(0, 0);
lcd.print("T:");
lcd.print(temp, 1);
lcd.print("C ");
lcd.print("H:");
lcd.print(humidity, 0);
lcd.print("%");
// --- Line 2: Pressure + Altitude ---
lcd.setCursor(0, 1);
lcd.print("P:");
lcd.print(pressure, 0);
lcd.print("h ");
lcd.print("A:");
lcd.print(altitude, 0); // altitude in meters
delay(1500);
}Explanation (BME280 + LCD + Altitude)
1. Libraries
#include <Wire.h>
#include <Adafruit_Sensor.h>
#include <Adafruit_BME280.h>
#include <LiquidCrystal_I2C.h>These libraries allow Arduino to communicate with the BME280 sensor (temperature, humidity, pressure, altitude) and the I2C LCD.
2. Objects & Constants
#define SEALEVELPRESSURE_HPA 1013.25
Adafruit_BME280 bme;
LiquidCrystal_I2C lcd(0x27, 16, 2);- Sea-level pressure is needed for altitude calculation.
bmeandlcdhandle sensor and display communication.
3. Setup()
void setup() {
  Serial.begin(9600);

  // Initialize LCD
  lcd.init();
  lcd.backlight();
  lcd.setCursor(0, 0);
  lcd.print("BME280 + LCD");
  delay(1500);
  lcd.clear();

  // Initialize BME280 sensor
  if (!bme.begin(0x76)) {
    lcd.print("BME Err!");
    while (1);  // Stop execution
  }
}- Start Serial communication
- Initialize LCD and show a welcome message
- Initialize BME280 at address
0x76 - If sensor not found: show error on LCD and stop the program
4. loop() – Read Sensor Values
float temp = bme.readTemperature();
float humidity = bme.readHumidity();
float pressure = bme.readPressure() / 100.0;
float altitude = bme.readAltitude(SEALEVELPRESSURE_HPA);The BME280 provides:
- Temperature (°C)
- Humidity (%)
- Pressure (hPa)
- Altitude (meters)
5. Display on LCD
  // --- Line 1: Temperature + Humidity ---
  lcd.setCursor(0, 0);
  lcd.print("T:");
  lcd.print(temp, 1);
  lcd.print("C ");

  lcd.print("H:");
  lcd.print(humidity, 0);
  lcd.print("%");

  // --- Line 2: Pressure + Altitude ---
  lcd.setCursor(0, 1);
  lcd.print("P:");
  lcd.print(pressure, 0);
  lcd.print("h ");

  lcd.print("A:");
lcd.print(altitude, 0); // altitude in metersLine 1:T:xx.xC H:xx%
Line 2:P:xxxxh A:xxx
All values fit neatly in the 16×2 LCD.
6. Delay
delay(1500);Updates the display every 1.5 seconds.
Output on the LCD1602
Once the code is uploaded successfully, the LCD should print the Temperature, Pressure, Humidity and Altitude values as shown in the image below.
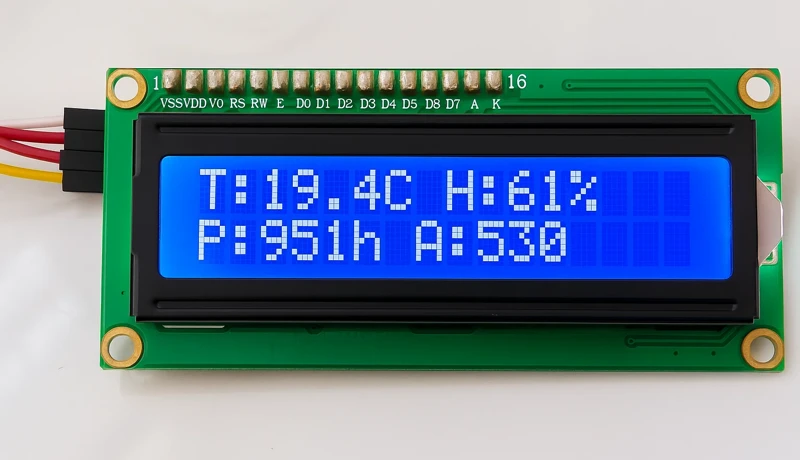
These values on the LCD display will update every 2 seconds.
Link to Detailed LCD Tutorial
If you want to learn more about how the I2C LCD1602 display works — including how to find its I2C address, create custom characters, or troubleshoot display issues — check out my full guide here:
This detailed post explains everything you need to know about using I2C LCDs with Arduino.
Common Errors and Troubleshooting (BME280 + Arduino)
Even though the BME280 is easy to use, you may still face issues such as incorrect readings, missing output, or I2C errors. Below are the most common problems and their fixes.
1. BME280 Not Detected (No I2C Response)
Symptoms:
- Serial Monitor shows:
“Could not find BME280 sensor!” - LCD displays an error message
- Code stuck in loop after
bme.begin()
Fix:
- Check wiring for SDA → A4 and SCL → A5
- Make sure the sensor is powered with 3.3V (most boards also support 5V)
- If sensor address is different, try both addresses in code:
bme.begin(0x76); // or bme.begin(0x77);
2. Wrong Temperature or Humidity Readings
Symptoms:
- Temperature too high
- Humidity stuck at 0% or 100%
Fix:
- Do not place the sensor near heat sources, Arduino boards, voltage regulators, or displays
- Use longer wires to keep the sensor away from the main board
- Ensure proper air circulation around the sensor module
3. Pressure Reading Extremely High or Low
Symptoms:
- Pressure shows 0 hPa
- Pressure value unrealistic (e.g., 2000 hPa or 300 hPa)
Fix:
- Check if the sensor is BME280 (temperature, humidity, pressure)
and not BMP280 (temperature + pressure only) - Try a different library address (
0x76or0x77)
4. Altitude Value Not Accurate
Reason:
Altitude depends on sea-level pressure, which changes daily.
Fix:
- Update sea-level pressure in code:
#define SEALEVELPRESSURE_HPA 1013.25 // replace with your local value - You can check real-time SLP from weather websites or local weather apps.
5. LCD Not Showing Values (Only Backlight ON)
Fix:
- Check LCD I2C address (commonly
0x27or0x3F) - Use I2C scanner sketch to detect address
- Make sure SDA and SCL are shared correctly between LCD and BME280
- Confirm that both devices are powered (5V or 3.3V as required)
Conclusion
In this tutorial, you learned how to interface the BME280 sensor with Arduino and display real-time temperature, humidity, pressure and altitude readings. We covered everything from understanding the sensor and wiring it correctly, to reading the data in the Serial Monitor and showing it on a 16×2 I2C LCD.
This setup is perfect for weather stations, indoor monitoring, and many other Arduino projects. With both serial output and LCD display working together, you now have a complete and practical system that can be used anywhere without a computer.
Browse More Arduino Sensors Tutorials
ADXL345 Arduino I2C Tutorial: Pinout, Wiring, Calibration, and Accelerometer Data Reading Explained
MPU6050 Arduino Tutorial: I2C Wiring, Raw Data, Calibration & Code
PIR Sensor Arduino Tutorial: Wiring, H/L Modes, Smart Light & Alarm
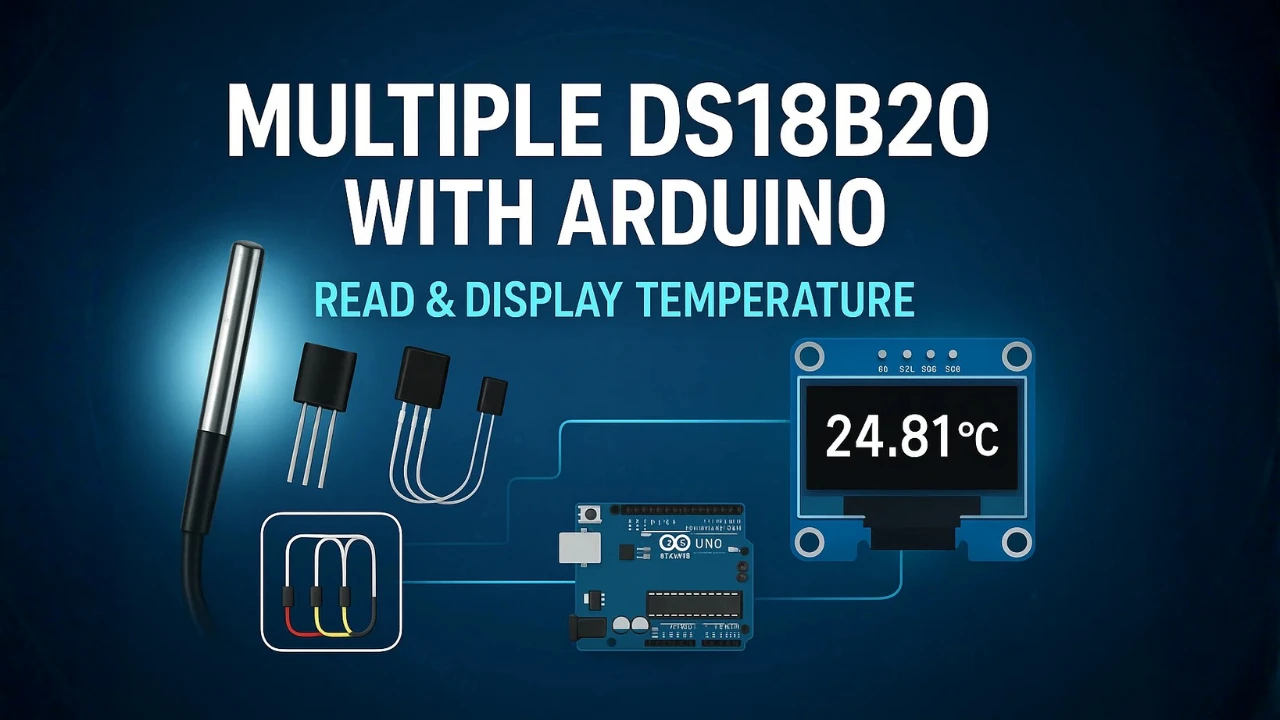
DS18B20 Arduino Tutorial: Single & Multiple Sensors, Serial & OLED Output
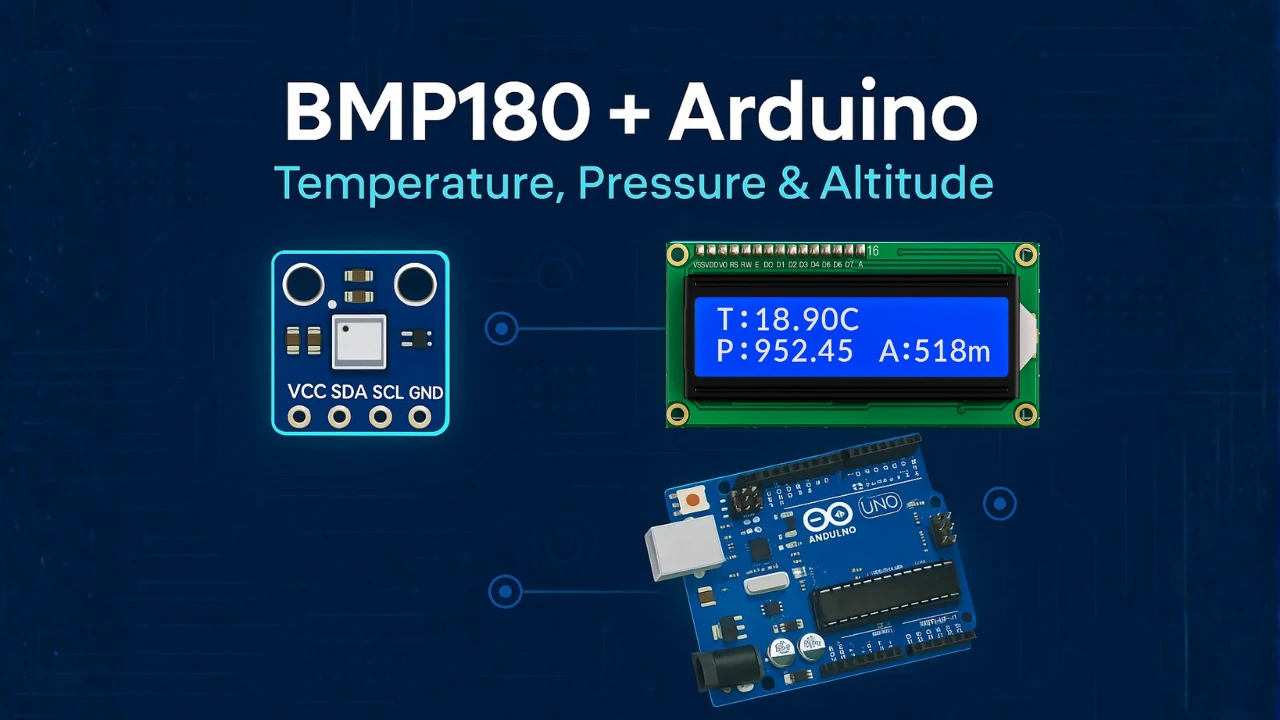
BMP180 Arduino Tutorial: I2C Wiring, Temperature, Pressure, Altitude & LCD1602
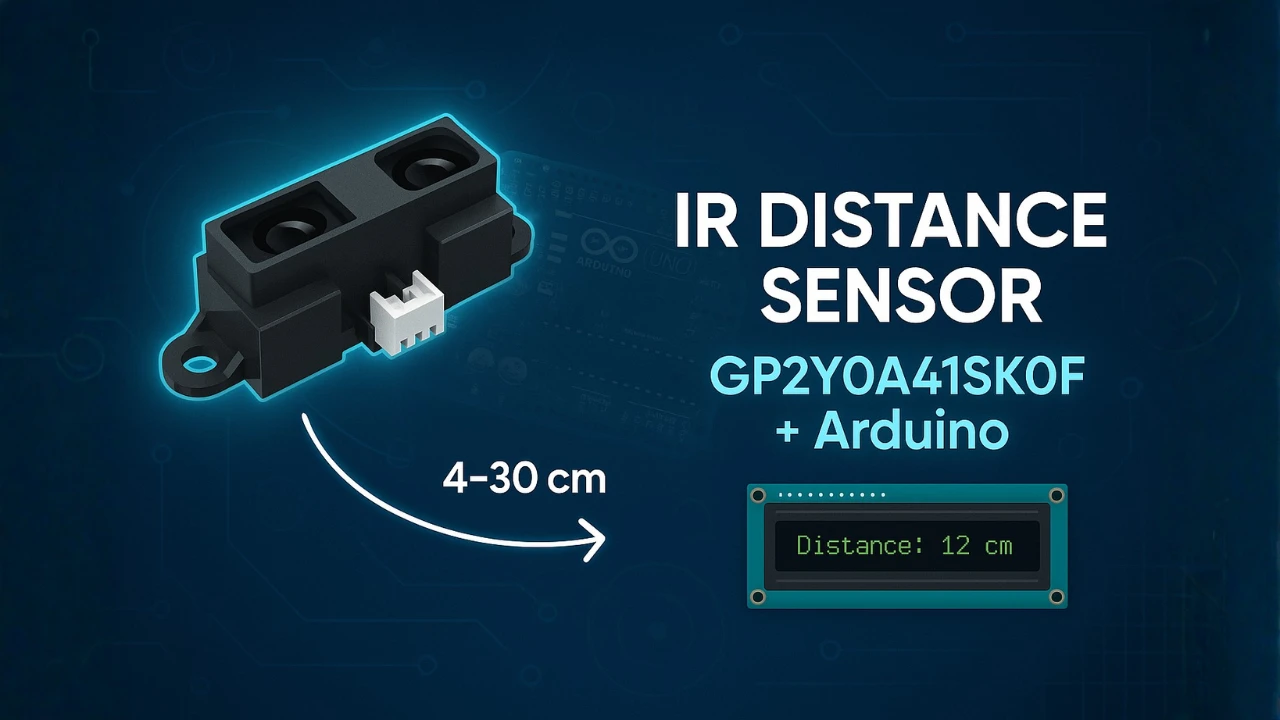
How to Interface GP2Y0A41SK0F Distance Sensor with Arduino (Serial Monitor + I2C LCD Display)
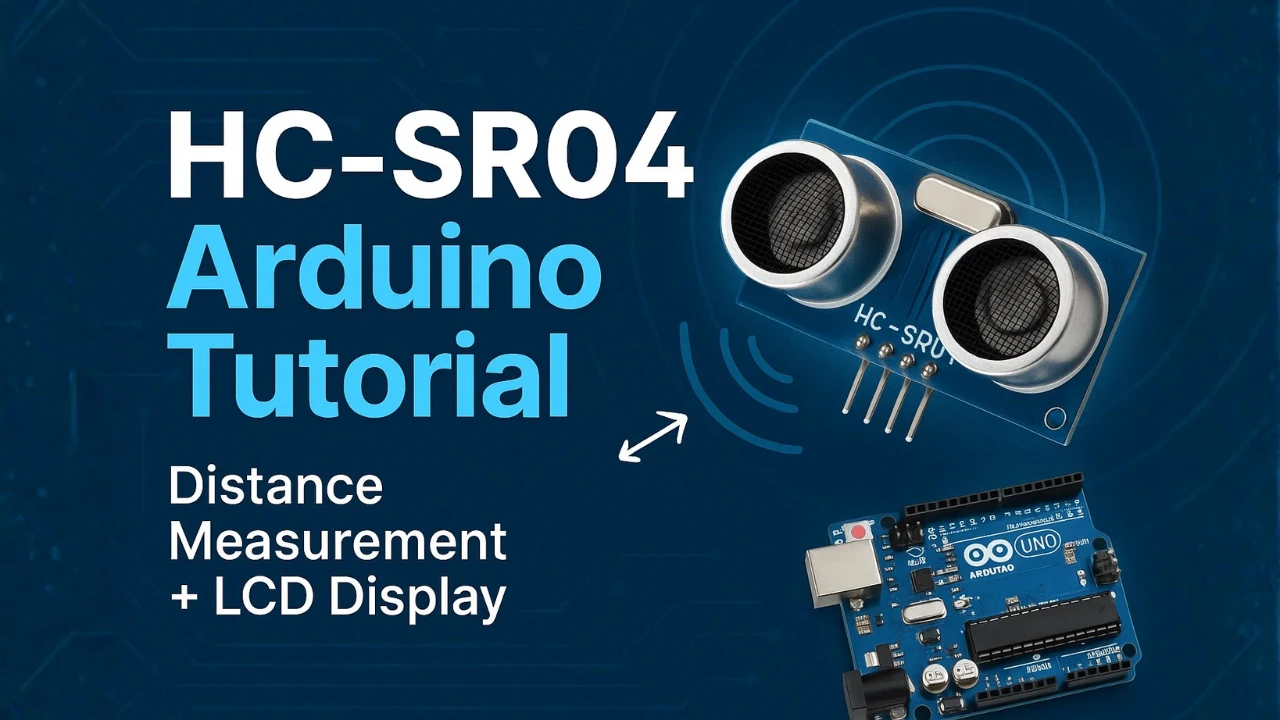
HC-SR04 Arduino Tutorial: Measure Distance and Display on Serial Monitor & LCD1602 I2C
Arduino BME280 Project Download
Arduino BME280 FAQs

Subscribe
Login
0 Comments
Newest
