
Home ▸ STM32 Tutorials ▸
Updated On: March 23, 2026
TouchGFX #2. How to use TextArea and Wildcards
This is 2nd tutorial in the STM32 TouchGFX series, and today we will see how to use the Text Area, and how to make use of the wildcard.
Text Area can be used to display different Texts on the screen. The wildcards are basically used to display the values which are not predefined during the design process. This may included values such as the sensor’s data, or the values input by the user. We will see how to display them in this tutorial.
You much see the previous tutorial, as I am going to skip the basic setup that has already been explained in the previous tutorial.
Let’s start with the touchGFX setup
VIDEO TUTORIAL
You can check the video to see the complete explanation and working of this project.
TouchGFX Setup
I am assuming that you have already seen the previous tutorial, so I will skip the project setting part. There is a background image added to the project and we will only see the configuration of the components, that we will use only in this project.
TextArea Setup
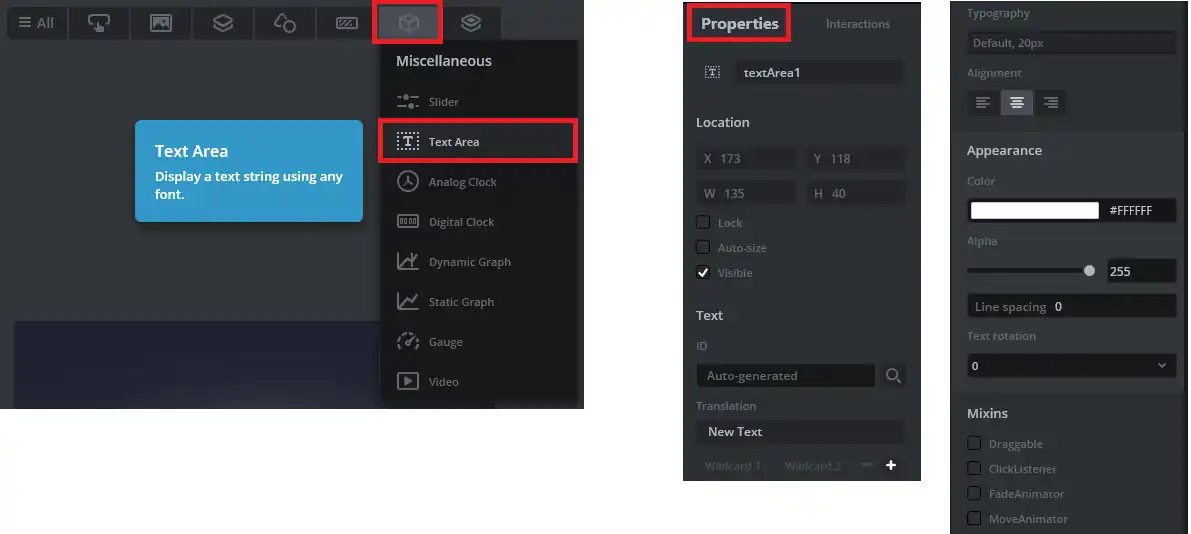
First we have to add the Text Area to our screen. On the right sided, you can see the properties of the textArea.
The only change I have made is that I have changed the Text color to white so that it can be visible on the black background.
Since we will use this text area to display the values based on the user input, we can’t use the default data. We must use the wildcards for the same.
Wildcard setup
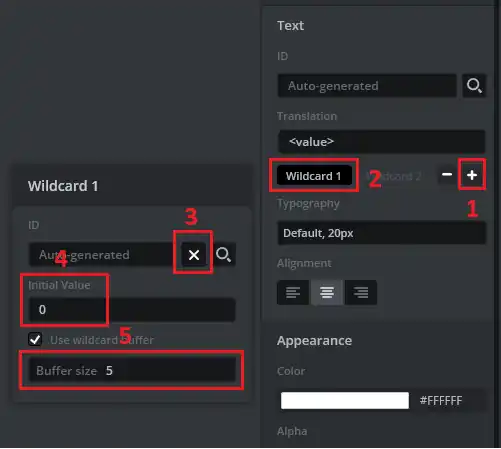
The wildcard can be added from the textArea properties itself.
- Click the Add (+) button to add the wildcard.
- In the Translation section, you can see the “<value>”. This <value> will be replaced by the value assigned to the wildcard during the runtime.
- Click on the Wildcard to see it’s properties.
- Click the add (+) button if you want to assign some default value/Text to the TextArea.
- I have assigned the value 0.
- We will use the wildcard buffer to store the wildcard values. I have assigned the buffer with 5 bytes.
Now the wildcard has been created, but we must also assign the wildcard characters. You basically define what characters the wildcard can use.
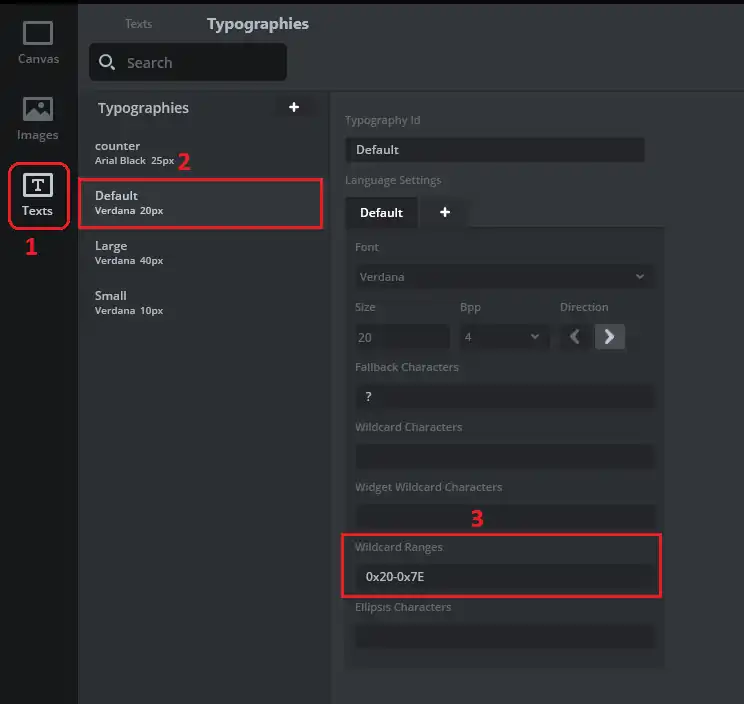
To assign the wildcard characters, goto Text, and then select the typography you are using for the textArea. I am using the default typography.
Now in the wildcard range, you can assign the range of characters the wildcard can use.
For eg- The range 1-9 means it can only use the numbers from 1 to 9 and in case 0 arrives, or any other character arrives, it will display the fallback character (‘?’ in this case).
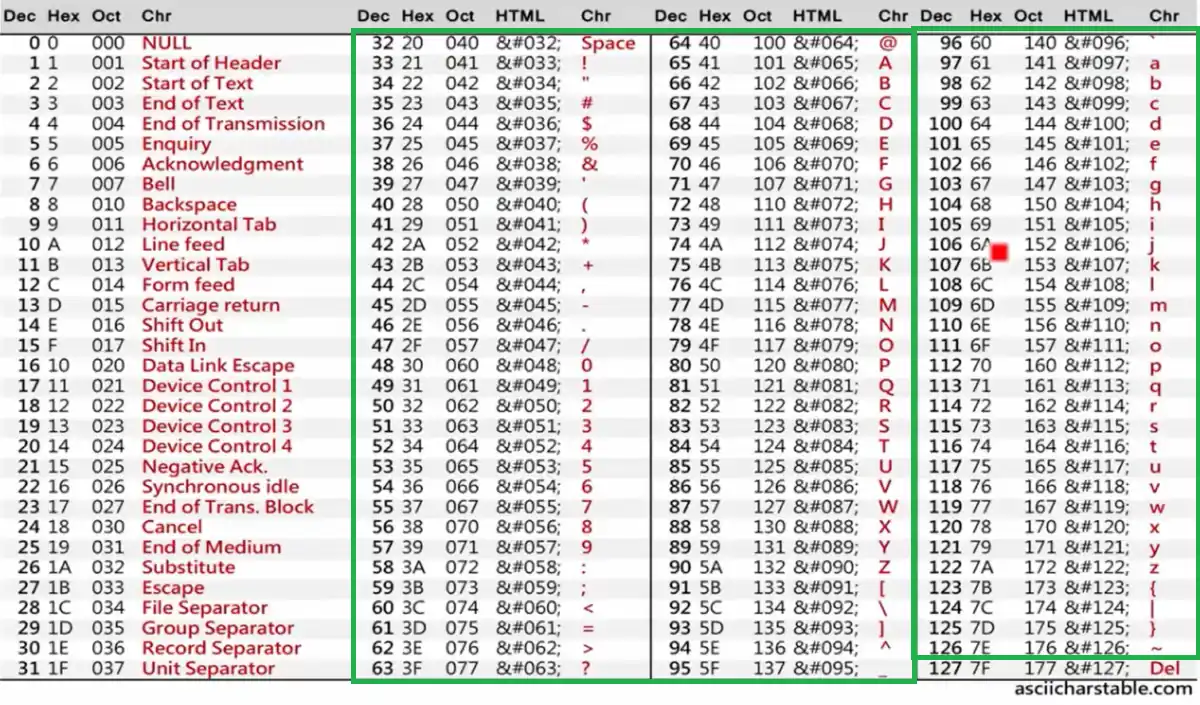
I have assigned the range from 0x20-0x7E, which covers the entire range of characters as per the ascii table shown below.
Button Setup
I have assigned 2 flex buttons for the counter. The image is shown below
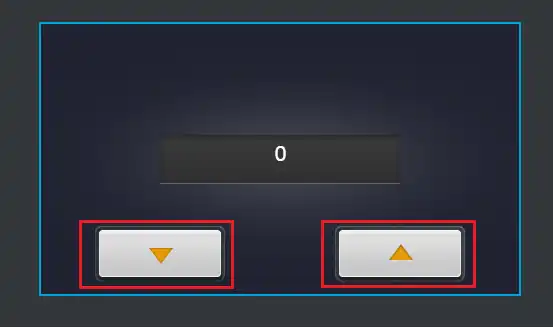
The images assigned to these buttons can be found in the TouchGFX\assets\images folder.
We will add some interactions to this screen for these buttons.
Interactions
I have added 2 interactions for the 2 buttons. They are shown below
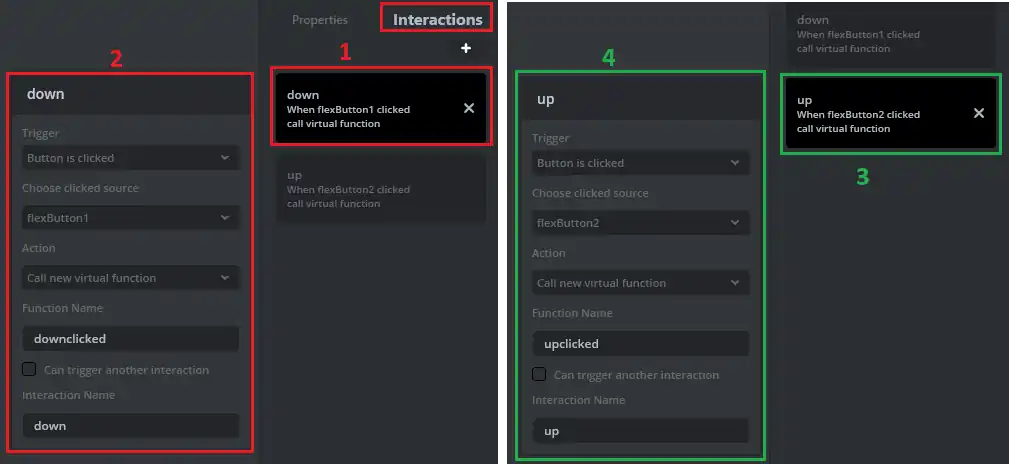
The first interaction is named down and will be triggered when the flexButton1 (down button) is clicked.
When this button is clicked, it will call a new virtual function, “downclicked“, which we will write in the code.
The second interaction is named up and will be triggered when the flexButton2 (up button) is clicked.
When this button is clicked, it will call a another virtual function, “upclicked“, which we will write in the code.
The code
First of all, in the screen1View header file define the functions we declared in the interactions.
virtual void downclicked();
virtual void upclicked();

protected:

int16_t counter = 0;I have also defined a variable, counter, which will keep the record of the counts when the UP and DOWN buttons will be pressed.
We will write these functions in the screen1View source file
void Screen1View::downclicked()
{
	counter--;
	if (counter<=0) counter = 0;
	Unicode::snprintf(textArea1Buffer, TEXTAREA1_SIZE, "%d", counter);
	textArea1.invalidate();
}

void Screen1View::upclicked()
{
	counter++;
	Unicode::snprintf(textArea1Buffer, TEXTAREA1_SIZE, "%d", counter);
	textArea1.invalidate();
}When the UP button will be pressed, the upclicked function will be called. Here we will increment the counter value.
- Now we need to display this value in the textArea we created. The textArea can only display the Ascii characters, so we need to convert the counter value to it’s equivalent characters.
- We use sprintf to do the conversion. The textArea1Buffer is the 5 bytes buffer we allocated for the textArea during the design process.
- In order to print the data stored in the buffer, we need to invalidate the textArea.
Similarly when the DOWN button is clicked, the downclicked function will be called and here we will decrease the counter value.
I don’t want the value to be negative, so I have restricted it to go upto 0.
We will do the same character conversion and then invalidate the textArea to print the value on the textArea.
Result
Below is the gif showing the counter working
You can see the counter is increasing when the UP button is pressed and decreasing with the DOWN button. Also note that the counter’s value is going below 0, as this is the limit I set in the code.
STM32 TouchGFX Tutorial Series

TouchGFX #3. Sending data to UI || MVP

TouchGFX#4. Sending data from another task || Gauge || Animation

TouchGFX #5. Data from UART to UI
TouchGFX #6. How to Build a Multiscreen Project
TouchGFX #7. How to implement on screen keyboard

TouchGFX #8. Send data from GUI to MCU


When building this project I am getting 2 errors
./TouchGFX/gui/src/screen1_screen/Screen1View.cpp:26:27: error: ‘textArea1Buffer’ was not declared in this scope
26 | Unicode::snprintf(textArea1Buffer, TEXTAREA1_SIZE, “%d”, val);
| ^~~~~~~~~~~~~~~
../TouchGFX/gui/src/screen1_screen/Screen1View.cpp:26:44: error: ‘TEXTAREA1_SIZE’ was not declared in this scope
26 | Unicode::snprintf(textArea1Buffer, TEXTAREA1_SIZE, “%d”, val);
How to fix this problem ?
Regards