HTTP WEBSERVER SIMPLE
This is the 6th tutorial in the STM32 ETHERNET series, and today we will see how to use our STM32 to create a HTTP Webserver. This section will be divided into three parts.
The first part will cover the basic webserver, where we will simply create a webpage or 2.
In the Next part, we will use the SSI (Server Side Include) to update the webpage at a regular interval.
And in the final third part we will use the CGI (Common Gateway Interface).
This tutorial will cover the simple webpage, and we will also see how to add resources (images and html pages) to our project.
Let’s start with CubeMX setup first.
CubeMX Setup
The basic part of the CubeMX initialization remains similar to connection tutorial, so I would advise you to go through it first. You should only proceed, if the things are working as mentioned in that.
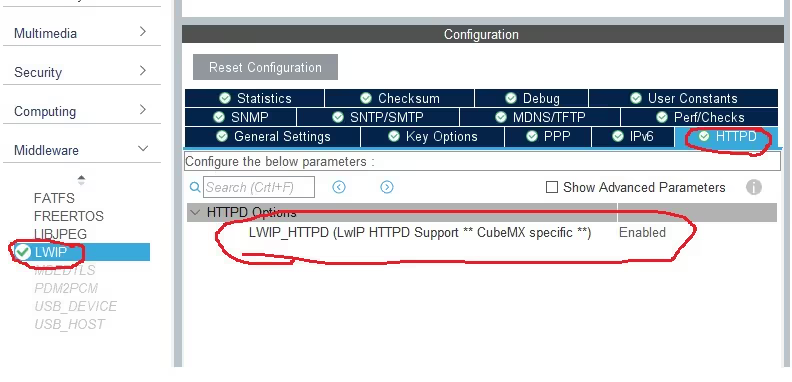
In addition to the connection tutorial, we need to enable the HTTPD in the LWIP. This is shown below
Here I have enabled the HTTPD. This is all the additional setting we need on top of the previous connection video.
The additional Setup
After creating the project, if you build it for the first time, you are going to get errors. So this section will cover the additional setup we need to do, to remove those errors.
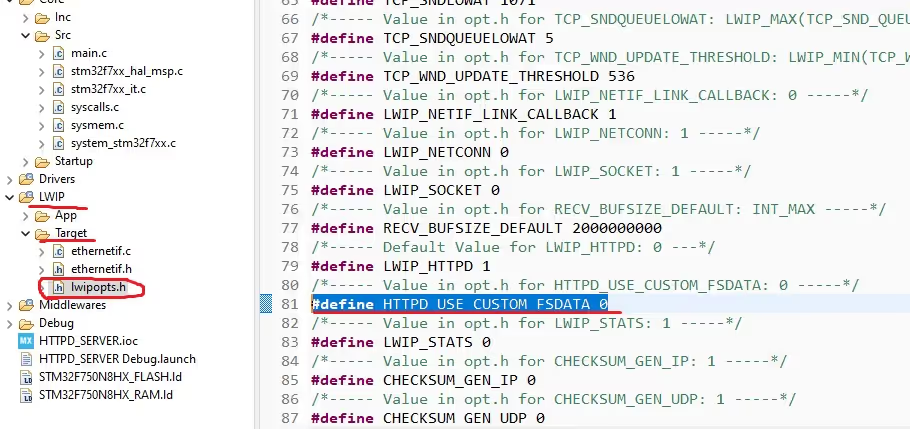
First of all goto LWIP->Target->lwipopts.h and change the #define HTTPD_USE_CUSTOM_FSDATA 0
Now we need to include the “FsData.c” file along with the resources that we are going to use for the webserver.
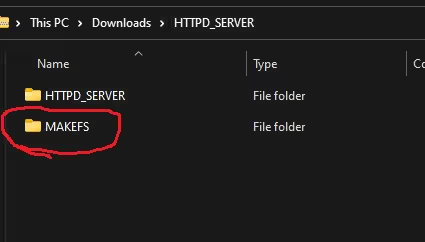
After downloading the code at the end of this post, you will find a folder called “MAKEFS“
Extract this folder separately. Inside you will find another folder “fs“, which contains all the resources you are going to use for the webserver.
By default this folder contains one index page, and a 404 error page. There is also a image inside the img folder. I am going to use these default pages for the application. If you want to modify or add the pages, you have to do it inside this folder.
Now we need to copy the folder content into our project.
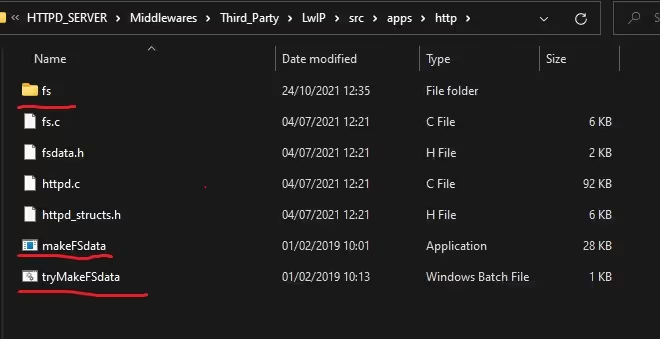
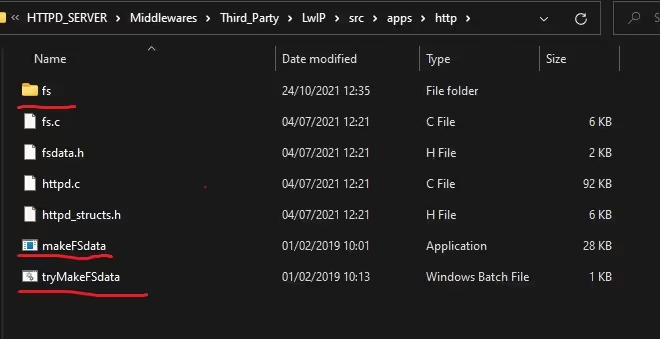
So goto Project\Middlewares\Third_Party\LwIP\src\apps\http and copy the folder contents here.
After copying, all you need to do is double click the makeFSdata application. This is generate a new file fsdata.c as shown below
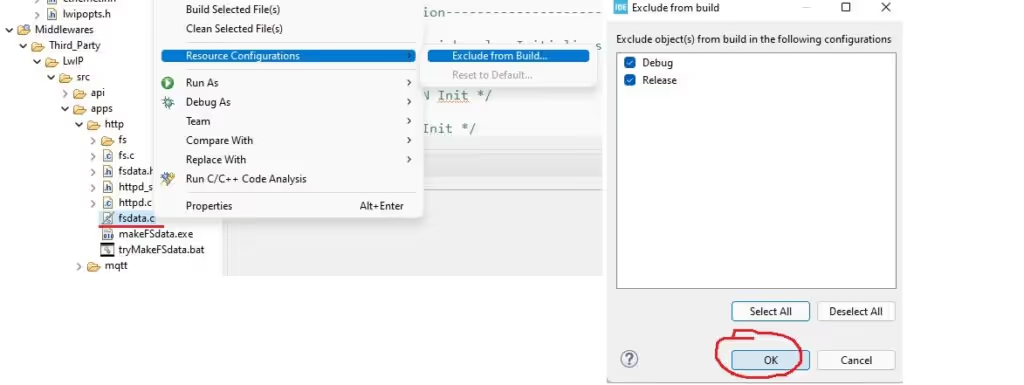
Now the final step is to exclude the fsdata.c from the build.
This is it for the setup. If you build the code now, all the errors should be gone.
Now we will write the code for the initialization of the webserver.
Some Insight into the CODE
#include "lwip/apps/httpd.h"Include the httpd.h file, so that we can use the http initialisation in the main function.
extern struct netif gnetif;

int main ()
{

..............
..............
..............

  /* USER CODE BEGIN 2 */

  http_server_init();

  /* USER CODE END 2 */

  /* Infinite loop */
  /* USER CODE BEGIN WHILE */
  while (1)
  {
    /* USER CODE END WHILE */

    /* USER CODE BEGIN 3 */

	  ethernetif_input(&gnetif);

	  sys_check_timeouts();
  }
  /* USER CODE END 3 */
}
The code here is similar to what we have been in all the previous tutorials.
Except that we have to initialise the http_server in the main function.
Result
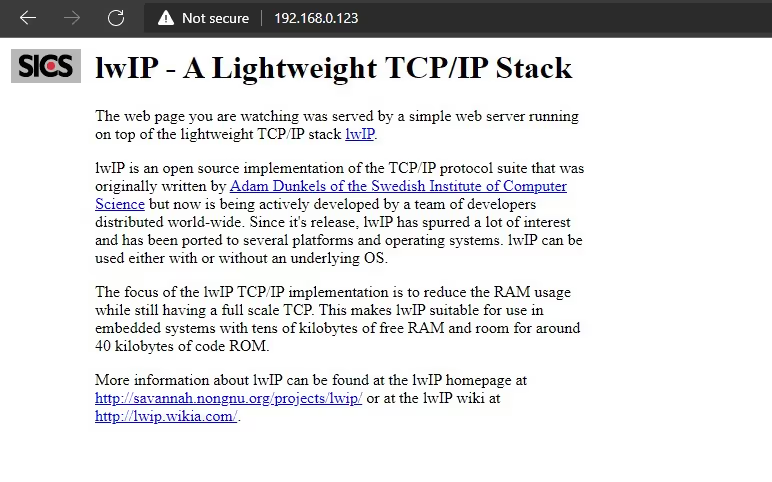
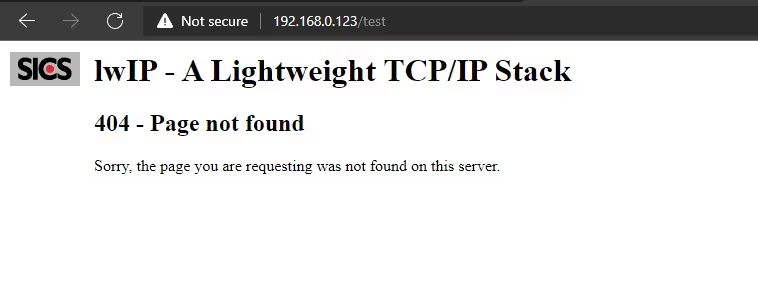
Below are the images of the homepage and the 404 error page.




Hi, Im trying to do a webserver with my stm32h743ZI2 board. But I can´t to do a ping with my computer, I can´t find the mistake. I did several times all tutorial but my board donn´t connect.
I thing thas is a problem with DMA but I don´t now how to to solve it. Can you help me please.
check the forum, someone have solved something similar there
i want to make my STM32 board as server and create GET/POST request to Erp using Ethernet present on the board. Can someone send me an example. thnx 🙂
Hello sir,
Apologies for posting it here, but i really need help in one of your other tutorials, the STM32 SPI SD card interfacing…
I am struck with the FR_NOT_READY problem and have posted a comment to ask you, but haven’t heard back in 3 days.
So, a kind of desperate attempt to get your help.
The comment link:https://controllerstech.com/sd-card-using-spi-in-stm32/#comment-8870
Please help
Well considering that’s the first step, I can’t really tell what’s wrong.
Some SD cards don’t work too. SDXC or SDHC, one of those doesn’t work. I don’t remember which one.
Check the voltage source. Make sure you use the external 5 V