SDRAM in STM32
This tutorial will cover how to interface the external SDRAM with STM32. Most of the STM32 boards, which comes with the pre attached SDRAM, have the MT48LC4M32B2B5 by Micron. So this tutorial will cover the interfacing of this particular RAM.
SDRAMs are mostly used when we are working with large buffers, for eg while using the LCD display. Here we need to store the frame buffer, which is of typically few hundred Kilobytes in size. Storing such a large buffer in the internal RAM is not possible for some microcontrollers, and that is why we use the SDRAM for the storage.
VIDEO TUTORIAL
You can check the video to see the complete explanation and working of this project.
CubeMX SETUP
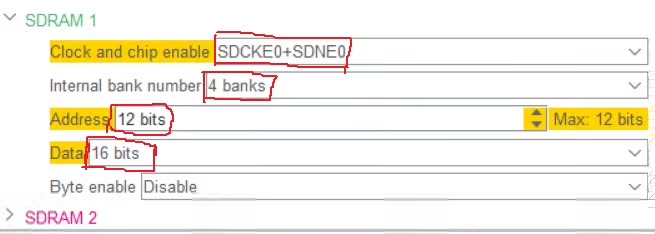
- The SDRAM have 2 banks, Bank 1 and Bank 2.
- SDRAM1 (Bank 1) or SDRAM2 (Bank 2) will depend on the board you are using. For me, it’s SDRAM1
- Clock and Chip Enable is set to SDCKE0+SDNE0 for the Bank 1, and SDCKE1+SDNE1 for the Bank 2.
- I am using 4 internal Banks, so the size of the RAM = 4*32 = 128 Mbits
- The ADDRESS is 12 bits. Check the schematics for the number of address pins.
- The DATA is 16 bits wide. Check the schematics for the number of data pins.
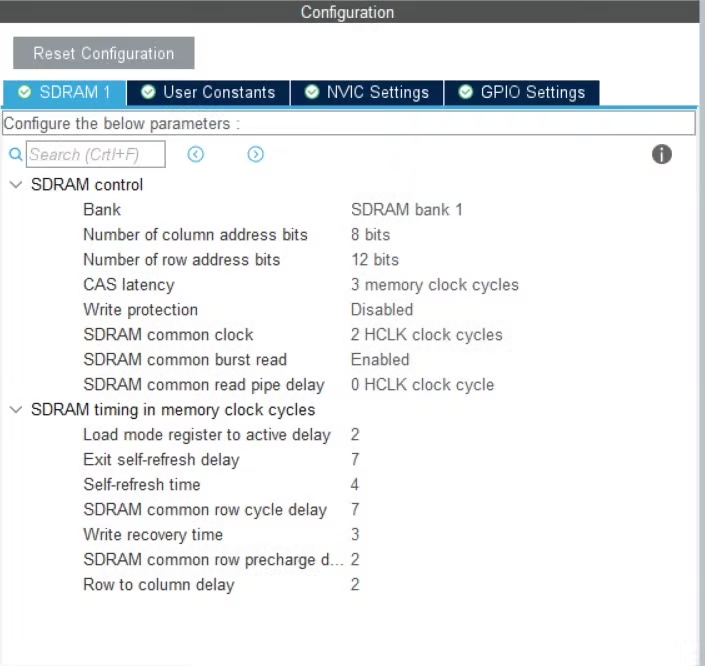
Configure the parameters as shown above. I have tested these with 3 different controllers, and the same setting works for all.
This is it for the CubeMX configuration.
Other than these, we need to include the files for the MT48LC4M32B2B5 in our project folder. You can get the files at the end of this post.
Some Insight into the CODE
First of all we need to define the address of the SDRAM. I am also creating write and read buffers.
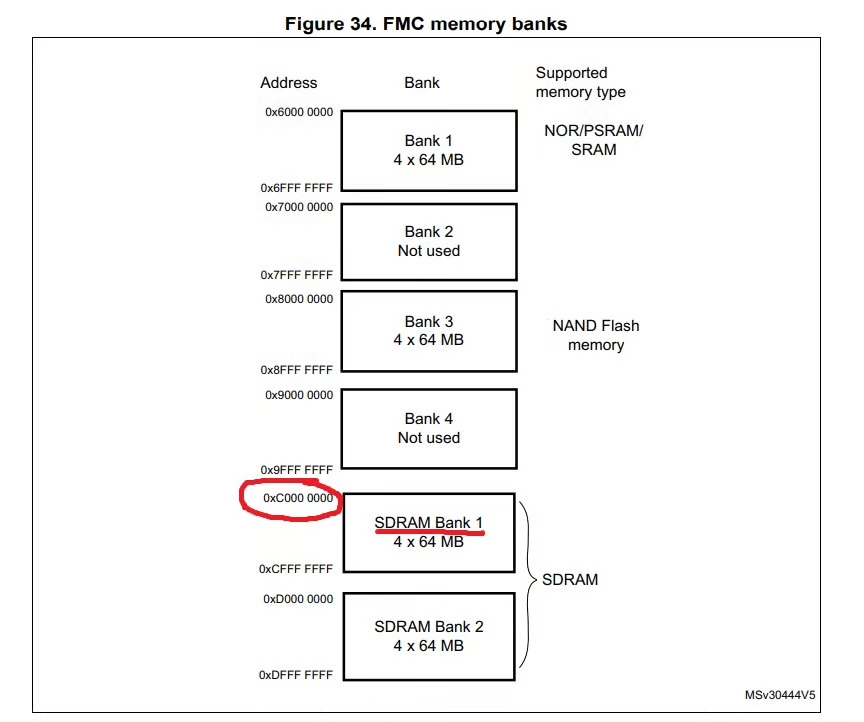
#define SDRAM_ADD 0xC0000000

uint8_t wdata[] = {0x1, 0x2, 0x3, 0x4, 0x5};
uint8_t rdata[10];Here I have defined the address as 0xC0000000. This depends on the board you are using.
To find out the address, check the FMC section in your reference manual as shown below.
Inside the main function, we can simply use the memcpy function to copy the data into/from the SDRAM.
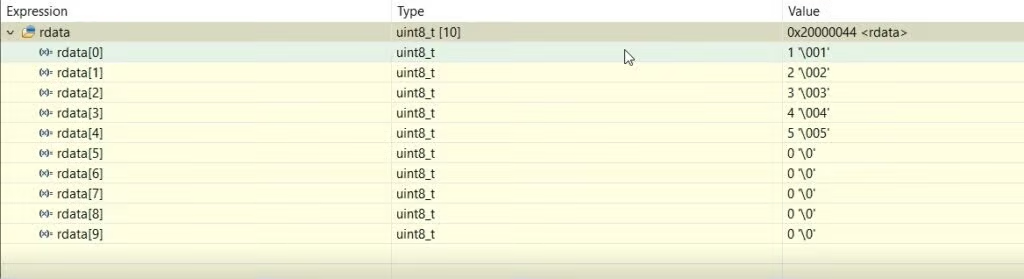
  memcpy((uint32_t *) SDRAM_ADD, wdata, 5);

memcpy(rdata, (uint32_t *) SDRAM_ADD, 5);RESULT

You can see above, the data at the location 0xC0000000 is same as that we copied.
If we perform the read operation, we should be able to read this data into our buffer.


This board is no longer manufactured. ST is replacing it with STM32H7S78-DK. Will you update this page?
Thank you