Home ▸ STM32 Tutorials ▸
Updated On: March 23, 2026
HTTP Server using LWIP NETCONN (RTOS)
This is the 10th tutorial in the STM32 ETHERNET series, and today we will see how to use our STM32 to create a HTTP Webserver but using the FreeRTOS and the NETCONN API of course. This tutorial will only cover the basic webserver, where we will display one index page and for any other request, we will display the error page.
A more complete webpage using AJAX for asynchronous loading will be coming in few days.
NOTE: I am using STM32F750 Discovery Board, which have the RMII connection type and the CubeMX does not allow memory configuration for the Ethernet.
VIDEO TUTORIAL
You can check the video to see the complete explanation and working of this project.
CubeMX Setup
Let’s start with CubeMX Setup, which is pretty much the same as the last tutorial.
Let’s start with enabling the ethernet itself :
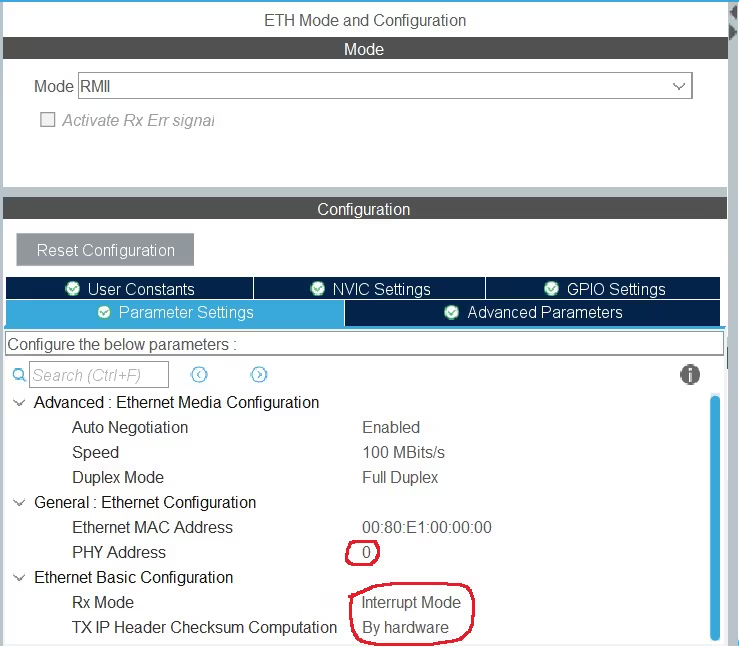
- I have chosen the RMII connection type for the ethernet.
- The PHY Address is set to 0, because I am using the on board Ethernet module.
- The Rx Mode is set to Interrupt mode.
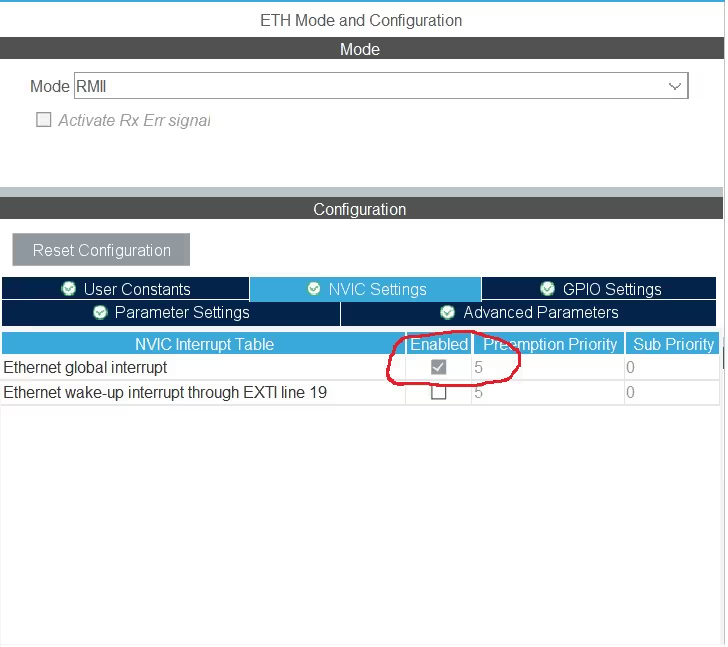
Since I have selected the Rx mode as the interrupt mode, the Ethernet global interrupt gets turned on automatically.
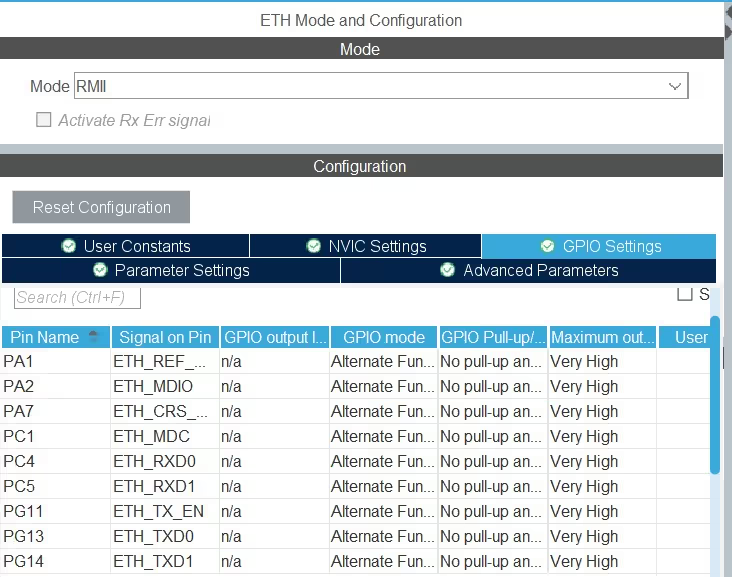
Picture above shows the Pins used for the Ethernet. Note that all the Pins are set to “Very High” Speed.
Now let’s take a look at the Free RTOS Settings
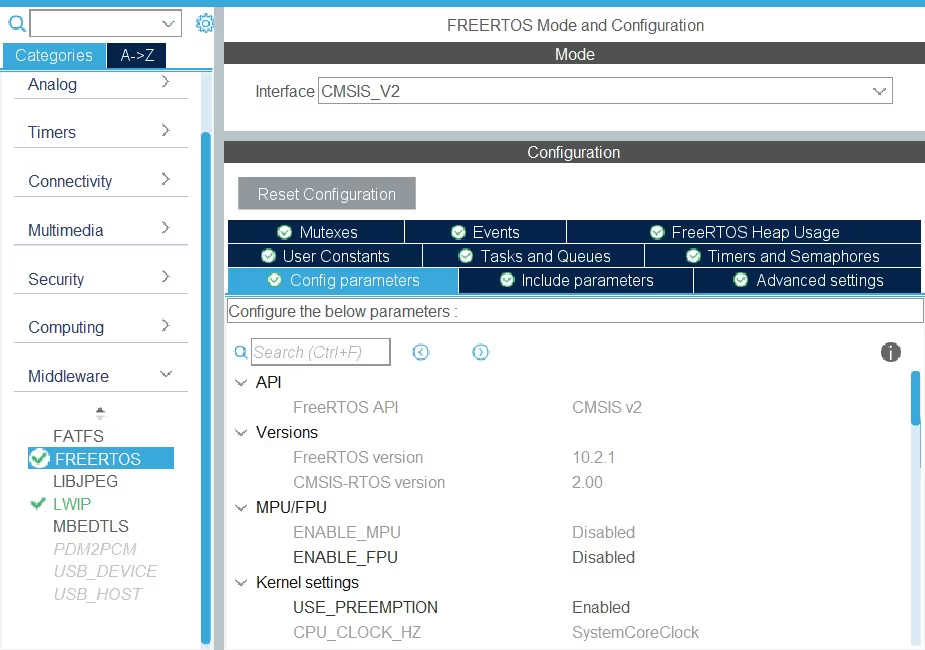
- As shown above, I have enabled the FreeRTOS and I am using the CMSIS_V2. If you are not comfortable with V2, you can use V1 also.
- Everything else is set to default, and I haven’t made any changes in RTOS settings.
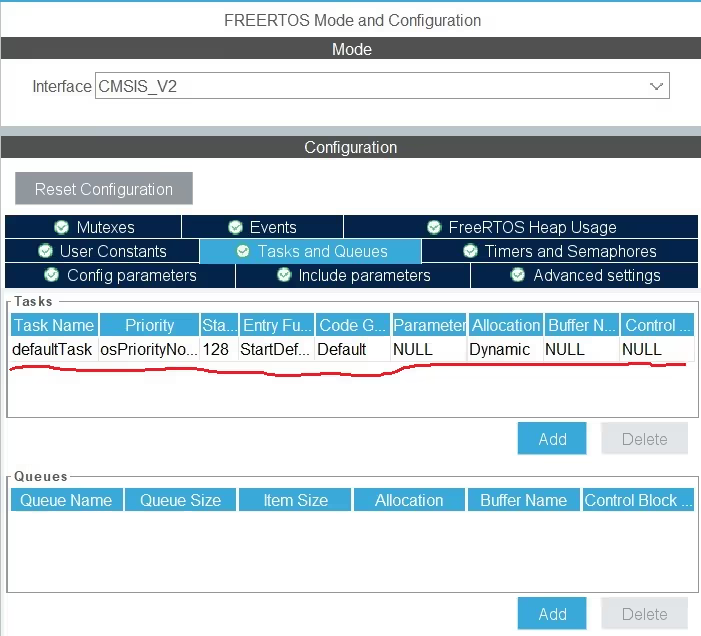
As I mentioned, everything is set to default and you can see there is a default Task which gets created automatically. I am leaving this as it is and we will make the use of it later in our code.
Let’s see the LWIP Configuration
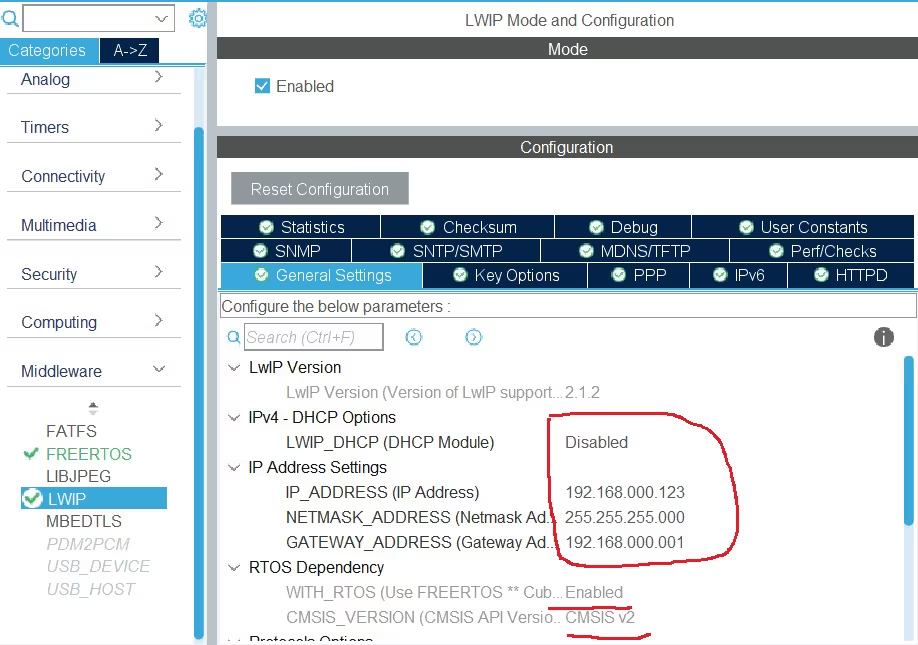
- As shown in the picture above, I have disabled the DHCP and manually entered the addresses. This will help us getting the static IP also.
- Since we are using the RTOS, you can see it’s enabled in the “RTOS Dependency” section.
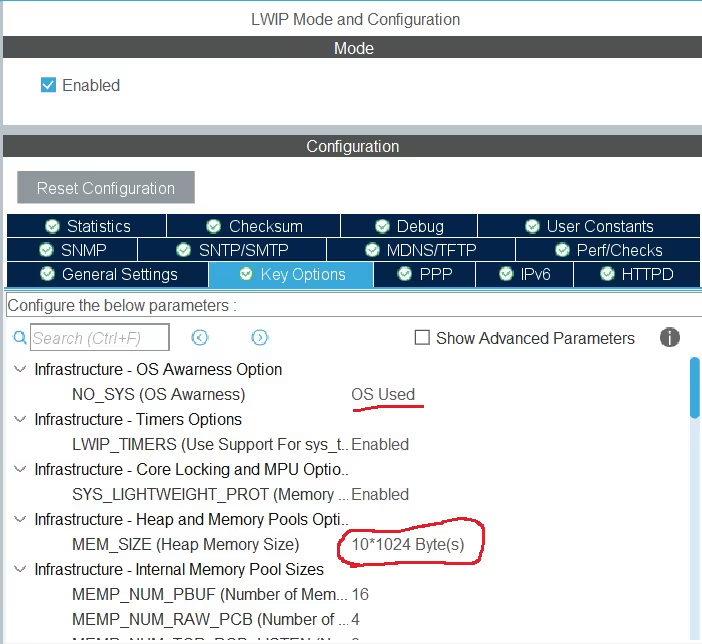
- In the “Key Options” Tab I have increased the heap to 10 KiloBytes.
- Other than this, everything is still set to default.
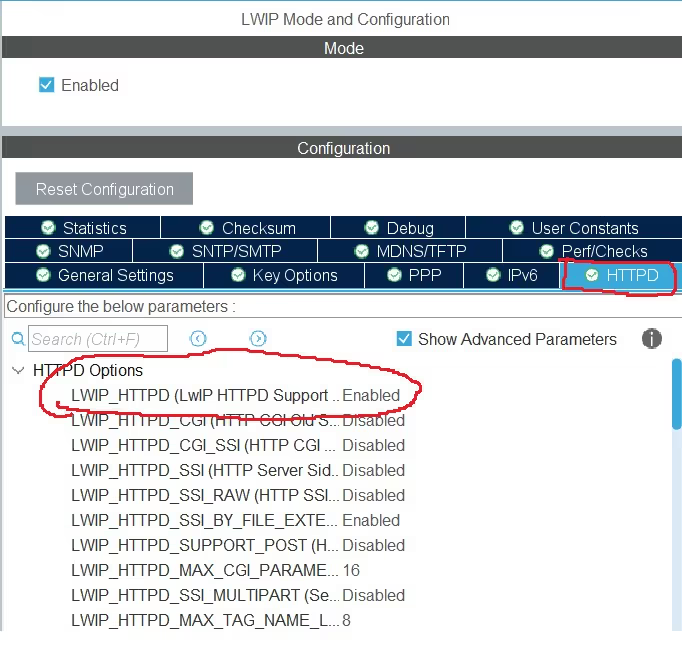
- Here in the HTTPD tab, we have to enable the LWIP_HTTPD support.
- Everything else should be kept default for this tutorial.
This is it for the Ethernet and LWIP configuration.
The following Configuration is only for the Cortex M7 series MCUs
Now since I am using a cortex M7 based MCU, which don’t have enough Flash memory. I have to use the external flash and need to configure the MPU for the same. The following part of the configuration is only valid for the same.
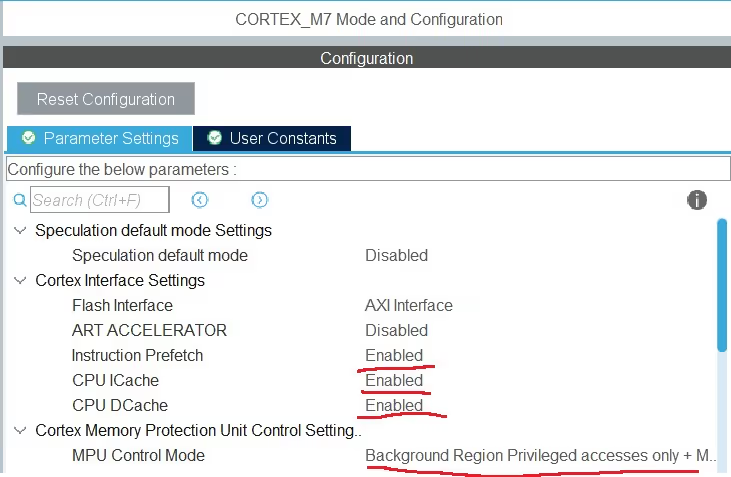
- The MPU Control mode is set to “Background Region Privileged access only + MPU disabled during hardfault”
- I have enabled the Instruction prefetch, CPU ICache and DCache.
Following is the MPU Configuration for the external Flash, which is located at the memory address 0x90000000 and have the size of 16 MB.
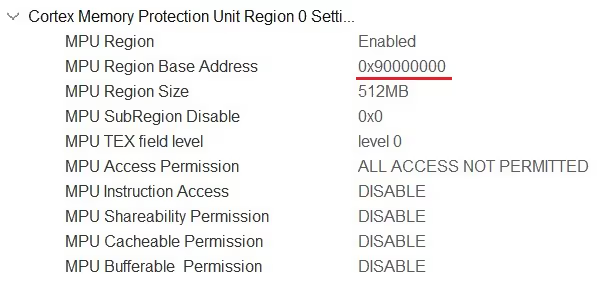
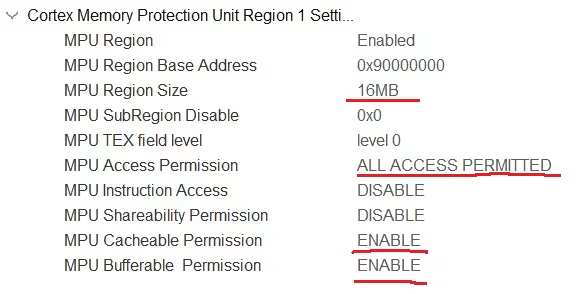
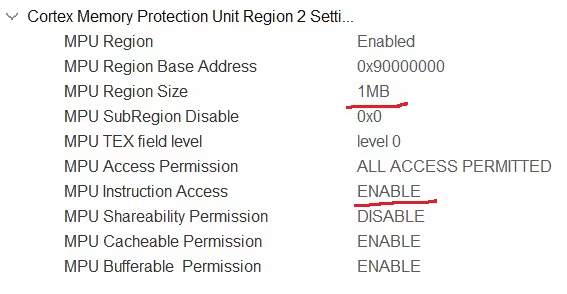
- Basically I have set the 16 MB Region (external flash) as the cacheable and bufferable region. This will configure the memory region as the Normal memory type with write back attribute.
- The 1 MB in the beginning will also allow the instructions to be executed from this region.
If you want to learn more about MPU configuration and memory types, I would recommend you to watch STM32 MPU Config playlist on the topic https://www.youtube.com/playlist?list=PLfIJKC1ud8gjoY2McCCqkxXWuwiC2iSap
The additional Setup
After creating the project, if you build it for the first time, you are going to get errors. So this section will cover the additional setup we need to do, to remove those errors.
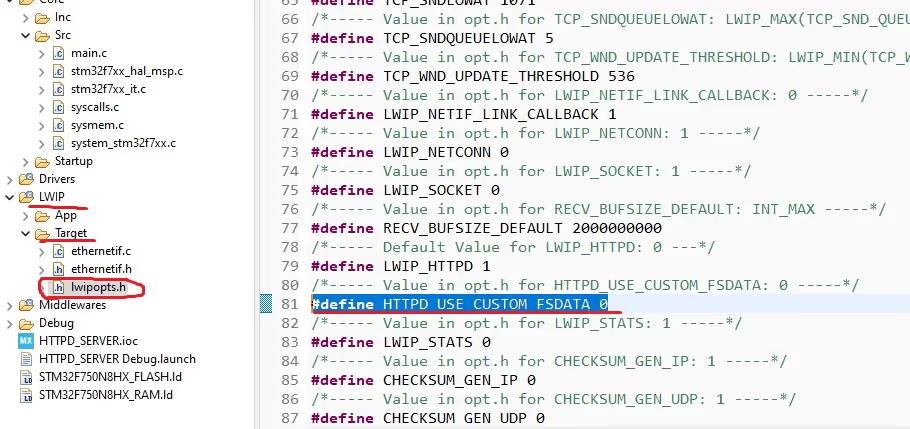
First of all goto LWIP->Target->lwipopts.h and change the #define HTTPD_USE_CUSTOM_FSDATA 0
Now we need to include the “FsData.c” file along with the resources that we are going to use for the webserver.
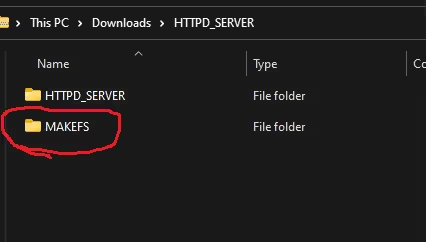
After downloading the code at the end of this post, you will find a folder called “MAKEFS“
Extract this folder separately. Inside you will find another folder “fs“, which contains all the resources you are going to use for the webserver.
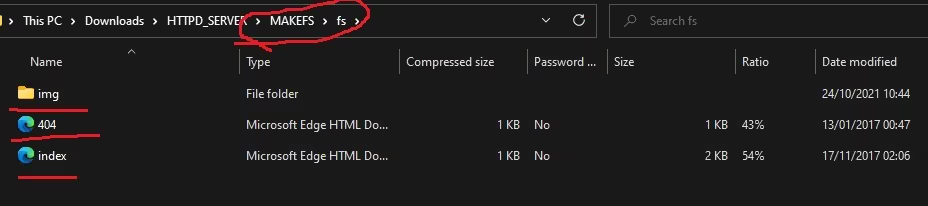
By default this folder contains one index page, and a 404 error page. There is also a image inside the img folder. I am going to use these default pages for the application. If you want to modify or add the pages, you have to do it inside this folder.
Now we need to copy the folder content into our project.
So goto Project\Middlewares\Third_Party\LwIP\src\apps\http and copy the folder contents here.
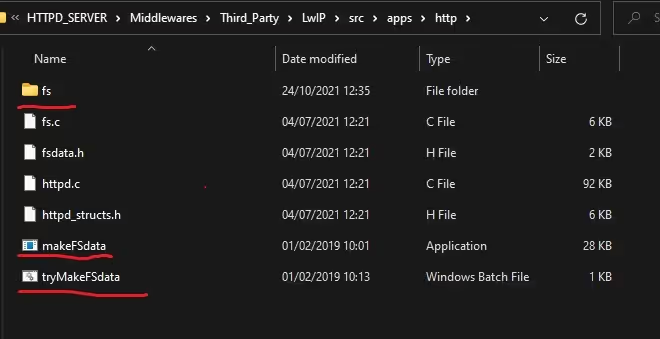
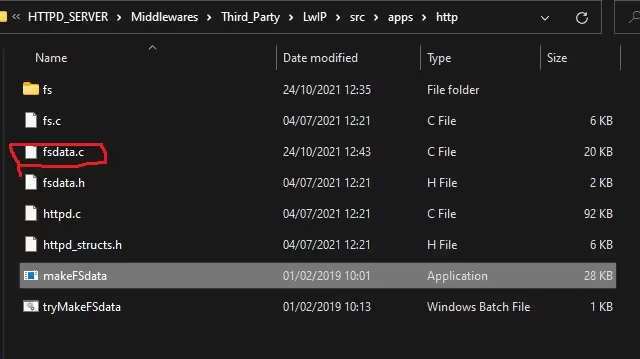
After copying, all you need to do is double click the makeFSdata application. This is generate a new file fsdata.c as shown below
Now the final step is to exclude the fsdata.c from the build.
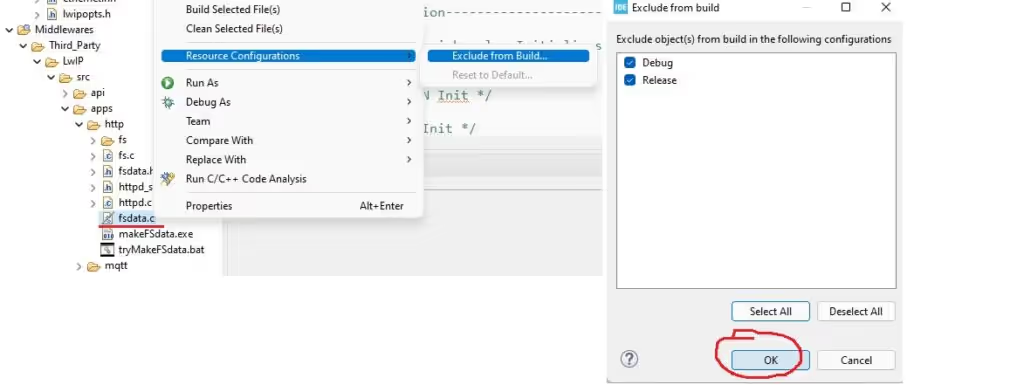
This is it for the setup. If you build the code now, all the errors should be gone.
Now we will write the code for the initialization of the webserver.
Some Insight into the CODE
The main Function
void StartDefaultTask(void *argument)
{
  /* init code for LWIP */
  MX_LWIP_Init();
  /* USER CODE BEGIN 5 */
  http_server_init();
  /* Infinite loop */
  for(;;)
  {
    osDelay(1);
  }
  /* USER CODE END 5 */
}- In the default task, the LWIP gets initialized first.
- Then we will call the
http_server_init()Function, which will basically start everything.
The http_server_init Function
void http_server_init()
{
  sys_thread_new("http_thread", http_thread, NULL, DEFAULT_THREAD_STACKSIZE, osPriorityNormal);
}- The http_server_init() Function will simply create a new http_thread.
- The stack size is set to default (1024 Bytes) and the priority is se to normal.
The http_thread
static void http_thread(void *arg)
{
  struct netconn *conn, *newconn;
  err_t err, accept_err;

  /* Create a new TCP connection handle */
  conn = netconn_new(NETCONN_TCP);

  if (conn!= NULL)
  {
    /* Bind to port 80 (HTTP) with default IP address */
    err = netconn_bind(conn, IP_ADDR_ANY, 80);

    if (err == ERR_OK)
    {
      /* Put the connection into LISTEN state */
      netconn_listen(conn);

      while(1)
      {
        /* accept any incoming connection */
        accept_err = netconn_accept(conn, &newconn);
        if(accept_err == ERR_OK)
        {
          /* serve connection */
          http_server(newconn);

          /* delete connection */
          netconn_delete(newconn);
        }
      }
    }
  }
}- Here in the http_thread we will first create a new TCP connection using
netconn_new - Once the connection is created, we will bind it to the local IP address using
netconn_bind - The IP address will be the one we set in the cubeMX, and this will be the IP of our HTTP server.
- The port of the server is 80.
- After binding the server to the address and port, we will put the connection in the listen mode using
netconn_listen - The server will now listen for any client that tries to connect to the server.
- Once the client connects to the server, we will accept the connection using
netconn_accept netconn_accepttakes 2 arguments, the first is which connection is listening (conn) and the second is where the new connection is going to store (newconn).- After accepting the connection, we will call the
http_serverto handle the requests made by the client. - After the request is served by the function, we will delete the new connection, so that a new client can connect to this server.
- The while loop runs forever, and so will be the process of accepting the connection and serving the request.
The http_server
static void http_server(struct netconn *conn)
{
	struct netbuf *inbuf;
	err_t recv_err;
	char* buf;
	u16_t buflen;
	struct fs_file file;

	/* Read the data from the port, blocking if nothing yet there */
	recv_err = netconn_recv(conn, &inbuf);

	if (recv_err == ERR_OK)
	{
		if (netconn_err(conn) == ERR_OK)
		{
			/* Get the data pointer and length of the data inside a netbuf */
			netbuf_data(inbuf, (void**)&buf, &buflen);

			/* Check if request to get the index.html */
			if (strncmp((char const *)buf,"GET /index.html",15)==0)
			{
				fs_open(&file, "/index.html");
				netconn_write(conn, (const unsigned char*)(file.data), (size_t)file.len, NETCONN_NOCOPY);
				fs_close(&file);
			}
			else
			{
				/* Load Error page */
				fs_open(&file, "/404.html");
				netconn_write(conn, (const unsigned char*)(file.data), (size_t)file.len, NETCONN_NOCOPY);
				fs_close(&file);
			}
		}
	}
	/* Close the connection (server closes in HTTP) */
	netconn_close(conn);

	/* Delete the buffer (netconn_recv gives us ownership,
   so we have to make sure to deallocate the buffer) */
	netbuf_delete(inbuf);
}The http_server function will serve the requests made by the client.
Receiving data
- Here we will receive the request made by the client, using
netconn_recvfunction - This parameters are @conn, the connection which is making the request, and @inbuf, the netbuf structure where the request data will be saved.
- After receiving the request, we will get the data pointer and it’s length from the netbuf.
netbuf_datais used for this purpose and it’s parameters are @inbuf is the netbuf to get the data from, @buf is the pointer to a void pointer where to store the data pointer, @buflen is the pointer to an u16_t where the length of the data is stored.
Handling the request
- Next we will compare the data in the data pointer with the ones the server can handle.
- For example, I have only index.html file in the FS folder, and this is why I am only checking for that particular request.
if (strncmp((char const *)buf,"GET /index.html",15)==0)we check if the client is requesting the index.html file.- If it is, we will open the file using
fs_openand store the file in the file structure. - Then we will write the data from this file to the client using the function
netconn_write - The parameters are, the connection where we are writing the data, the data itself, the length of data, and finally the API flag.
- This flag basically configures how the data is to be written, and since we are using the NO_COPY, means there is no condition on writing the data.
- After writing the data, we will close the file.
- If any other request comes from the client, we will show the 404 error page in the similar way we did for the index page.
Closing connection
- Finally close the connection, delete the netbuf, and delete the connection, so that the client can make a new request, or a new client can make request.
Result
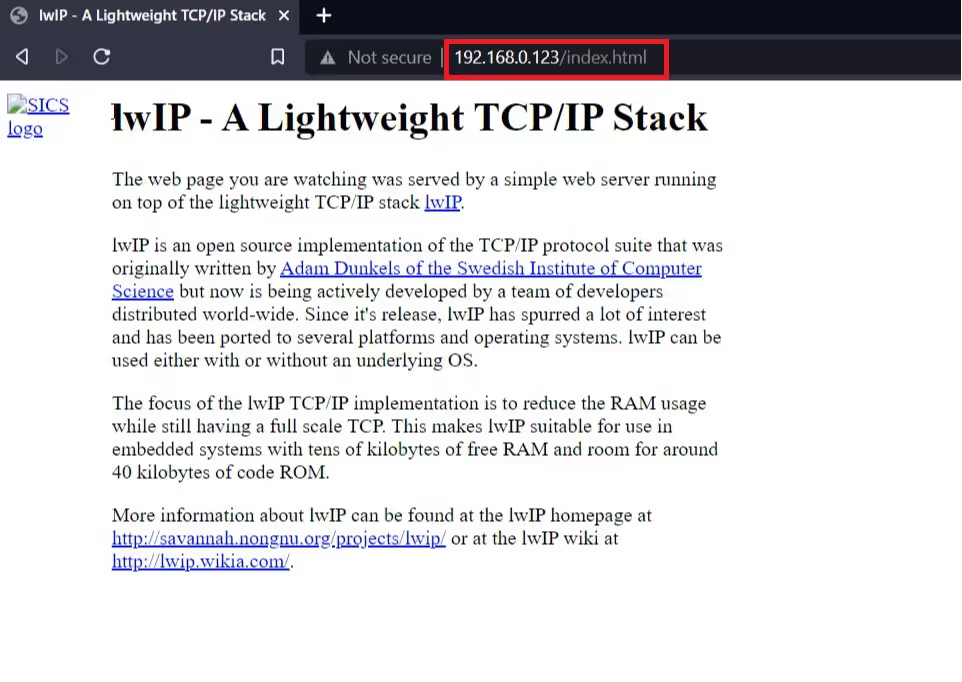
- As shown above, the index.html page is being displayed on the request.
- The server IP is same as we set in the cubeMX
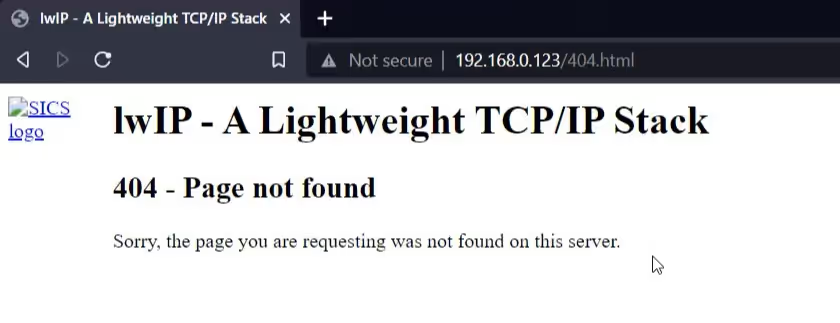
The 404 Error page shows whenever any request, other than index.html, is made by the client.
Next Tutorials in the STM32 Ethernet Series
STM32 Ethernet PART 6.1 – Configure HTTP Webserver using SSI

STM32 Ethernet PART 6.2 – Configure HTTP Webserver using CGI

STM32 Ethernet PART 7 – UDP Server using LWIP NETCONN (RTOS)

STM32 Ethernet PART 8 – UDP Client using LWIP NETCONN (RTOS)

STM32 Ethernet PART 9 – TCP Server and Client using LWIP NETCONN (RTOS)

STM32 Ethernet PART 11 – HTTP Server using AJAX PART1

STM32 Ethernet PART 12 – HTTP Server using AJAX PART2


Hello, I’m running this code in a STM32F407, the setup is going well, I receive the http request but something inside the function netconn_write() is blocking everything. I’m Using CubeMX 6.11.0 and CubeIDE 1.15.0.
Hello! I hope you’re doing well!
I’ve been following your channel for some time now and I’ve found your tutorials incredibly helpful and insightful, especially when it comes to STM32 Ethernet.
I wanted to reach out to you because I’ve been really interested in learning more about implementing SNMP (Simple Network Management Protocol) using STM32 microcontrollers. It’s a topic that seems quite complex, but I believe your expertise and teaching style would make it much easier to understand.
Would you be able to create a tutorial video on this topic? I think it would be immensely valuable for me and many others in your audience who are interested in IoT and network management.
I have the same issue. I can’t ping after I have surfed into the web server with my web browser
You can hold RST of DP83848/LAN8720A for a while , it may works
Hi, Im trying to do a webserver with my stm32h743ZI2 board. But I can´t to do a ping with my computer, I can´t find the mistake. I did several times all tutorial but my board don´t connect.
I thing that is a problem with DMA but I don´t now how to to solve it. Can you help me please.
check the forum, someone have solved something similar there
try CUBEIDE v.1.7.1