Published: November 15, 2025
Last Updated: March 23, 2026
Last Updated: March 23, 2026
STM32 W5500 TCP Client Tutorial (Using Static IP and DNS)
This is Part 4 of the STM32 W5500 Ethernet series. In the previous tutorials, we learned how to set up the W5500 module, run a ping test, create a TCP server, and even use FreeRTOS with the server. If you missed them, here are the links:
- Part 1: STM32 W5500 Ethernet Interface Setup and Ping Test
- Part 2: STM32 W5500 TCP Server Tutorial
- Part 3: STM32 FreeRTOS TCP Server Tutorial
In this part, we will turn the STM32 into a TCP client. The client will connect to a TCP server, send data, and receive data back. We will test two types of servers. First, a local TCP server running on the computer. Then, a public TCP echo server that uses a hostname, so we will also cover how to enable DNS resolution on W5500.
This tutorial follows the same structure as the previous ones. All steps are simple and easy to follow. By the end, you will be able to connect your STM32 to any TCP server using either a static IP or a DNS-based hostname, and exchange data reliably.
Introduction to STM32 W5500 TCP Client Mode
This is the fourth part of the STM32 W5500 Ethernet tutorial series. In the earlier parts, we built a strong base for working with the W5500 module.
In Part 1, we set up the hardware, configured the W5500 in CubeIDE, and verified the network connection using a ping test.
Whereas, In Part 2, we created a simple TCP server on the STM32 and learned how to accept incoming connections.
In Part 3, we improved the TCP server by running it under FreeRTOS, which allowed us to manage multiple tasks without blocking the CPU.
All these steps prepared us to move forward and use the W5500 in client mode, where the STM32 will actively connect to a server.
What we will build in Part 4
In this part, we will turn the STM32 into a TCP client. The client will connect to a TCP server, send data at regular intervals, and receive responses from the server.
We will test this in two ways:
- By connecting to a local server created on the computer
- By connecting to a public TCP echo server on the internet
This gives us a complete understanding of how the STM32 behaves as a TCP client in real scenarios.
Using TCP client mode with static IP and DNS
The W5500 supports two ways of connecting to a TCP server:
- Using a static IP address: The server’s IP is fixed and known in advance.
- Using a hostname through DNS: The server is identified by a URL-like name (for example, tcpbin.com), and the W5500 resolves it to an IP address.
In this tutorial, we will use both methods.
First, we will connect to a TCP server using a simple static IP.
Then, we will enable DNS on the W5500 and connect to a server using its hostname.
This step is important for real-world applications because many public servers use hostnames instead of static IPs.
Project Setup for STM32 W5500 TCP Client
We’ll continue from the same project we created in Part 1 of the STM32 W5500 Ethernet tutorial. In the previous part, we connected the W5500 Ethernet module to the STM32 microcontroller using SPI, configured the network settings, and verified the connection using a ping test.
For this tutorial, we’ll use the same wiring and hardware setup. There’s no need to change the connections between the STM32 and W5500 module. The only difference is that we’ll now add a few new source files to implement the TCP Client functionality.
Adding the TCP client files
To turn the STM32 into a TCP client, we need to add the TCP_Client.c and TCP_Client.h files to the project. These files include the logic for opening sockets, connecting to a server, sending data, receiving data, handling disconnections, and resolving hostnames when DNS is enabled.
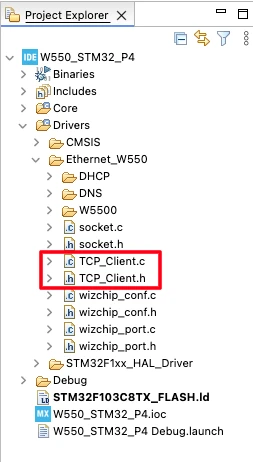
Download the updated project files from the end of this tutorial. Inside the Project folder, you will find an ethernet directory. Place the TCP client source and header files in this same folder so all related Ethernet code stays organized in one place.
tcp_client.c Overview
The entire TCP client logic is implemented inside a single file called tcp_client.c. This file contains the two main functions responsible for running the client workflow. TCP_Client_Init() will initalize the STM32 as a TCP client and connect to the provided TCP server. Whereas, TCP_Client_Handle() will handle the communication with the server.
These functions handles all the tasks required for TCP client communication:
- Creating and configuring a socket in TCP mode
- Connecting to a remote server using an IP address or hostname
- Sending data to the server
- Receiving data back from the server in blocking mode
- Handling timeouts and reconnecting when the connection drops
At the top of this file, you will see the important configuration values for the TCP client:
#define TCP_CLIENT_SOCKET   0
#define TCP_CLIENT_PORT     5000
#define TCP_SERVER_IP "192.168.1.100"The W5500 provides eight independent hardware sockets (0–7).
As explained in earlier tutorials:
- Socket 7 was used for DHCP
- Socket 6 was used for DNS
So for the client example, we choose one of the free sockets, such as socket 0, to keep things simple and consistent.
Understanding the TCP_Client.c File
The TCP_Client.c file contains all the logic needed for creating and running the TCP client on the STM32 with the W5500 Ethernet module. This is where we set up DNS support, configure sockets, and define the server address. Each part of the file works together to ensure that the STM32 can connect to a local or public TCP server in a reliable way.
Enabling DNS Resolution
One important addition in this part of the series is DNS support, #define DNS_RESOLVE 1.
Therefore, instead of always using a fixed IP address, the STM32 can now connect to a server using a hostname, such as:
"tcpbin.com"
"example.com"The W5500 does not perform DNS lookups by itself. So in TCP_Client.c, we include the DNS library provided with the project. It uses a dedicated socket to query a DNS server and convert the hostname into an IP address.
This step is done only once at the beginning, or whenever the hostname needs to be resolved again. Once the DNS lookup succeeds, the TCP client stores the resolved IP and uses it for the actual connection request.
Configuring Sockets for TCP and DNS
The W5500 provides eight sockets, and each socket can be used for different tasks. In earlier parts:
- Socket 7 was used for DHCP
- Socket 6 was used for DNS
In this tutorial, the TCP client uses one of the free sockets, usually socket 0, for the main TCP connection.
Inside TCP_Client.c, you will find socket definitions similar to:
#define TCP_CLIENT_SOCKET   0
#define DNS_SOCKET 6The TCP socket is configured in TCP mode, while the DNS socket is configured for UDP, because DNS uses UDP packets. The file initializes both sockets, checks their status, and handles timeouts or errors.
Defining Server IP or Hostname
The final part of the file is where you set the server address. You can either enter:
- A fixed IP address (for local servers), or
- A hostname (for public servers)
For example:
#define SERVER_DOMAIN   "tcpbin.com"
#define SERVER_PORT 4242or, for a local server:
#define SERVER_IP       "192.168.1.10"
#define SERVER_PORT 5000If a hostname is provided, the DNS function will resolve it during runtime. Otherwise, If an IP address is provided, the client skips DNS and connects directly.
TCP Client Functions Explained (with Code + Explanation)
The TCP_Client.c file contains everything needed to run the STM32 as a TCP client using the W5500 Ethernet chip. Below, we walk through each part of the file and explain how the client works, step by step.
1. Enabling DNS Resolution
At the top of the file, DNS support is enabled using a simple macro:
#define DNS_RESOLVE 1If DNS_RESOLVE is enabled, the STM32 will use a hostname (like tcpbin.com). If you comment it out, the code will use a static IP defined elsewhere in the file.
This makes the client flexible enough to work with:
- A local server on your computer (static IP)
- A public cloud server with a hostname
2. TCP and DNS Socket Configuration
The W5500 has eight sockets, so we assign one for TCP and one for DNS:
#define TCP_CLIENT_SOCKET      0
#define TCP_SERVER_PORT        4242
#define TCP_SERVER_HOST        "tcpbin.com"
#define DNS_SOCKET             6
#define DNS_SERVER_IP {8, 8, 8, 8}Here:
- Socket 0 → TCP client
- Socket 6 → DNS resolver
- 8.8.8.8 → Google DNS server
If DNS is disabled, the code falls back to:
#define TCP_SERVER_IP {192, 168, 1, 7}This setup lets the STM32 connect to any server, either by hostname or static IP.
3. DNS Resolution Function
The function below resolves the hostname into an IP using the W5500 DNS library:
int TCP_Client_ResolveDNS(void)
{
    printf("Resolving %s ...\r\n", TCP_SERVER_HOST);

    DNS_init(DNS_SOCKET, dns_buffer);

    int8_t result = DNS_run(dns_ip, (uint8_t *)TCP_SERVER_HOST, server_ip);

    if (result != 1)
    {
        printf("DNS resolution failed (code=%d)\r\n", result);
        return -1;
    }

    printf("Resolved %s -> %d.%d.%d.%d\r\n", TCP_SERVER_HOST,
            server_ip[0], server_ip[1], server_ip[2], server_ip[3]);
    return 0;
}How it works:
- Initializes the DNS socket
- Sends a DNS query to 8.8.8.8
- Waits for the response
- Stores the resolved IP in
server_ip[]
If DNS lookup fails, the function returns -1.
4. TCP_Client_Init(): Connecting to the Server
This is the most important function. It:
- Resolves DNS (if enabled)
- Creates the TCP socket
- Connects to the remote server
- Waits for the connection to be established
int TCP_Client_Init(void)
{
    int8_t ret;
    uint8_t status;

    printf("Initializing TCP Client...\r\n");

#ifdef DNS_RESOLVE
    if (TCP_Client_ResolveDNS() != 0)
        return -1;
#else
    uint8_t static_ip[4] = TCP_SERVER_IP;
    memcpy(server_ip, static_ip, 4);
#endif

    ret = socket(TCP_CLIENT_SOCKET, Sn_MR_TCP, 3000, 0);
    if (ret != TCP_CLIENT_SOCKET)
    {
        printf("Socket open failed\r\n");
        return -1;
    }

    printf("Connecting to (%d.%d.%d.%d:%d)...\r\n",
            server_ip[0], server_ip[1], server_ip[2], server_ip[3], TCP_SERVER_PORT);

    ret = connect(TCP_CLIENT_SOCKET, server_ip, TCP_SERVER_PORT);
    if (ret != SOCK_OK)
    {
        printf("Connect() failed (ret=%d)\r\n", ret);
        close(TCP_CLIENT_SOCKET);
        return -1;
    }

    uint32_t timeout = HAL_GetTick() + 5000;
    do {
        status = getSn_SR(TCP_CLIENT_SOCKET);
        if (status == SOCK_ESTABLISHED)
        {
            printf("TCP connection established!\r\n");
            return 0;
        }
        if (status == SOCK_CLOSED || status == SOCK_CLOSE_WAIT)
            break;
    } while (HAL_GetTick() < timeout);

    printf("Connection timeout or closed\r\n");
    close(TCP_CLIENT_SOCKET);
    return -1;
}What happens step-by-step:
- Resolve DNS or load static IP
- Open Socket 0 in TCP mode
- Connect to the server
- Wait up to 5 seconds for connection
- If the connection is not established, it close the socket and return error
This function must return 0 before the client can start communication.
5. TCP_Client_Handle(): Sending + Receiving Data
This function runs repeatedly inside your while(1) loop. It handles sending data, receiving responses, and reconnecting when needed.
void TCP_Client_Handle(const char *data)
{
    int32_t ret;
    uint8_t status;

    status = getSn_SR(TCP_CLIENT_SOCKET);

    if (status == SOCK_ESTABLISHED)
    {
        if (data && strlen(data) > 0)
        {
            ret = send(TCP_CLIENT_SOCKET, (uint8_t *)data, strlen(data));
            if (ret > 0)
                printf("Sent (%ld bytes): %s\r\n", ret, data);
            else
                printf("Send failed (ret=%ld)\r\n", ret);
        }

        ret = recv(TCP_CLIENT_SOCKET, rx_buf, sizeof(rx_buf) - 1);
        if (ret > 0)
        {
            rx_buf[ret] = '\0';
            printf("Received (%ld bytes): %s\r\n", ret, rx_buf);
        }
        else if (ret < 0)
        {
            printf("Receive error (ret=%ld)\r\n", ret);
        }
    }
    else if (status == SOCK_CLOSE_WAIT)
    {
        printf("Server closed connection.\r\n");
        disconnect(TCP_CLIENT_SOCKET);
    }
    else if (status == SOCK_CLOSED)
    {
        printf("Socket closed, attempting reconnect...\r\n");
        TCP_Client_Init();
    }
}Breakdown of the workflow
A. When socket is established
- Send data if the caller supplied a buffer
- Receive data if the server sends anything
- The data is logged on the Serial console
B. When server closes connection
SOCK_CLOSE_WAIT is detected, it call the disconnect() function to disconnects the client as well.
C. When socket is fully closed
Client automatically calls:
TCP_Client_Init();This reconnects to the server automatically, keeping everything in a loop. If you do not want the client to connect to the server automatically, just comment out this function.
Testing the STM32 TCP Client With a Local Server
To verify that the TCP client is working correctly, we start with a simple test using a local server. This helps confirm the W5500 setup, the client code, and the main loop logic before moving on to public servers or DNS-based communication.
The main.c File
Inside the main() funciton, after all the peripherals are initialized, call the following functions to initialize W5500 module and TCP client.
if (W5500_Init() != 0)
    Error_Handler();

if (TCP_Client_Init() != 0)
Error_Handler();Once the W5500 is initialized and the TCP client is connected, the infinite loop sends data every second:
while(1){
  TCP_Client_Handle("Hello from STM32!");
  HAL_Delay(1000);
}This loop drives all TCP communication during the local test.
TCP_Client.c File
Next, go to TCP_Client.c and set the following:
Disable DNS to use static IP for the TCP server.
// #define DNS_RESOLVE 1 // comment this line for static IP modeDefine your computer’s IP and set the port to match the Server:
define TCP_SERVER_IP  {192, 168, 1, 7}   // example local PC IP
#define TCP_SERVER_PORT 5000. // Creating a Local TCP Server Using Packet Sender
To test the client, create a local TCP server on your computer. I am going to use Packet Sender to do the same. It only requires one step, just click the TCP Server button. Packet Sender then displays the port number it is listening on.
You can also enable the “Persistent TCP” to ensure the server does not close the connection automatically.

Note: You need to define this TCP Port in the TCP_Client.c file #define TCP_SERVER_PORT 51907.
Sending and Receiving Data
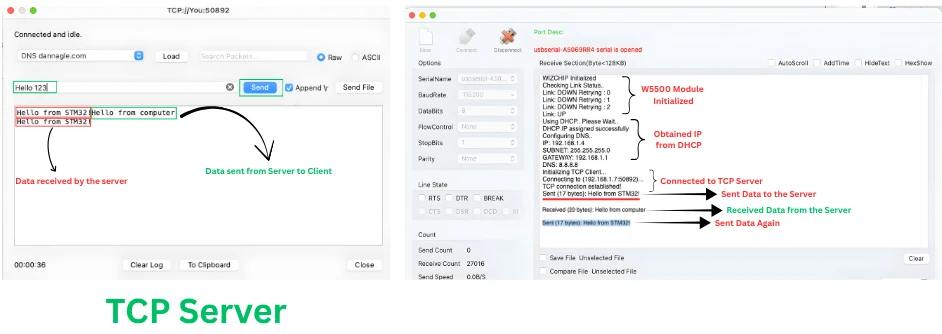
Once the code is flashed on the STM32 board, you can open the serial terminal to view the logs. The image below shows the logs printed on the console.
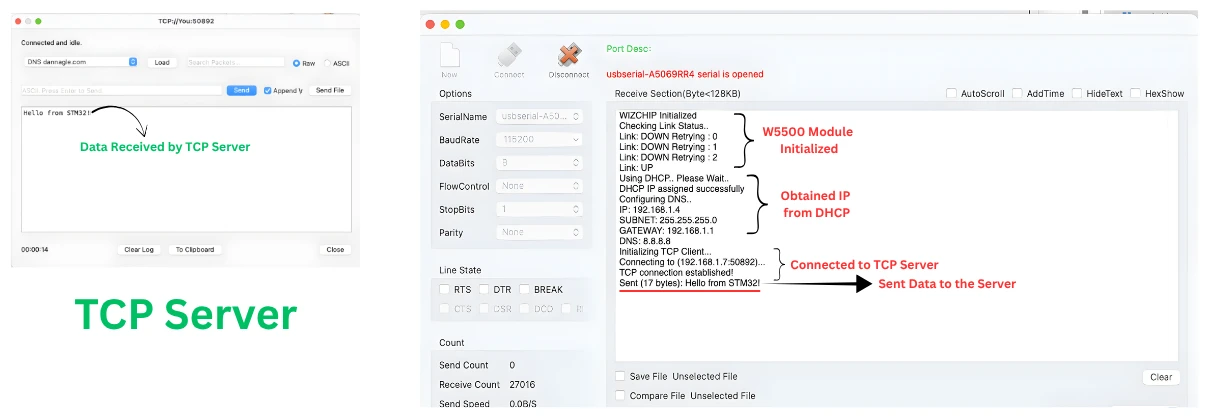
As you can see in the image above:
- W5500 is initlized with IP obtained from DHCP
- Then the client connects to the TCP server
- After connecting, it transmits the data “Hello from STM32!”
- The data is received by the server
The client then does not send anything else. It waits for the server response.
Once the server sends some data back to the client, the data is printed on the serial console. This is shown in the image below.
After receiving the data from the server, the client sends the data again. This loop continue to run forever.
Receive only Client
If you want the client to only receive the data from the server, you can simply pass the 0 or NULL as the parameter of the TCP_Client_Handle() function. Since there is no data to transfer, the client will simply skip the sending part.
while(1){
  TCP_Client_Handle(o);
  HAL_Delay(1000);
}The image below shows the output when the client is configured in the receive only mode.
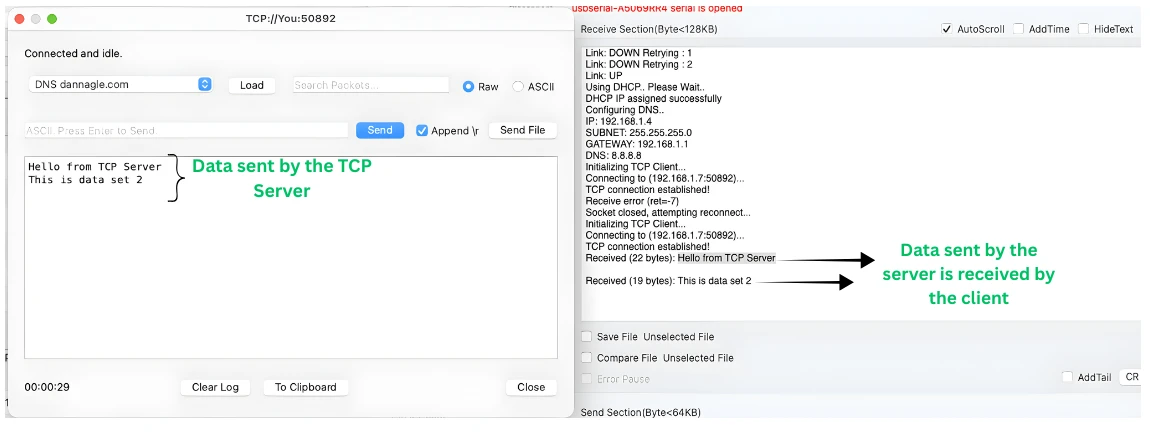
You can see that the STM32 client does not send any data. It only receive the data from the server.
Connecting STM32 to a TCP Server Using DNS
In the previous section, we connected the STM32 to a local TCP server using a static IP address. Now we will extend the same project to connect to a public TCP echo server using a hostname, not an IP address.
To do this, we need to enable DNS resolution in the TCP_Client.c file so the W5500 can convert the hostname into an IP address before connecting.
This section shows how to configure DNS, prepare dynamic data for testing, and verify that the public server echoes data back correctly.
Configuring Hostname and DNS Socket
Open TCP_Client.c and enable DNS by keeping the following line uncommented:
#define DNS_RESOLVE 1 // enable hostname resolutionAfter enabling DNS, define the hostname of the server and its TCP port:
#define TCP_SERVER_HOST   "tcpbin.com"
#define TCP_SERVER_PORT 4242The TCP client will now connect to tcpbin.com:4242, which is a public TCP echo service.
DNS requires a separate socket, so ensure this is defined:
#define DNS_SOCKET  6
#define DNS_SERVER_IP {8, 8, 8, 8} // Google DNSWhen the client runs, the function TCP_Client_ResolveDNS() is called automatically. It sends a DNS query to 8.8.8.8 and waits for the IP response from the DNS server.
The serial terminal will show something like:
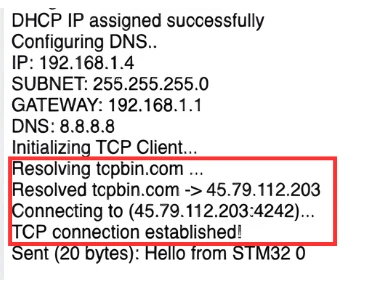
Once the IP is resolved, the TCP client connects to that IP like any normal server.
Preparing Dynamic Data for Transmission
To make the test more meaningful, we will send a different message each time the client runs. Inside the main.c, define a counter and a buffer:
int count = 0;
uint8_t buffer[50];Inside the infinite loop, update the buffer with a unique message:
sprintf(buffer, "Hello from STM32 %d\r\n", count++);
TCP_Client_Handle(buffer);
HAL_Delay(1000);The important part is the \r\n at the end. tcpbin.com expects each message to end with these characters, otherwise it won’t echo the data correctly.
Sending and Receiving Data
Once the code is flashed on the STM32 board, you can open the serial terminal to view the logs. The image below shows the logs printed on the console.
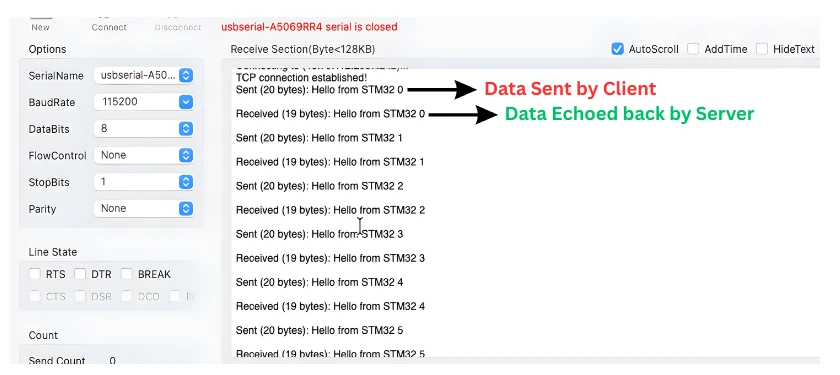
You can see the data sent by the STM32 client is echoed back by the TCP server. The echoed data is exactly the same as the data sent by the Client. This loop continues as long as the connection stays open.
Video Tutorial
STM32 W5500 TCP Client Video Tutorial
This video continues the STM32 W5500 Ethernet series and shows how to use the STM32 as a TCP Client. You will see how to connect to a local TCP server, send and receive data, and then move on to a public TCP echo server using DNS. The video also explains how the client handles reconnection, how to send dynamic messages, and how to switch between static IP and hostname-based communication using the W5500. Watch the full tutorial below.
Watch the STM32 TCP Client TutorialConclusion
In this part of the W5500 Ethernet series, we learned how to use the STM32 as a TCP client. We started by testing the client with a local server, then moved on to a public echo server using a hostname. Along the way, we explored how to send and receive data, how to prepare dynamic messages, and how to switch between static IP and DNS-based communication. We also looked at reconnect logic, receive-only mode, and how the client behaves with persistent and non-persistent servers.
With these features in place, the STM32 can now communicate with almost any TCP service, local or cloud-based. This makes the setup useful for IoT applications, data logging, remote control, or integrating STM32 devices with online APIs or servers. By understanding how W5500 handles DNS, sockets, and TCP states, you now have a flexible and reliable foundation to expand into advanced networking tasks or multi-tasking with FreeRTOS.
Browse More STM32 W5500 Tutorials
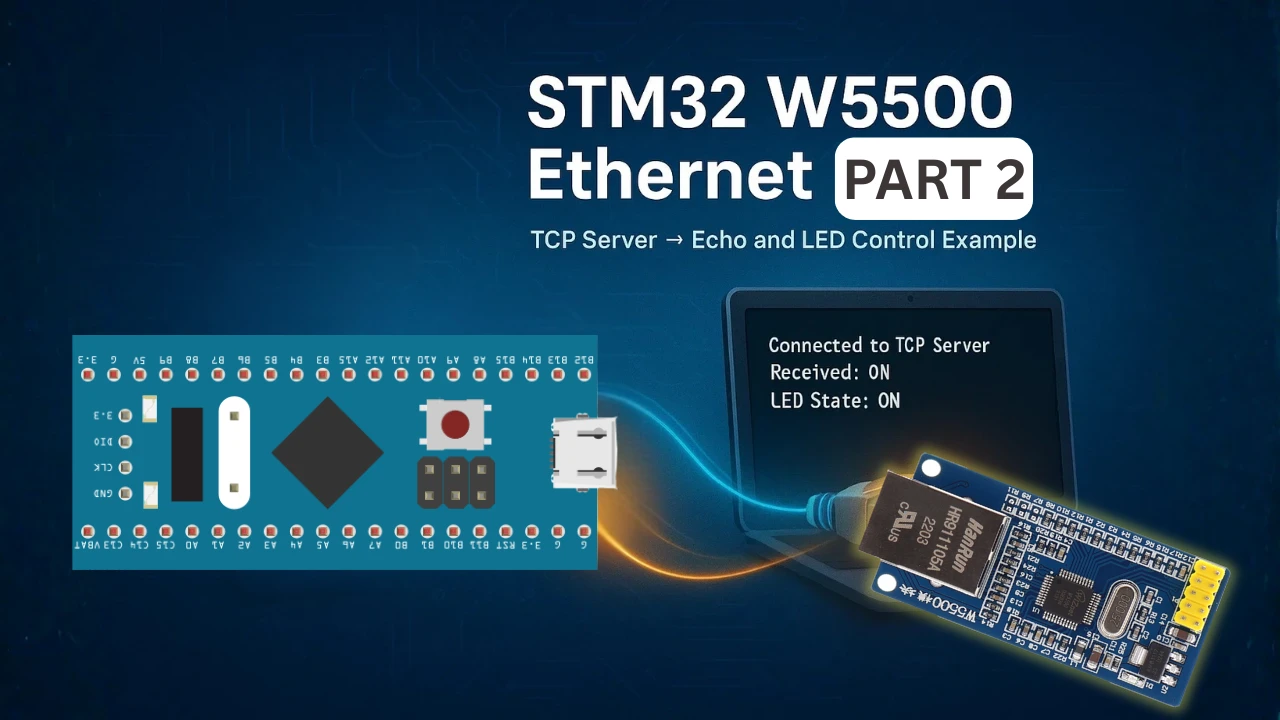
STM32 W5500 Ethernet Tutorial (Part 2): Create a TCP Server to Receive and Process Data
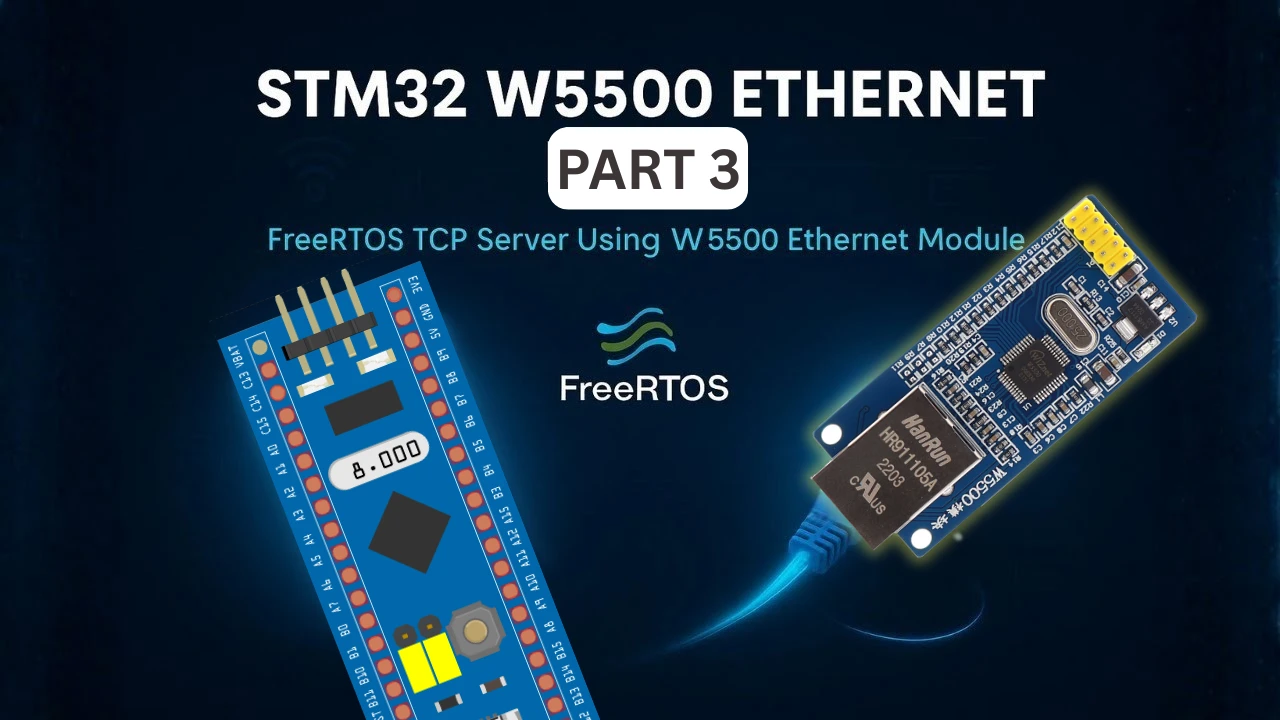
STM32 W5500 Ethernet Tutorial (PART 3): TCP Server with FreeRTOS
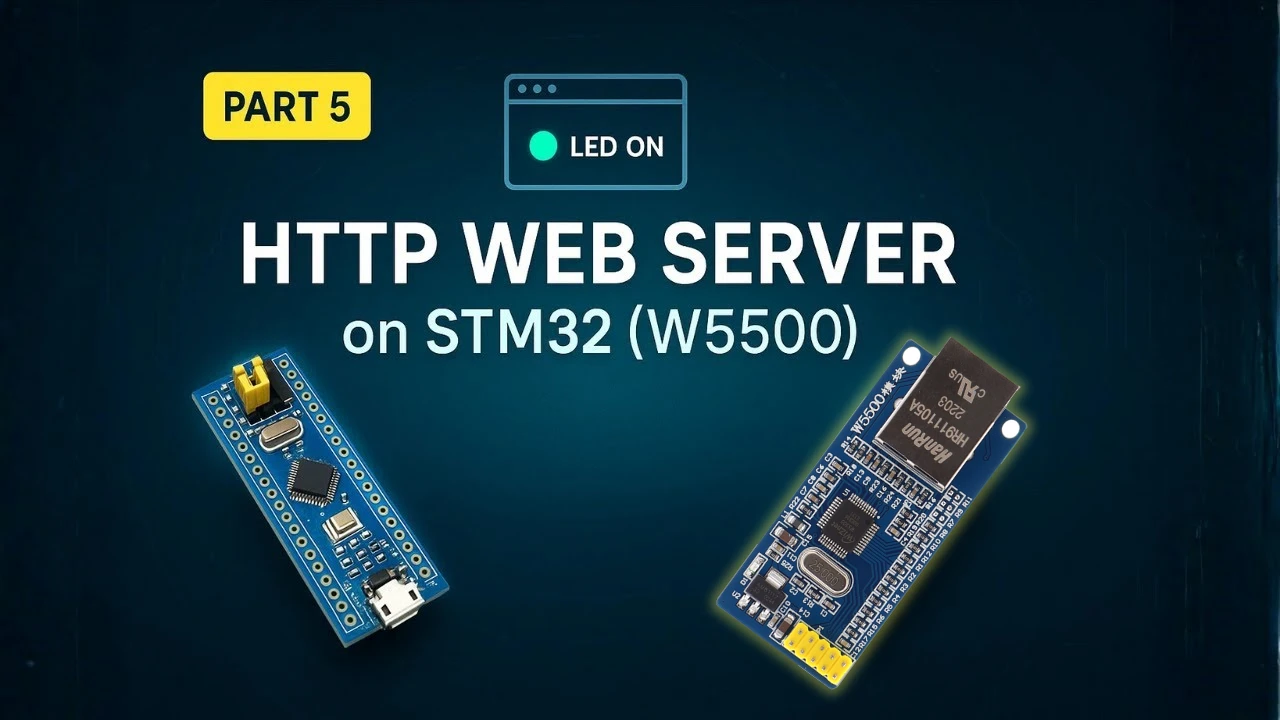
STM32 W5500 Ethernet Tutorial (Part 5): HTTP Webserver on STM32
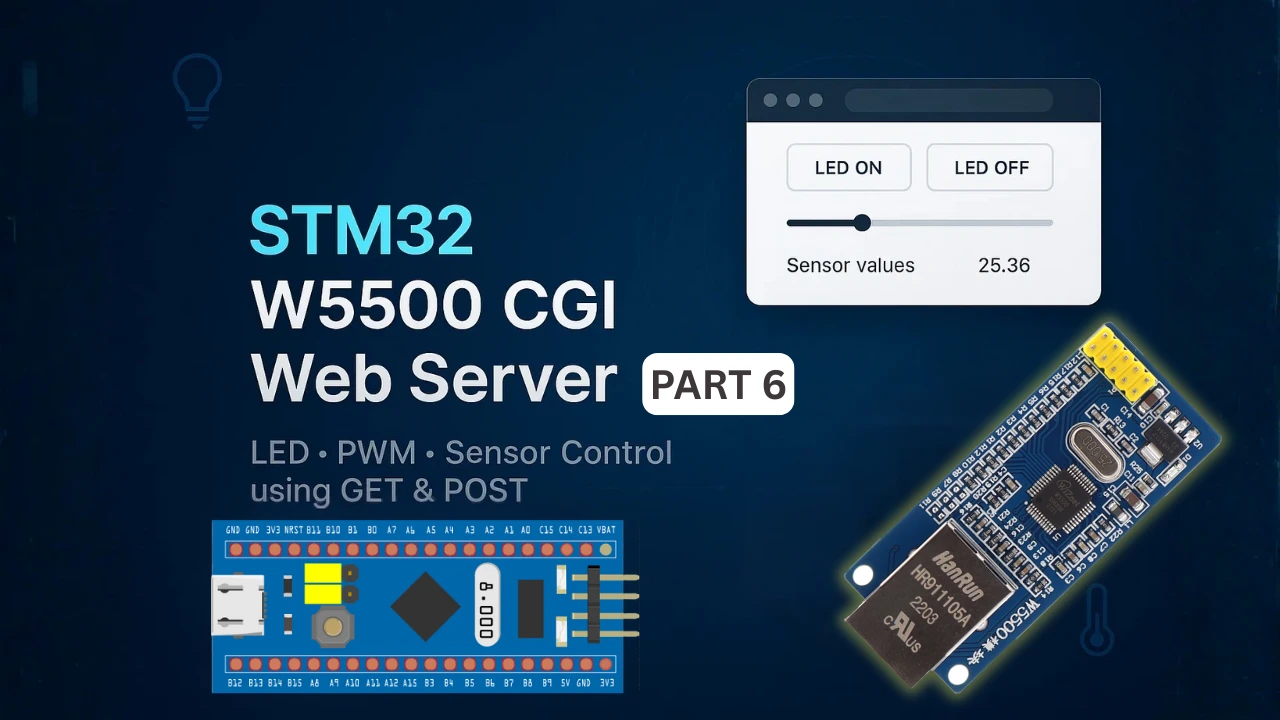
STM32 W5500 Ethernet Tutorial (Part 6): Dynamic HTTP Webserver using CGI

Compilation results in:
../Drivers/Ethernet_W5500/W5500/w5500.h:62:38: error: expected identifier or ‘(‘ before numeric constant
62 | #define _W5500_IO_BASE_ 0x00000000
. Good work. and thanks.
There is no such error in the project. Something must be wrong from your end.
This file is provided by wiznet.