Home ▸ STM32 Tutorials ▸
Updated On: March 23, 2026
HTTP Server using AJAX PART1
This is the 11th tutorial in the STM32 ETHERNET series, and today we will see how to use the webserver with AJAX (Asynchronus Javascript And XML). This tutorial will only cover the basics like making the XMLHTTPRequest, and understanding it’s functions. We will make an empty request to make sure the server is receiving the request without the page being reloading.
A more complete webpage using AJAX for will be coming in few days, where we will receive the data from the server and display it on the webpage, of course without reloading the page again.
This tutorial is a continuation from the https://controllerstech.com/use-stm32-as-http-server/, so all the setup is same. I am only going to make few changes in that project.
VIDEO TUTORIAL
You can check the video to see the complete explanation and working of this project.
Description
AJAX stands for Asynchronous JavaScript and XML. It describes a “new” approach to using a number of existing technologies together, including HTML or XHTML, CSS, JavaScript, DOM, XML, XSLT, and most importantly the XMLHttpRequest object. When these technologies are combined in the Ajax model, web applications are able to make quick, incremental updates to the user interface without reloading the entire browser page. This makes the application faster and more responsive to user actions.
We will also use the XMLHttpRequest object to make an asynchronous request to the server, and to do that, we need to make changes in our html file.
For this project I am using the files from one of the ST’s examples. We will still make changes to make them fit for our project. The example files can be found in the STM32Cube\Repository\STM32Cube_FW_F7_V1.16.2\Projects\STM32746G-Discovery\Applications\LwIP\LwIP_HTTP_Server_Netconn_RTOS\Fs Folder.
I have renamed the files and folders as shown below
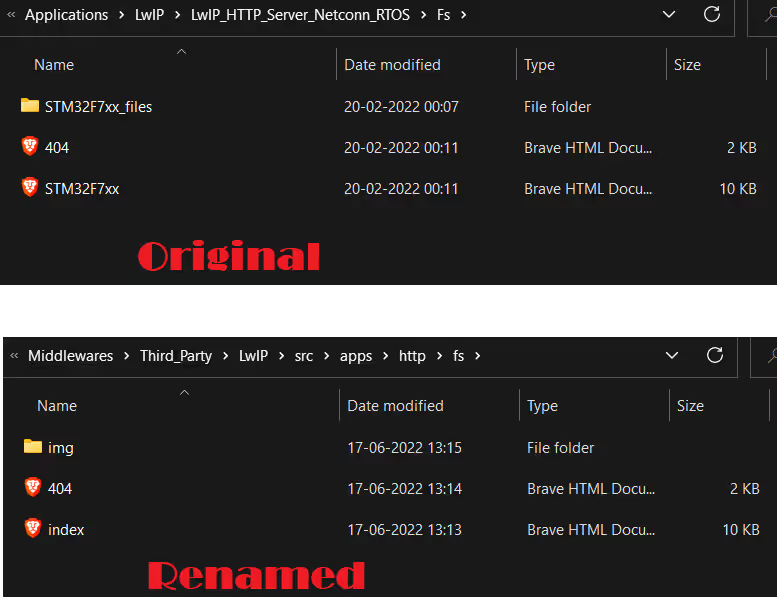
We need to copy these files in our project directory, Project\Middlewares\Third_Party\LwIP\src\apps\http\fs folder.
Now since the image folder has been renamed, we need to update the path in the html files as well. Picture below shows the changes made in the index.html file

We also need to make changes in the 404.html file in the similar way.
Now we will edit the index.html file, and include the XMLHttpRequest.
<body onload = "onload()">First of all we will add the onload event to the <body>. It will basically call the onload() function once the entire page is loaded.
Now we will write the rest in the <script> tag inside the <head> section.
<script>
var xhr;

function onload(){
	xhr = new XMLHttpRequest ();
   	}
</script>- Here we will first create a variable, xhr, to store the XMLHttpRequest
- Once the page is loaded successfully, the onload() function will be called, and here we will create a new XMLHttpRequest.
I have also created 2 buttons, which on click, will send empty requests to the server. The button code is shown below
<button class="button button1" onclick = "green()">Green</button>
<button class="button button2" onclick = "blue()">Blue</button>- On clicking the Green button, we call the function green(), similarly for blue button, we call the blue() function.
- We will write these functions in the <script> tag we defined in the head section.
The code for the same is shown below
<script>
var xhr;

function onload(){
	xhr = new XMLHttpRequest ();
   	}

function green (){
	xhr.open ("GET", "buttoncolor=G", true);
    xhr.send(null);
    }

function blue (){
	xhr.open ("GET", "buttoncolor=B", true);
    xhr.send(null);
    }

</script> - As shown in the code above, in the green() function, we call the
xhr.openfirst- The
XMLHttpRequestmethodopen()initializes a newly-created request, or re-initializes an existing one. The parameters are
- @method, The HTTP request method to use, such as
"GET","POST","PUT","DELETE", etc. - @URL, A string representing the URL to send the request to
- @async, An optional Boolean parameter, defaulting to
true, indicating whether or not to perform the operation asynchronously.
- The
- Next the
xhr.sendis being called- The
XMLHttpRequestmethodsend()sends the request to the server. send()accepts an optional parameter which lets you specify the request’s body; this is primarily used for requests such asPUT. If the request method isGETorHEAD, thebodyparameter is ignored and the request body is set tonull.
- The
- Here once the button is clicked, we will send a GET request to the server. The URL will be /buttoncolor=’G’ or /buttoncolor=’B’, depending on which button was pressed.
You can get the index file from the code itself. The download link is at the bottom of this article.
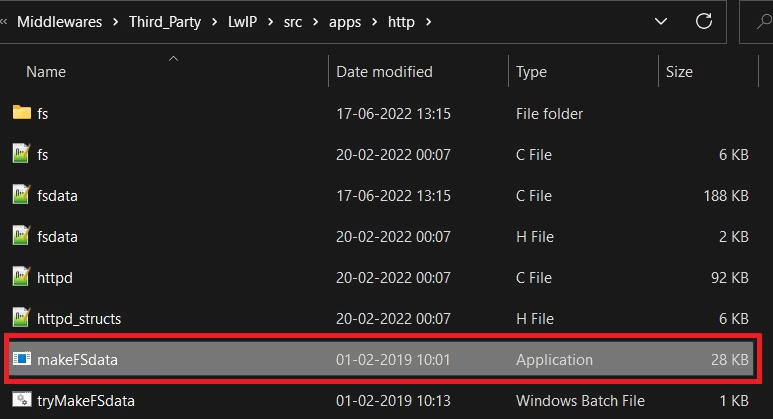
Now double click the makeFsdata application to generate the fadata.c file again
The STM32 CODE
The code will mostly be same as the previous tutorial, but we will add just a few things to it. We will modify the static void http_server(struct netconn *conn) function.
We will just add the new requests to our function. So far (as per the previous tutorial) it is only able to handle the index page and if any other request arrive, it will show the 404 error page
/* Check if request to get the index.html */
if (strncmp((char const *)buf,"GET /index.html",15)==0)
{
   fs_open(&file, "/index.html");
   netconn_write(conn, (const unsigned char*)(file.data), (size_t)file.len, NETCONN_NOCOPY);
   fs_close(&file);
}- Here we will basically check if the client is requesting the
index.htmlpage - If it is, then we will open the file (index.html) and send this data to the netconn
We have already covered this in the previous tutorial.
if (strncmp((char const *)buf,"GET /img/ST.gif",15)==0)
{
	fs_open(&file, "/img/ST.gif");
	netconn_write(conn, (const unsigned char*)(file.data), (size_t)file.len, NETCONN_NOCOPY);
	fs_close(&file);
}
if (strncmp((char const *)buf,"GET /img/stm32.jpg",18)==0)
{
	fs_open(&file, "/img/stm32.jpg");
	netconn_write(conn, (const unsigned char*)(file.data), (size_t)file.len, NETCONN_NOCOPY);
	fs_close(&file);
}
if (strncmp((char const *)buf,"GET /img/logo.jpg",17)==0)
{
	fs_open(&file, "/img/logo.jpg");
	netconn_write(conn, (const unsigned char*)(file.data), (size_t)file.len, NETCONN_NOCOPY);
	fs_close(&file);
}- Since we are loading different images in the webpage, we also need to handle their requests.
- As shown in the above code, we are checking for ST.gif, stm32.jpg, logo.jpg. These files are located in the img folder.
- Once the request is made by the client to load these files, we will open the respective file in the img folder, copy the file data to the netconn and close the file.
We have also included the buttons in our webpage, which on click, sends a GET request along with an URL. We also need to check for this request made by the client.
if (strncmp((char const *)buf,"GET /buttoncolor=",17)==0)
{
	colour = buf[17];
}As shown in the code above, we will check for the URL, buttoncolor=. The next character in the buffer will be stored in the colour variable. It will indicate whether the Green, or the Blue button is pressed.
The server is not sending anything back, and the client request is just for checking whether the server is receiving the request in the first place or not.
We will do a more complete project on ajax in the coming days, where the server will send the requested data to the client, and the client will display it without reloading the entire page.
Result
Below are some images of the webserver.
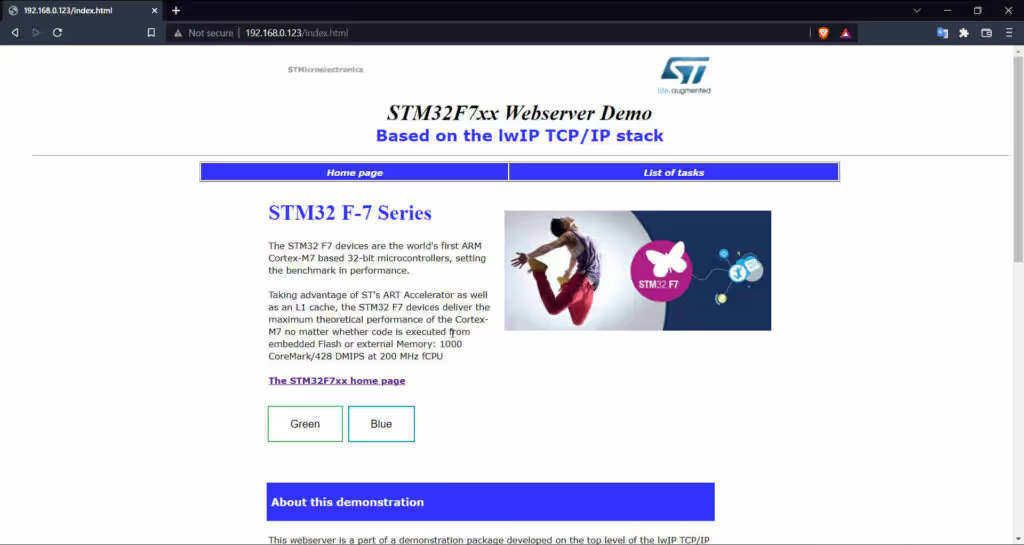
As shown above, the index.html page loaded successfully with all the images and the buttons. The server address is 192.168.0.123
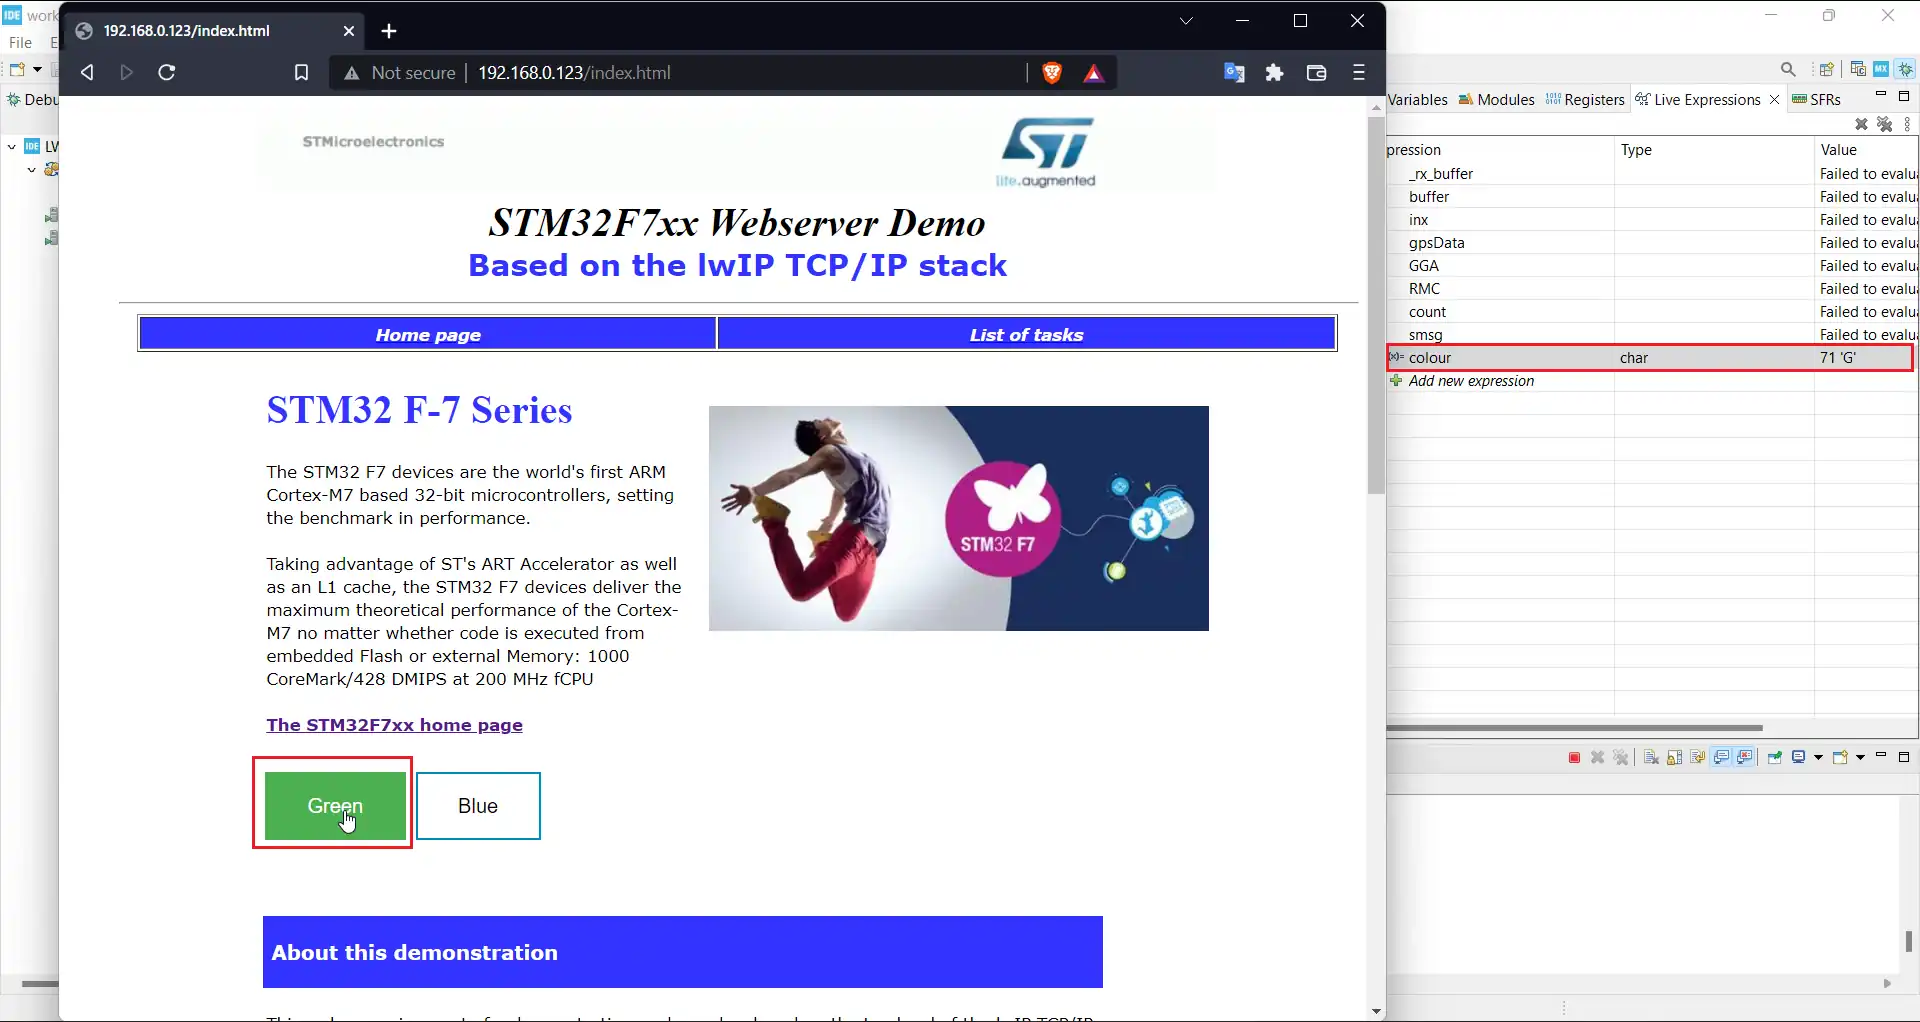
As shown above, when the Green button is clicked, the colour variable in the live expression have the character ‘G’, similarly, when we click the Blue button, it will have the character ‘B’.
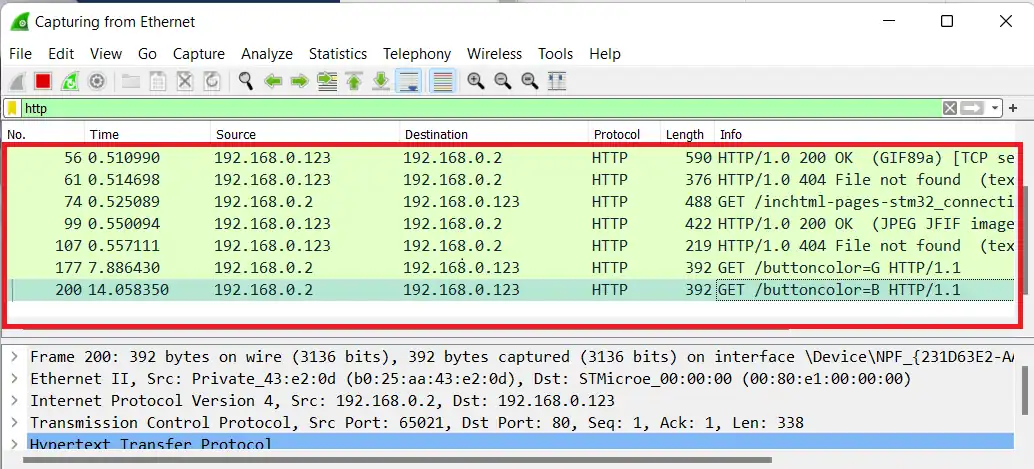
Above is the image of the wireshark. You can see in the last 2 lines, when the button is clicked, the client is making a request with the url, /buttoncolor=. In this request, the page does not reload, and this is exactly what we needed right now.
Next Tutorials in the STM32 Ethernet Series
STM32 Ethernet PART 6.1 – Configure HTTP Webserver using SSI

STM32 Ethernet PART 6.2 – Configure HTTP Webserver using CGI

STM32 Ethernet PART 7 – UDP Server using LWIP NETCONN (RTOS)

STM32 Ethernet PART 8 – UDP Client using LWIP NETCONN (RTOS)

STM32 Ethernet PART 9 – TCP Server and Client using LWIP NETCONN (RTOS)

STM32 Ethernet PART 10 – HTTP Server (Basic) using LWIP NETCONN (RTOS)

STM32 Ethernet PART 12 – HTTP Server using AJAX PART2


thanks