Published: November 21, 2025
Last Updated: February 6, 2026
Last Updated: February 6, 2026
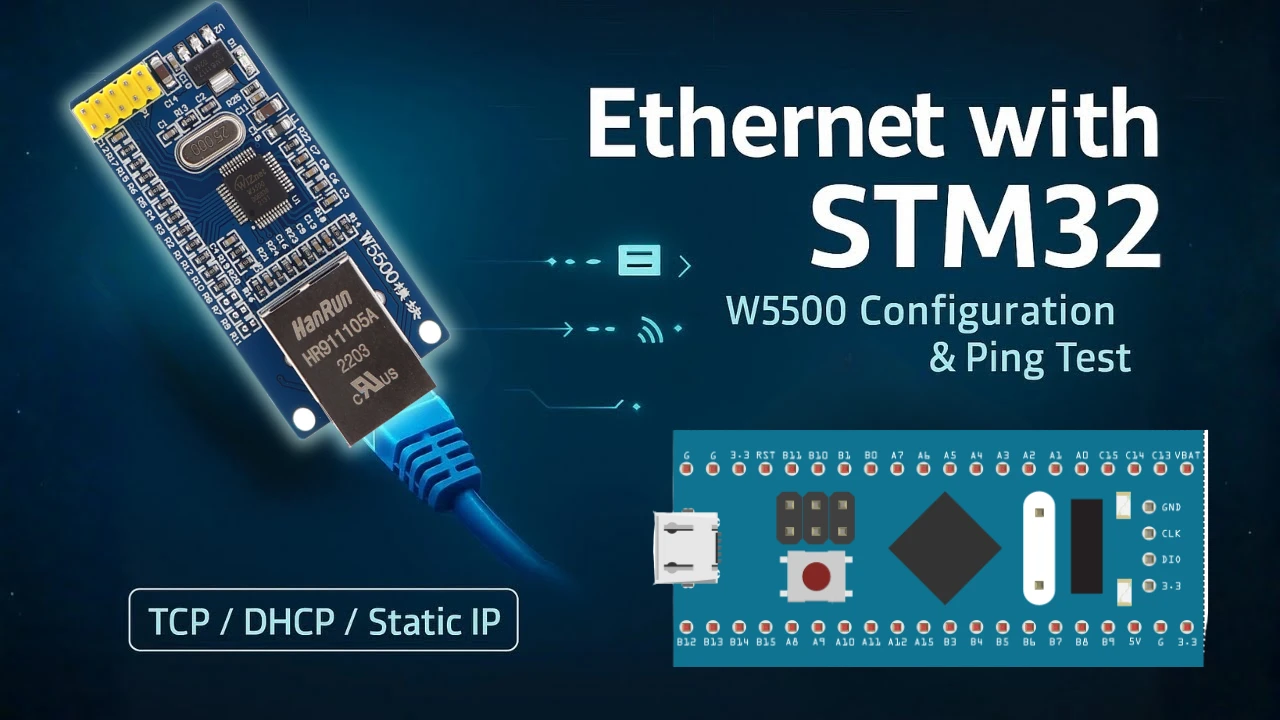
STM32 W5500 HTTP Web Server Tutorial
Creating a web server on STM32 is one of the most exciting parts of working with the W5500 Ethernet module. In this Part 5 of the STM32 W5500 Ethernet Series, we will build a simple HTTP web server that can control an LED on the STM32 board. The goal is to serve basic webpages and change the GPIO state directly from the browser.
This tutorial continues from Part 1 of the series, where we simply configured the module and performed a ping test. Here we move one step further and learn how to host web pages, handle HTTP requests, and control hardware using a normal browser. The process is simple, and the steps are easy to follow, even if you are new to networking on STM32.
In this guide, we will set up the HTTP server files, register static webpages, handle the URI manually, and link those requests to GPIO actions. By the end of this tutorial, you will have a working web server running on STM32, and you will be able to switch the LED ON and OFF from any device on the same network.
Introduction to STM32 W5500 HTTP Web Server
In this section, we will take a quick look at what an HTTP web server is and how we can implement one on STM32 using the W5500 Ethernet module. You will get an overview of the ideas we will use throughout the tutorial, along with the basic requirements to follow along. This will help you understand the goal before we move into the setup and coding steps.
What You Will Learn
In this part of the series, you will learn how to:
- Create a simple HTTP web server on STM32.
- Serve static webpages using the W5500 Ethernet module.
- Handle different URLs (URI) and link them to actions.
- Control an onboard LED directly from a web browser.
- Understand how sockets are used inside the Wiznet HTTP library.
- Test the server from any device on the same network.
By the end, you will have a fully working web interface that controls STM32 GPIO.
What You Need Before Starting
Before moving ahead, make sure you already know the basics covered in previous parts of this series. You should have:
- A working STM32 project with W5500 connected through SPI.
- DHCP, DNS, and basic socket configuration already tested.
- Ability to ping the module on your network.
- The Wiznet W5500 IO library downloaded.
If your setup is not ready, go back to Part 1 to complete it.
Hardware and Software Used
For this tutorial, we will use simple and commonly available tools:
- STM32 development board (Blue Pill or any STM32F1/F4 board)
- W5500 Ethernet module
- RJ45 cable and home router
- STM32CubeIDE for coding and building
- Serial console (USB-UART) to view logs
- A web browser on any device in the same network
This is all you need to get the HTTP web server running on STM32.
Setting Up the HTTP Server Files for W5500
In this section, we will prepare all the files needed to run the HTTP server on STM32. The W5500 library already includes an HTTP server module, so we only need to add it to our project and make a few small adjustments. By the end of this section, your project will have all the required code to receive and process HTTP requests.
Adding the Wiznet HTTP Server Library
The Wiznet IO Library contains a complete HTTP server solution inside the internet folder. To use it:
- Open the Wiznet IO library that you downloaded in Part 1 of this series.
- Go to the internet directory.
- Find the folder named httpServer.
- Copy this entire folder into your STM32 project.
- Place it inside the ethernet folder you created for W5500 files.

This folder includes functions for creating sockets, parsing requests, and sending web pages, so you don’t need to write any low-level code yourself.
Copying Example HTTP Server Files
Along with the main library, we will use an example HTTP server that makes it easier to understand how everything works.
- Download the example project from the link provided in the end of the article.
- Copy the
http_server_example.cand.hfiles into your project. - These files include basic webpages and functions to bind each page to a specific URI.
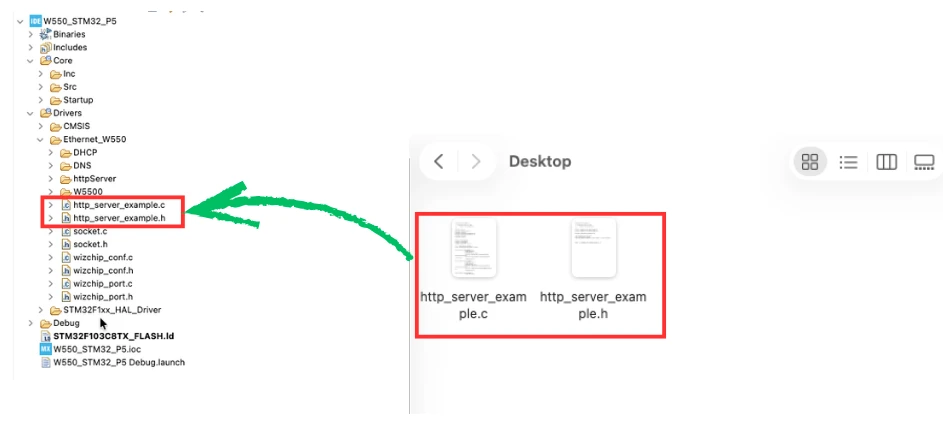
By adding these example files, you get a working structure that you can modify for your own application, such as controlling LEDs, motors, or sensors from a browser.
Understanding How the HTTP Parser Works
The HTTP parser in the Wiznet library reads incoming requests on each socket and extracts important information such as:
- Requested URI
- Request type (GET/POST)
- Client IP and port
- Data length
Once the URI is identified, the parser searches for a matching page that you registered earlier. If found, it sends the correct webpage back to the client.
This parser saves a lot of time. You don’t need to decode HTTP headers manually. The library does it for you, allowing you to focus on serving pages and controlling hardware based on the request.
Creating Static Webpages for the STM32 Web Server
In this section, we will create simple static webpages that the STM32 will serve through the W5500 module. These pages will allow us to control the LED and move between different URLs. Each page is short, easy to load, and perfect for testing the basic HTTP server setup.
The Index Page
The index page acts as the home page of our STM32 web server.
It usually contains:
- A welcome message
- Buttons or links to turn the LED ON
- Buttons or links to turn the LED OFF
This page is served when the user enters the IP address of the module in the browser. In our project, this page is stored as a simple text/HTML block in the code.
const uint8_t index_page[] =
		"<!DOCTYPE html>"
		"<html><body>"
		"<h2>LED Control</h2>"
		"<a href='/led_on.html'><button>LED ON</button></a><br><br>"
		"<a href='/led_off.html'><button>LED OFF</button></a>"
"</body></html>";LED ON Page
The LED ON page is loaded when the user clicks the “LED ON” button on the index page.
When this page is served:
- A simple message is shown to confirm the LED is ON
- Buttons are displayed to move to the Index or LED OFF page
const uint8_t led_on_page[] =
		"<!DOCTYPE html>"
		"<html><body>"
		"<h2>LED is ON</h2>"
		"<a href='/led_off.html'><button>LED OFF</button></a><br><br>"
		"<a href='/index.html'><button>HOME</button></a>"
"</body></html>";LED OFF Page
The LED OFF page works just like the LED ON page but does the opposite.
When the user clicks “LED OFF,” the browser loads this page.
Here:
- A message confirms the LED is now OFF
- Buttons allow navigation to other pages, index page and LED ON page
const uint8_t led_off_page[] =
		"<!DOCTYPE html>"
		"<html><body>"
		"<h2>LED is OFF</h2>"
		"<a href='/led_on.html'><button>LED ON</button></a><br><br>"
		"<a href='/index.html'><button>HOME</button></a>"
"</body></html>";Both LED pages help verify that the HTTP server and GPIO control are working correctly.
Registering Pages with the HTTP Server
After creating all three pages, we must register each one with the HTTP server. This step tells the server which page to serve when a specific URI is requested.
We use the function:
reg_httpServer_webContent("URI", "page_content");For example:
"index.html": serves the Index page page
Once registered, the HTTP parser can match each incoming request to the correct page. This is what allows smooth navigation between pages and proper control of the LED through your browser.
Configuring the HTTP Server Functions in STM32
In this section, we will break down the important functions that make the HTTP server work. These functions define how many sockets the server will use, how the server starts, how pages are registered, and how the server runs inside the main loop. Understanding these functions will help you customize or expand the web server in your own projects.
Setting the Number of Sockets for the HTTP Server
Before starting the server, we must tell the W5500 how many sockets we want to use:
#define HTTP_MAX_SOCK 2
uint8_t sockList[] = {0, 1};Here:
- HTTP_MAX_SOCK = 2 means we are using two sockets for the HTTP server.
- sockList[] = {0, 1} tells the server to use socket 0 and socket 1.
Using multiple sockets allows the server to handle more than one client at a time and makes the web interface more responsive.
Note: W5500 provides 8 hardware sockets in total. out of these socket 7 is used by DHCP and socket 6 is used by DNS server in the part 1. Therefore, we can use only from 6 available sockets (0 – 5).
Understanding the httpServer_setup Function
The main setup function initializes the HTTP server and registers all static pages:
void httpServer_setup(void)
{
    httpServer_init(tx_buf, rx_buf, HTTP_MAX_SOCK, sockList);

    reg_httpServer_cbfunc(NVIC_SystemReset, NULL);

    /* Register Static pages */
    reg_httpServer_webContent((uint8_t*)"index.html", (uint8_t*)index_page);
    reg_httpServer_webContent((uint8_t*)"led_on.html",  (uint8_t*)led_on_page);
    reg_httpServer_webContent((uint8_t*)"led_off.html", (uint8_t*)led_off_page);
}Here is what each part does:
httpServer_init()
This function initializes the server with:
- Transmit buffer
- Receive buffer
- Number of sockets
- Socket list
It prepares the W5500 so it can start accepting HTTP requests.
reg_httpServer_cbfunc()
This function is used to register two optional callback functions that the HTTP server can call internally:
- The first parameter is the MCU reset function.
By passingNVIC_SystemReset, we are allowing the HTTP server to trigger a system reset if needed (usually related to firmware update or recovery mechanisms). - The second parameter is a watchdog reset callback.
Since we do not use any watchdog functionality in this project, we passNULL.
Registering Static Pages
These lines bind each URI to its page:
reg_httpServer_webContent("index.html", index_page);
reg_httpServer_webContent("led_on.html", led_on_page);
reg_httpServer_webContent("led_off.html", led_off_page);Whenever the user opens one of these URLs, the server returns the matching page automatically.
Running the HTTP Server in the Main Loop
The server needs to keep processing requests, so we call this function inside the while loop:
void httpServerRun (void)
{
    for (int sn = 0; sn < HTTP_MAX_SOCK; sn++){
    	httpServer_run(sn);
    }
}Here’s how it works:
- The function loops through all sockets defined in
HTTP_MAX_SOCK. - httpServer_run(sn) handles everything for that socket, including:
- Accepting clients
- Parsing HTTP requests
- Matching URIs
- Sending the correct webpage
- Closing the socket if needed
You can call this function in:
- The main while loop, or
- Inside a FreeRTOS task
As long as it runs continuously, your web server stays active and responsive.
Handling URI and Controlling STM32 GPIO
In this part, we will learn how to handle custom URIs inside the STM32 W5500 HTTP server. The default W5500 example can only serve static pages. It cannot process dynamic requests like turning LEDs ON or OFF. To solve this, we will create our own URI handler and link it inside the HTTP server. This will allow us to read the requested URL and control GPIO based on it.
Why Default W5500 Config Cannot Handle URI
The default HTTP server from the W5500 library only delivers static content. It reads the requested file name and sends back a fixed HTML page.
But it cannot understand the meaning of a URI like:
led_on.html
led_off.htmlIt will only return the file. It will not run any GPIO code. That is why we must extend the behavior. We need a place where we can check the requested path and perform an action on the STM32.
Using a Custom http_dynamic_handler
To control hardware from a web request, we create a custom function named http_dynamic_handler. This function receives the HTTP request structure, which includes the URI.
Inside this function, we compare the URI with our expected paths:
- If the path is
led_on.html, we turn ON the LED. - If the path is
led_off.html, we turn OFF the LED.
Inside the http_dynamic_handler, we write simple GPIO code.
void http_dynamic_handler(st_http_request * p_http_request)
{
	if (strstr((char*)p_http_request->URI, "led_on"))
	{
	    led_Control(1);
	}
	else if (strstr((char*)p_http_request->URI, "led_off"))
	{
	    led_Control(0);
	}
}The server reads the requested URI. If it matches our LED URL, we change the GPIO state. Then the browser receives the matching HTML page, so the web interface stays simple.
This makes the STM32 behave like a small IoT device that reacts to HTTP commands.
Connecting the Handler Inside httpServer.c
The custom handler does nothing unless the HTTP server calls it. So we must hook this function inside httpServer.c.
In this source file, there is a function to parse the incoming HTTP requests, static void http_process_handler(uint8_t s, st_http_request * p_http_request). Inside this function, look for the CASE, which handles the GET requests.
In that part, we insert a call to our handler: http_dynamic_handler(p_http_request);
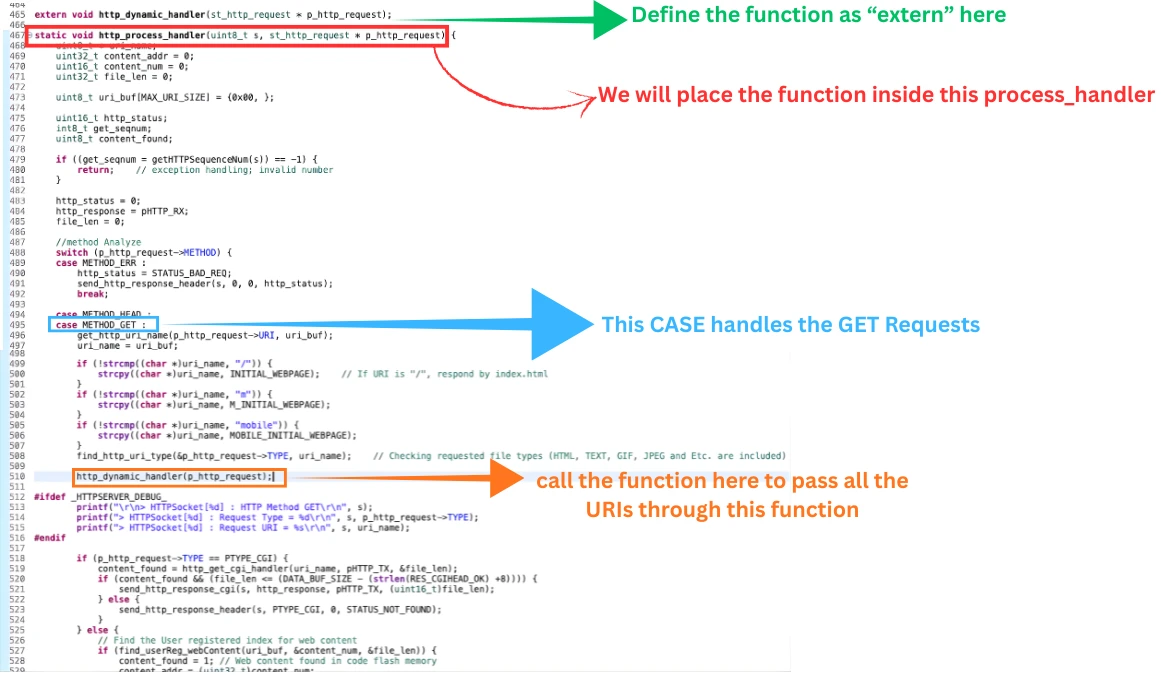
By adding this line, we allow every incoming HTTP request to pass through our function. This gives us a chance to analyze the URI and take action before the page is sent.
Without this connection, the handler will never run. Therefore even the LED ON page is server, the LED will never turn ON.
Note on CGI (For Next Tutorial)
This method works well for basic control. But for larger projects, we normally use CGI (Common Gateway Interface). CGI gives more flexibility, such as sending dynamic data back to the browser or reading sensors.
We will cover CGI and dynamic data handling in the next part of this STM32 W5500 Ethernet series.
Running the HTTP Server on STM32
In this section, we will bring everything together and run the HTTP server on the STM32 board. We will initialize the server, call the main processing function, and then test the web interface in a browser. Once this part is done, the STM32 will be able to host webpages and control GPIO over the network.
Initializing the Server in main.c
After the W5500 module is configured and the network is ready, we must start the HTTP server. To do this, include the http_server_example.h file in main.c.
Then, right after initializing the W5500, call:
httpServer_setup();This prepares all buffers, registers the web pages, and enables the server sockets. At this point, the STM32 is ready to accept HTTP requests.
Calling httpServerRun in Loop or FreeRTOS
The HTTP server needs to run continuously.
For this, we call:
httpServerRun();You can place this call inside the main while(1) loop. This allows the server to handle requests on all configured sockets.
If you are using FreeRTOS, create a new task and call httpServerRun() inside its infinite loop. This keeps the HTTP server responsive without blocking other tasks.
Controlling the LED
On matching the URI, the http_dynamic_handler call the led_Control function. This function is defined as extern in the http_server_example.c file, therefore we will write its main implementation in the main.c file.
void led_Control(uint8_t state)
{
	HAL_GPIO_WritePin(GPIOC, GPIO_PIN_13, !state);
}Here we will pass the inverted value of the parameter state. This is because the LED pin PC13 is active LOW, so setting it HIGH turns the LED OFF and resetting it LOW turns the LED ON.
Testing the Web Server in Browser
Once the project is flashed, you can see the logs on the serial console. The image below shows the logs generated.
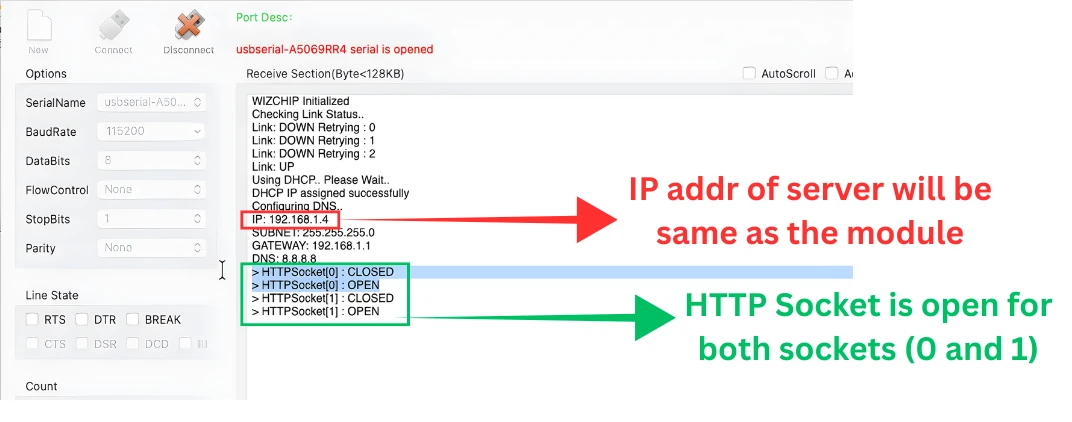
As you can see, after obtaining the IP address using DHCP, the HTTP server is UP on both the sockets. The IP address for this server will be the same as the IP of the module, i.e. 192.168.1.4
Index Page
Now open any web browser on a device connected to the same network. Enter the IP address shown in the logs and the index page should load, as shown in the image below.
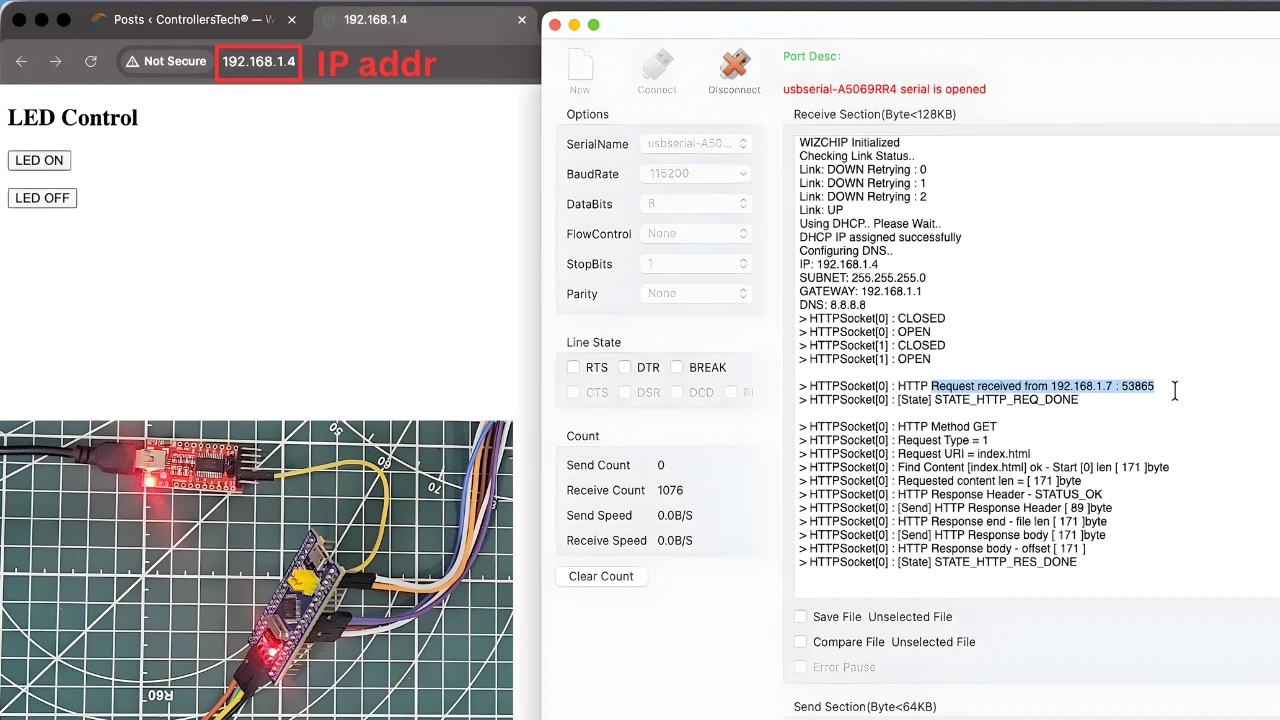
Click the LED ON or LED OFF buttons. The LED on the STM32 should respond immediately, and the correct page will be displayed.
LED ON Page
Once the LED ON button is clicked, the LED will turn ON and the LED ON page will be served. This is shown in the image below.
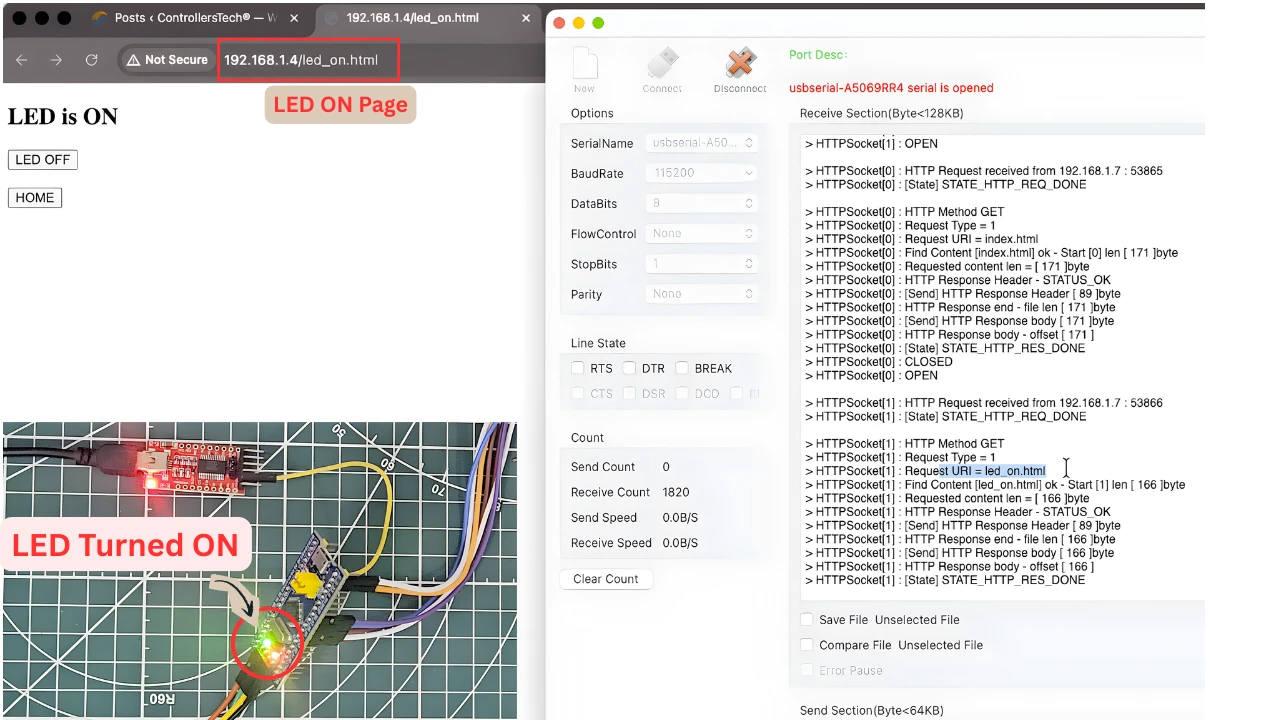
This page also give us 2 buttons, either to Turn the LED OFF or go back to index page.
LED OFF page
When the LED OFF button is clicked, the LED turns off and the LED OFF page is served. This is shown in the image below.
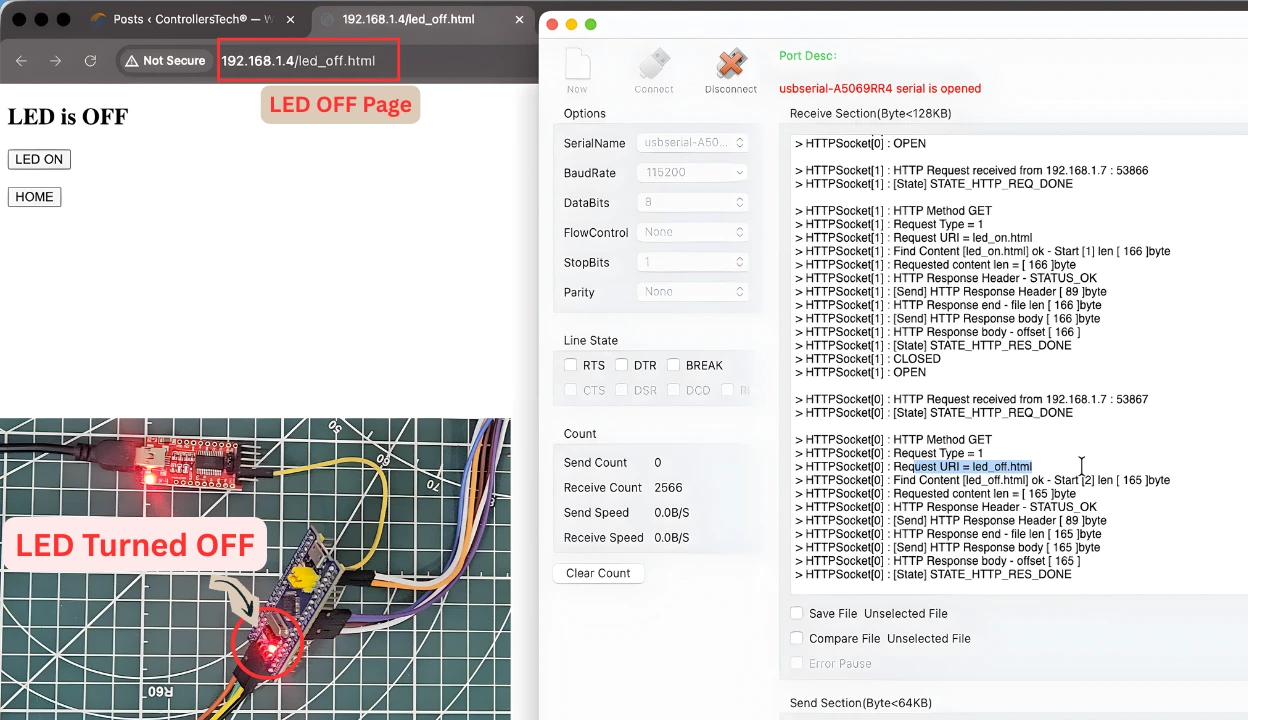
Here also give we have 2 buttons, Turn the LED ON or go back to index page.
Every request will also appear in the logs, so you can track the activity of the web server on the serial console.
Video Tutorial
STM32 W5500 HTTP Web Server Video Tutorial
This video is part 5 of the STM32 W5500 Ethernet series and shows how to build a simple HTTP Web Server using the STM32 and the W5500 module. You will learn how to add the HTTP server files, create static webpages, register them with the server, and control an onboard LED directly from a browser. The tutorial also explains how URI handling works, how to insert a custom request handler, and how to run the server using multiple sockets for better performance. Watch the full video below.
Watch the STM32 HTTP Web Server TutorialConclusion
In this part of the STM32 W5500 Ethernet series, we built a fully working HTTP web server on the STM32. We created simple static pages, registered them with the server, handled incoming requests, and even controlled a GPIO pin through a browser. This gives you a solid foundation for hosting basic web interfaces directly from your microcontroller. With this setup, we achieved everything needed for a simple, reliable web server. The pages load well, the LED control works smoothly, and the server handles multiple sockets without issues. It is a great starting point for more advanced web-based control systems.
However, static pages come with limitations. They cannot update values in real time, and the STM32 cannot easily send dynamic data back to the webpage. Every update requires loading an entire new page, which is not ideal for dashboards, sensor monitoring, or control panels.
To solve this, we will move to dynamic webpages in the next part of this series. In Part 6, we will use CGI (Common Gateway Interface) to process requests, update values, and exchange data between the browser and the STM32. This will allow your embedded web server to become much more powerful and interactive.
Browse More STM32 W5500 Tutorials
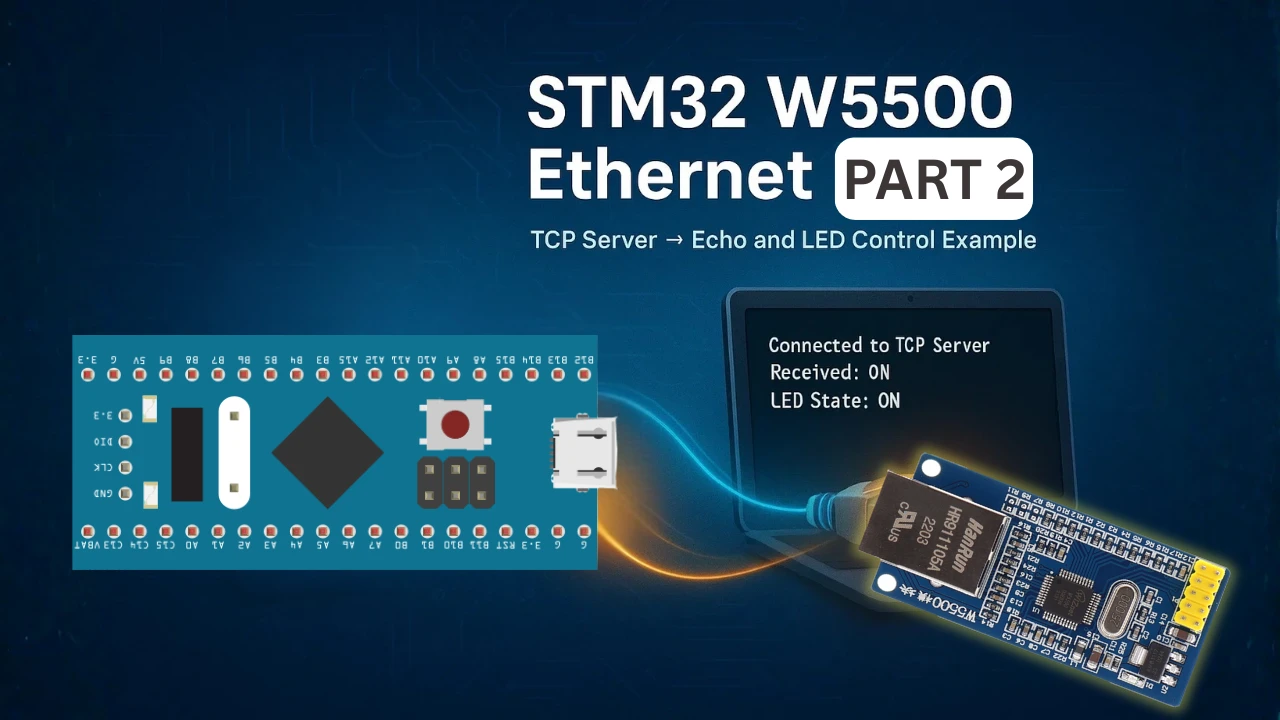
STM32 W5500 Ethernet Tutorial (Part 2): Create a TCP Server to Receive and Process Data
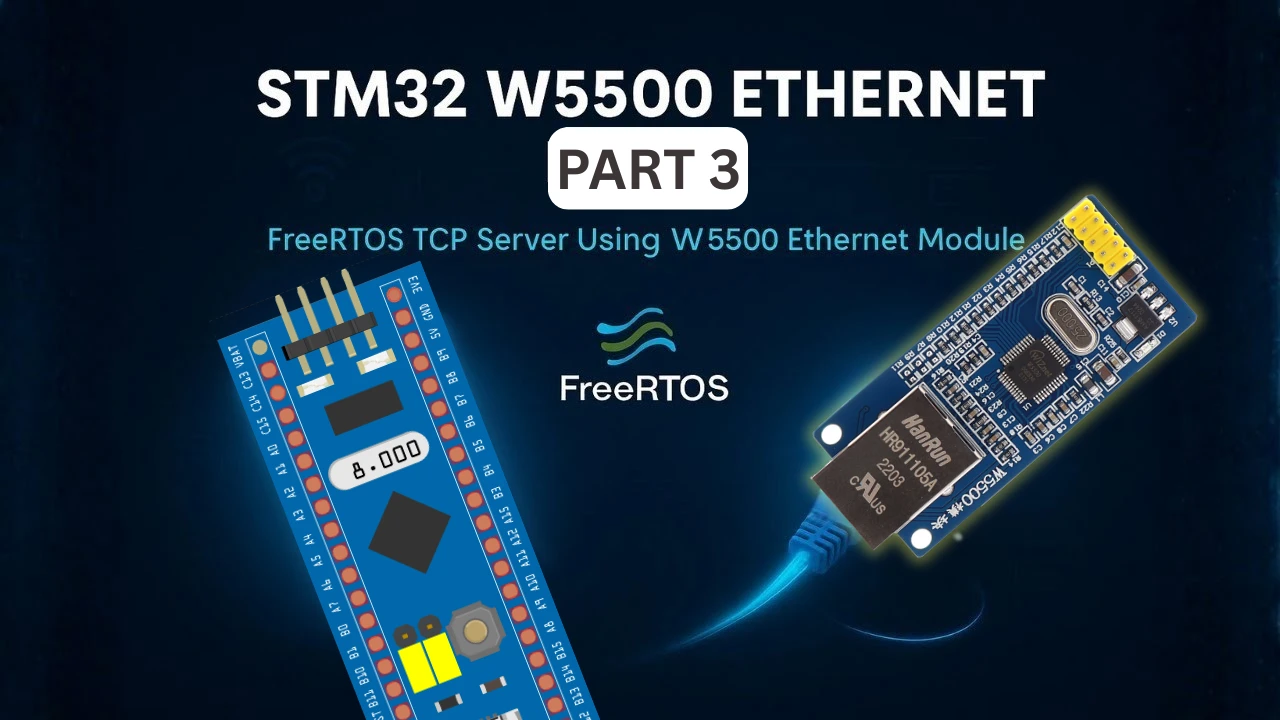
STM32 W5500 Ethernet Tutorial (PART 3): TCP Server with FreeRTOS
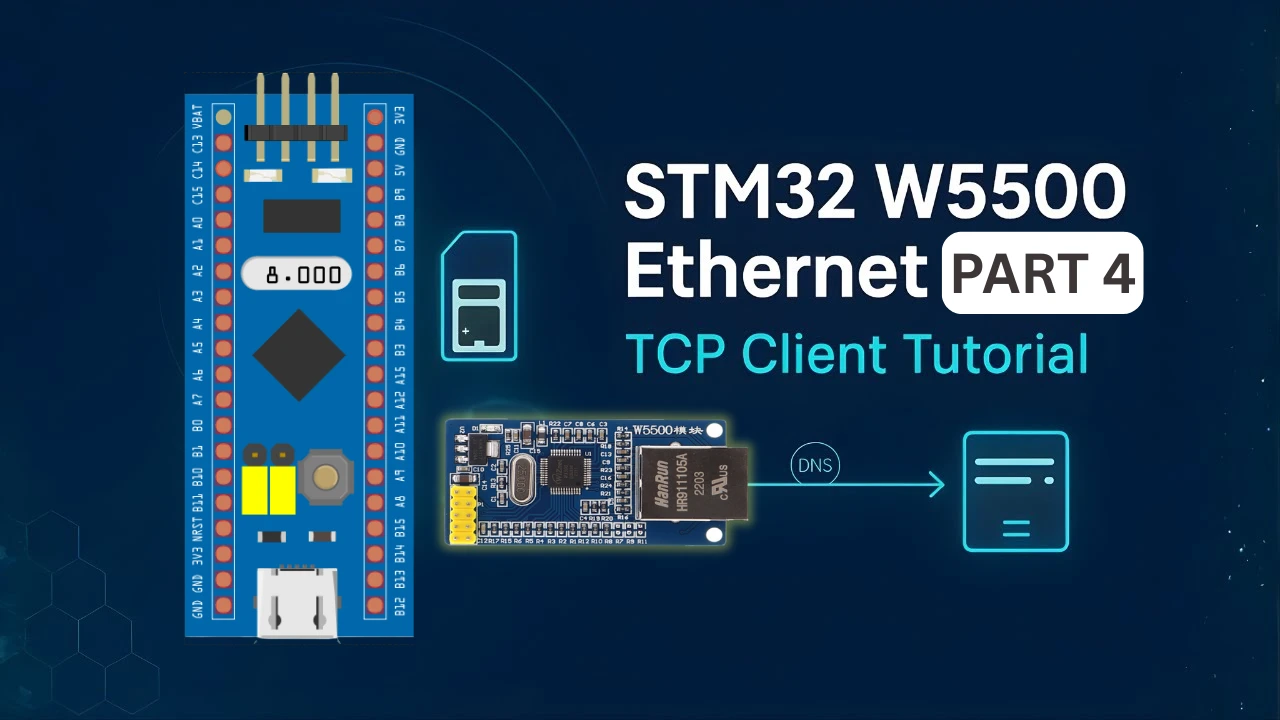
STM32 W5500 Ethernet Tutorial (Part 4): Connect STM32 to TCP Server Using DNS and Static IP
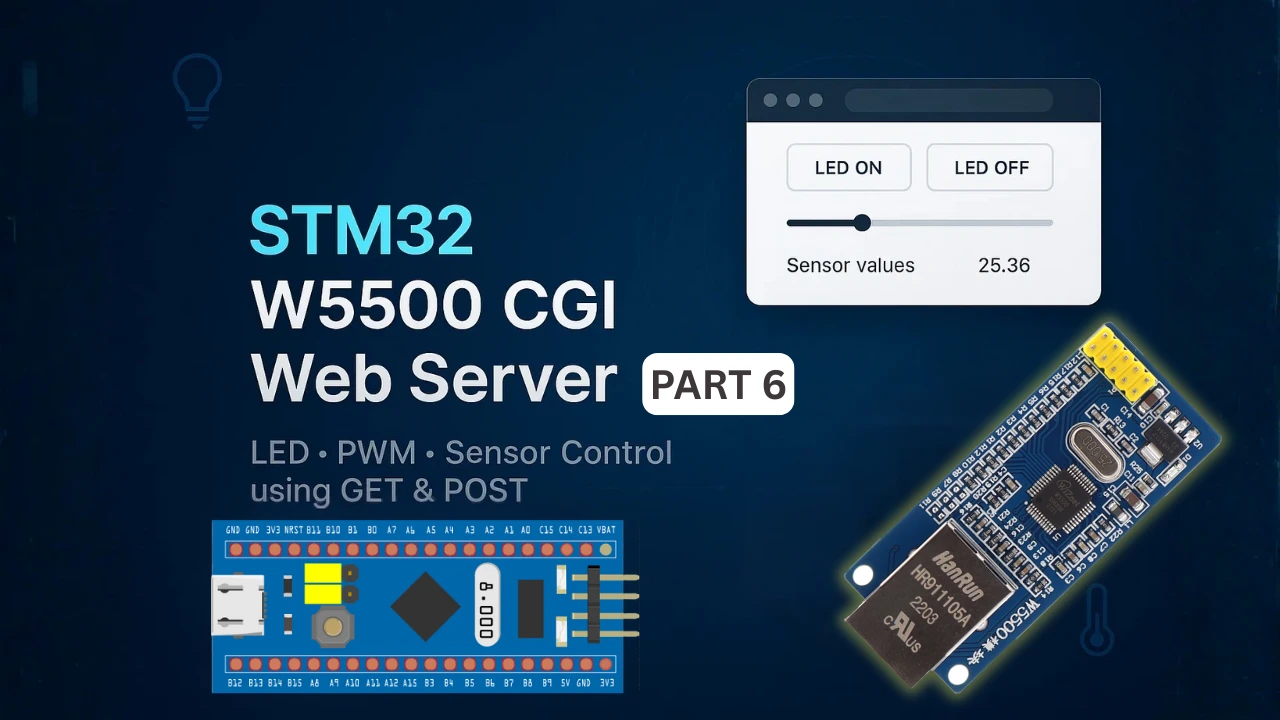
STM32 W5500 Ethernet Tutorial (Part 6): Dynamic HTTP Webserver using CGI
STM32 W5500 Ethernet Tutorial (Part 7): STM32 as MQTT Client
STM32 W5500 HTTP Server Project Download
STM32 W5500 HTTP Server FAQs
Subscribe
Login
0 Comments
Newest
