Home ▸ STM32 Tutorials ▸
Updated On: March 23, 2026
How to use the Keyboard on DISPLAY
This is the 5th tutorial in the STM32 LVGL series and today we will see how to use the on Display Keyboard. We will use the keyboard to enter the name and Password in the text fields on the display, and then retrieve this information on the MCU. Later this information will be sent to the computer via the UART.
VIDEO TUTORIAL
You can check the video to see the complete explanation and working of this project.
Connection & CubeMX Config
I have already covered in the previous tutorials how to connect the SPI Display and the touch controller to the MCU. I am skipping that part and will only focus on the UART in today’s tutorial.
Below shown is the UART configuration in the cubeMX.
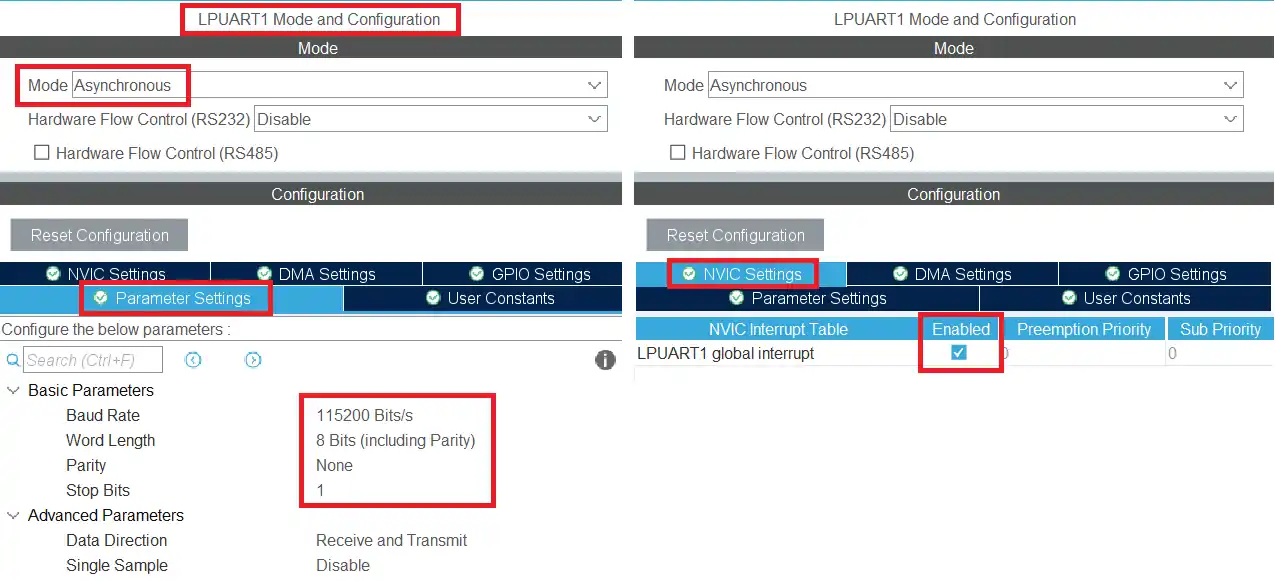
The UART is enabled in the Asynchronous mode with 115200 Baud, 8 data bits, 1 stop bit and no parity. I have also enable the UART interrupt to receive the data in the Interrupt Mode.
Below is the image showing the connection to the USB TTL Module.
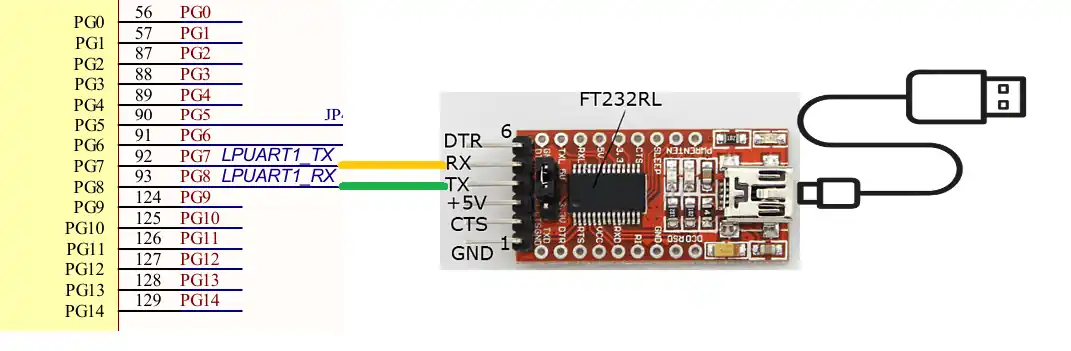
The UART pins are always connected in cross, connecting the TX pin to the RX of the module and RX pin to the TX of the module. The module is then connected to the computer, where we will send the data to.
UI Design
The major part of this tutorial is going to be the design, so we will cover this in detail.
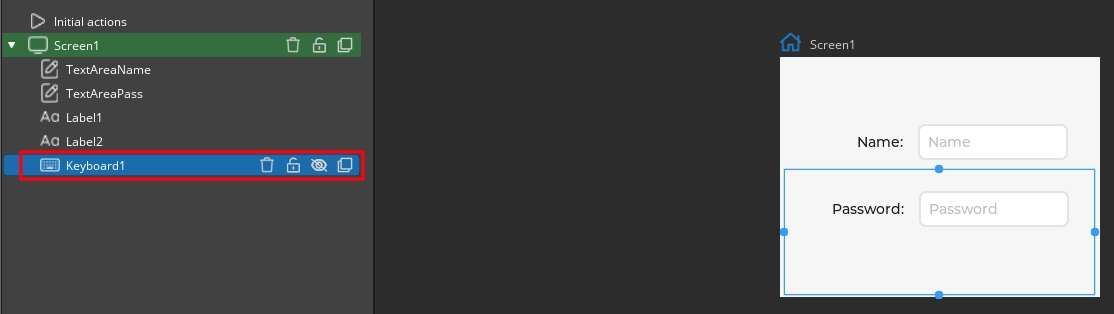
I have created 2 Text Areas, one for the name and another for the Password.

The keyboard is hidden by default as it will be shown only when any of the text areas are clicked.
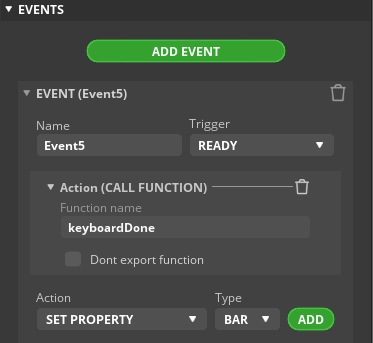
I have also added an event for the keyboard, which will trigger when it is READY ( ✔ on the keyboard is clicked). Here we will call a function, keyboardDone, where we will send the data from the screen to the UART.
We will add 2 events for each text area. One will trigger when the text area is in focus, and another one will trigger when it gets defocussed.
Below is the event when the text area is FOUCSSED.
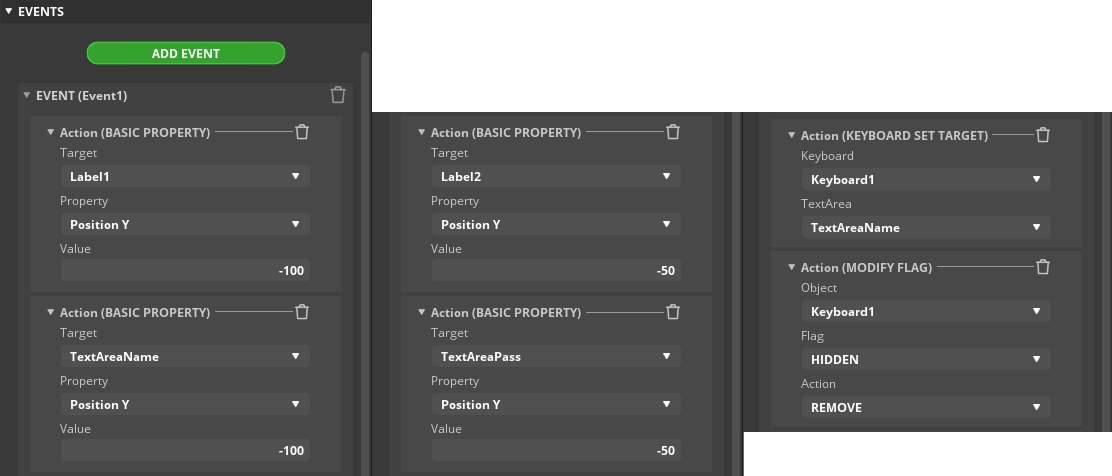
Here we will add 6 actions for this event.
- The first column shows the Y transformation of the Label 1 and TextareaName to the position -100. This will shift the name text area and it’s label to the top of the screen.
- The Second column shows the Y transformation of the Label 2 and TextareaPass to the position -50. This will shift the password text area and it’s label towards the top, but below the name text area.
- In the third column we are removing the HIDDEN flag from the keyboard, which will show the keyboard on the screen. Also we will set the keyboard Target to the Name Text area. This will make it possible to type in the respective text area.
Below is the event when the text area is DEFOUCSSED.
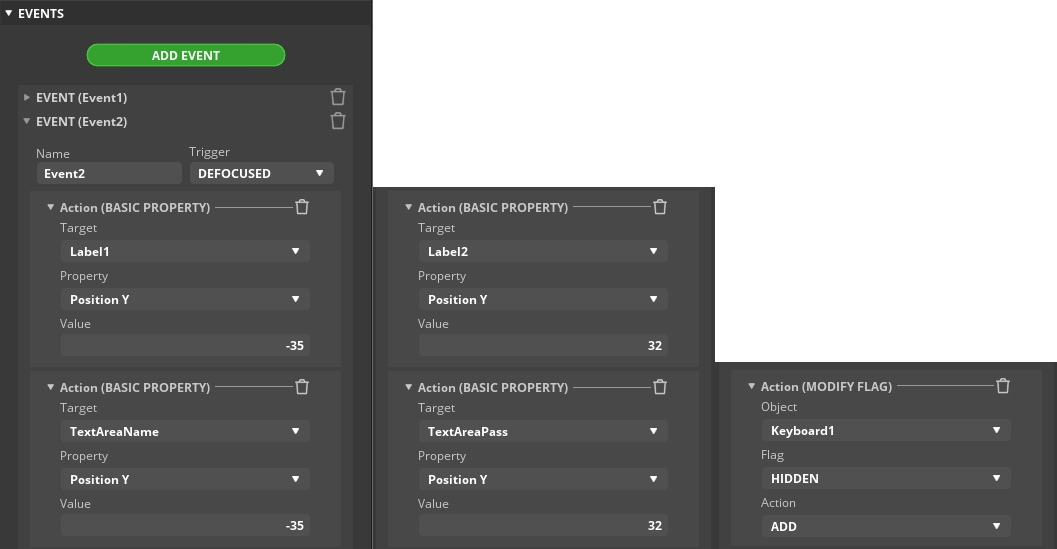
Here we will add 5 actions for this event.
- The first column shows the Y transformation of the Label 1 and TextareaName to their default positions.
- The Second column shows the Y transformation of the Label 2 and TextareaPass to their default positions.
- In the third column we will ADD the HIDDEN flag for the keyboard. This will hide the keyboard again.
The events shown above are assigned to the name text area. Similarly 2 events are also assigned to the password text area. They are basically same as what we saw above, except when the text area is Focussed, the keyboard Target will be set to textAreaPass.
This is all we need for the designing. Now we will write the function keyboardDone in the code.
The Code
We will write the function, keyboardDone, in the UI event source file. Below is the code for the UI_event.c file.
#include "ui.h"
#include "main.h"
#include <stdio.h>

char Name[16];
char Password[12];

char Data[32];
extern UART_HandleTypeDef hlpuart1;

void keyboardDone(lv_event_t * e)
{
	if (lv_keyboard_get_textarea(ui_Keyboard1) == ui_TextAreaName)
	{
		strcpy (Name, lv_textarea_get_text(ui_TextAreaName));
		sprintf (Data, "NAME: %s\n", Name);
		HAL_UART_Transmit(&hlpuart1, (uint8_t *)Data, strlen (Data), 1000);
	}
	else if (lv_keyboard_get_textarea(ui_Keyboard1) == ui_TextAreaPass)
	{
		strcpy (Password, lv_textarea_get_text(ui_TextAreaPass));
		sprintf (Data, "PASSWORD: %s\n", Password);
		HAL_UART_Transmit(&hlpuart1, (uint8_t *)Data, strlen (Data), 1000);
	}
}Here we first define the arrays to store the Name and Password data from the Screen. The Data array will be used to store the final string which we will send to the uart.
Inside the keyboardDone function, we will first check which text area the keyboard is assigned to. When the keyboard is READY ( ✔ is clicked), the function keyboardDone is called. So it is necessary to check the current assignment of the keyboard.
If the keyboard is assigned to the Name Text Area, we will copy the data from the text area to the Name array. Then add it to the Data array and send to the UART.
Similarly, If the keyboard is assigned to the Password Text Area, we will copy the data into the Password array. Then add it to the Data array and send to the UART.
Result
Below the images shows the data on the UI and the one sent to the computer by the MCU using UART.
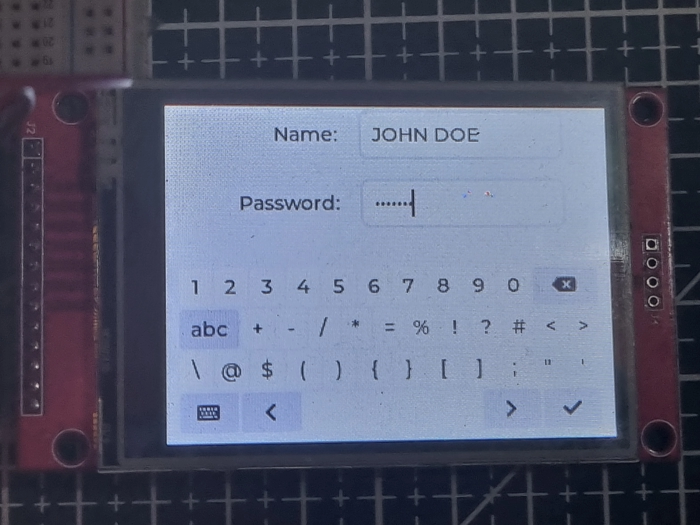
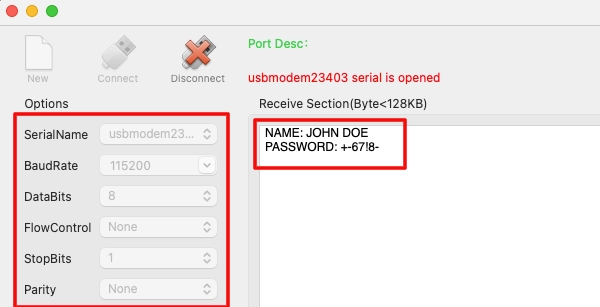
We got the same data that we typed on the display. Check the video below to see the full project configuration and its working.
STM32 LVGL Tutorial Series
LVGL on STM32 || PART 2
LVGL on Riverdi STM32-H7 Display
LVGL on STM32 || PART 4
LVGL on STM32 || PART 6
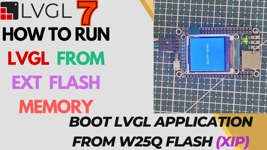
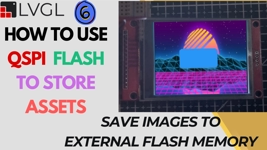
LVGL on STM32 || PART7 || Load LVGL from Ext Flash
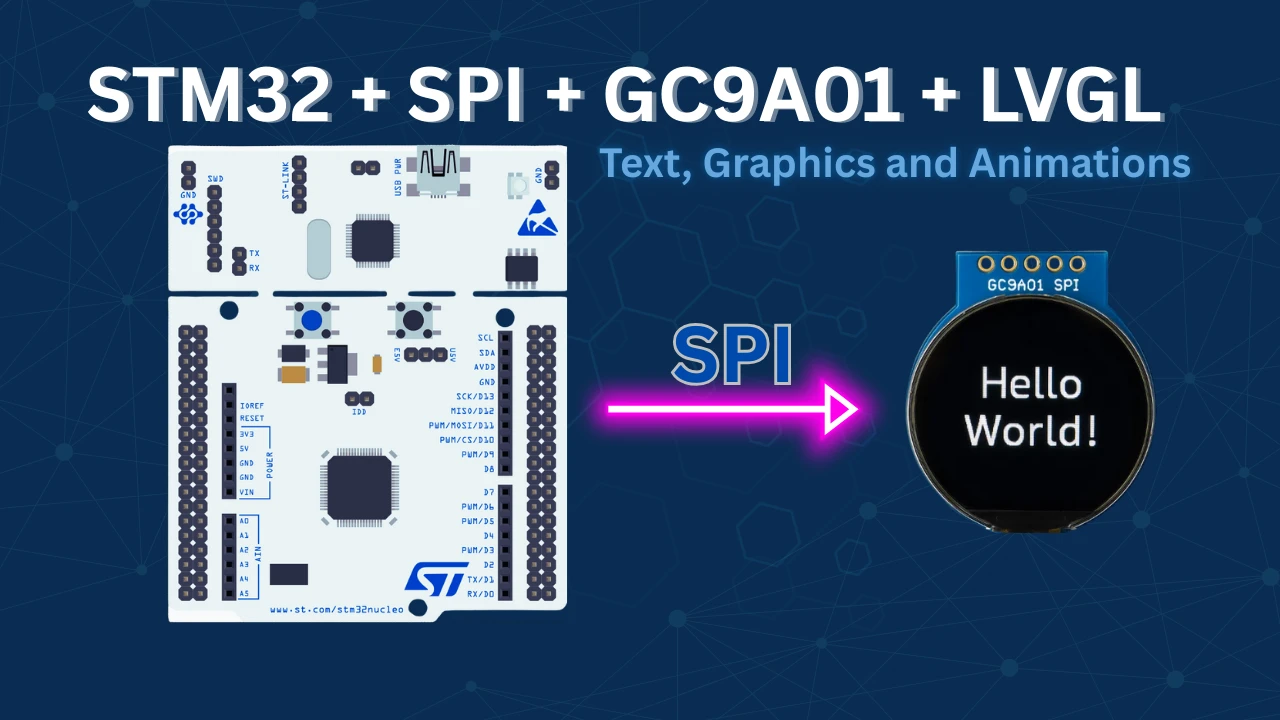
STM32 GC9A01 Round Display: SPI & LVGL Integration Guide
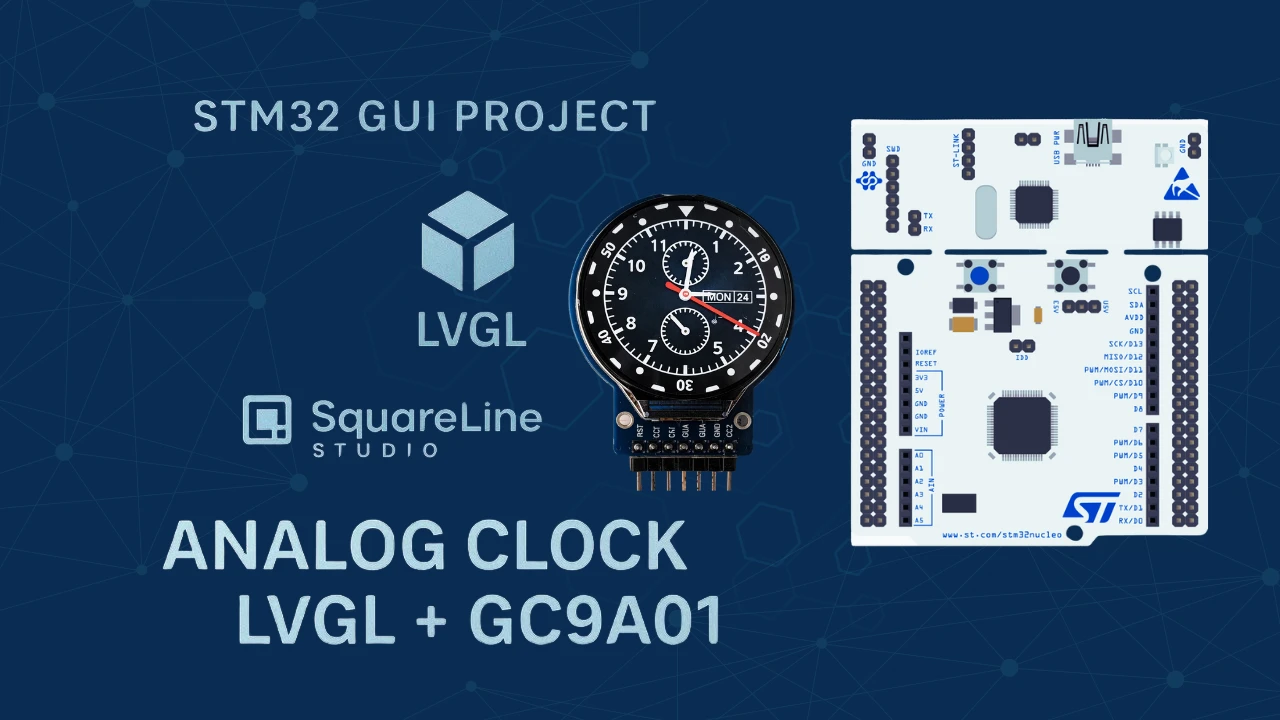
STM32 Analog Clock on GC9A01 — LVGL, SquareLine Studio & RTC

Subscribe
Login
0 Comments
Newest
