

Getting started with ESP32 and ESP-IDF
This is the new series of tutorials where we will cover the ESP32 microcontroller with Espressif-IDE. Well ESP32 is getting more and more popular, but we still don’t have many tutorials covering this MCU with the eclipse based IDE. That is why I have decided to cover the Espressif-IDE instead of arduino. This way we will get to understand the process in much better way, and we will have more control over our application.
Ass we will progress with these tutorials, we will cover some basic peripherals in the beginning, and then we will move to the more complicated protocols.
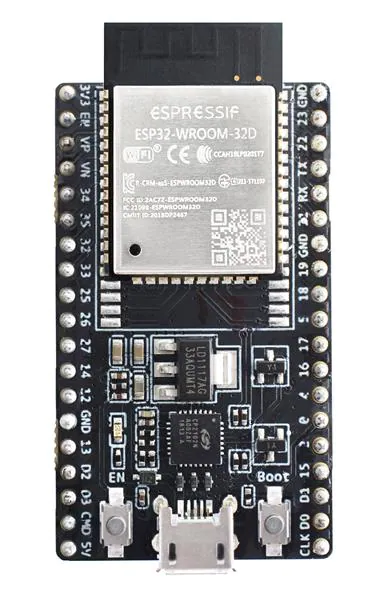
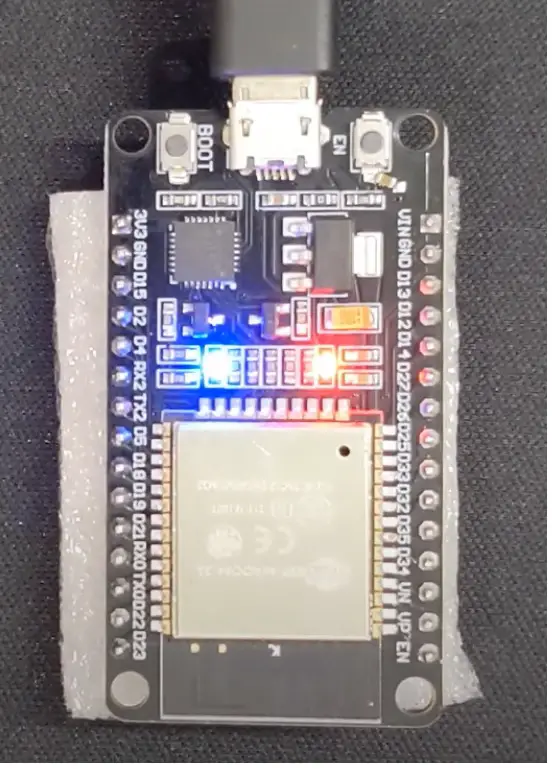
This particular tutorial will cover how to setup the IDE in windows, and how to blink the LED. For this series, I will be using the ESP32 WROOM Devkit, which is shown in the picture below.
Let’s start with setting up the IDE first.
Setting up the IDE
First of all we have to download the IDE. It can be downloaded from the official espressif website, https://docs.espressif.com/projects/esp-idf/en/latest/esp32/get-started/windows-setup.html


You have to go to the Windows Installer Download and for the best setup, you can choose the online installer as shown in the images above.
Once the setup starts, it will do some checkup and if it asks for fixes, you need to click apply. Then just click next

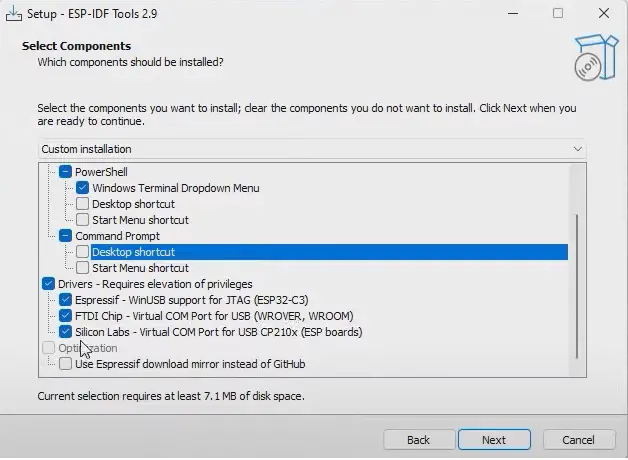
As shown in the image above, I am not enabling desktop or startmenu shortcuts for powershell and command prompt. Other than that everything is kept default to whatever it was.
Click next and wait for the IDE to get installed.
Creating our first Project
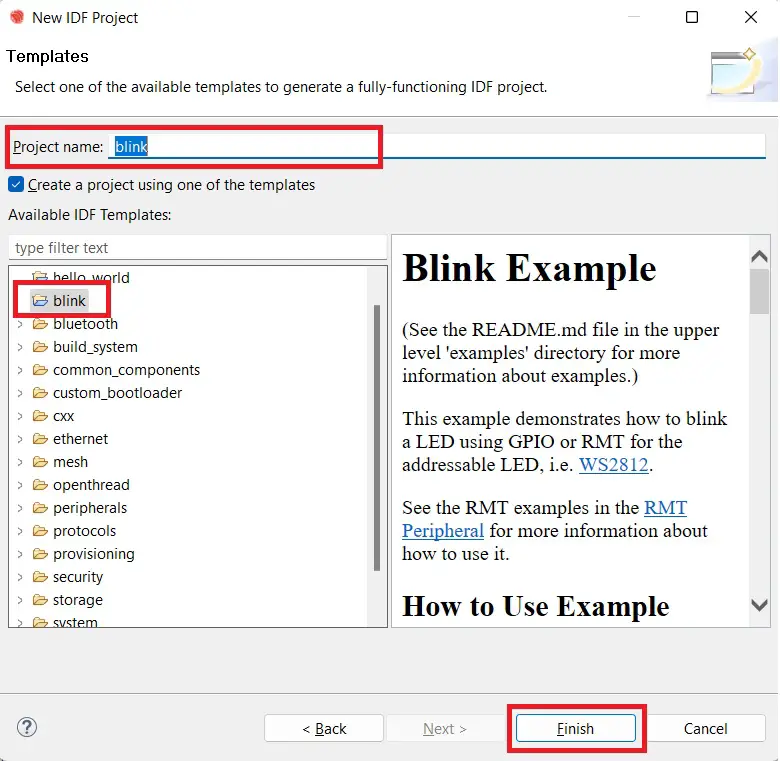
After opening the IDE, click on “Create a new EspressIf IDF Project”. Then Give some name to this project and click next.

For this tutorial we will use an example template. As shown below, I am using the blink template. After you choose the template, the project name changes according to the template, so you can leave it or change it back to whatever you want.
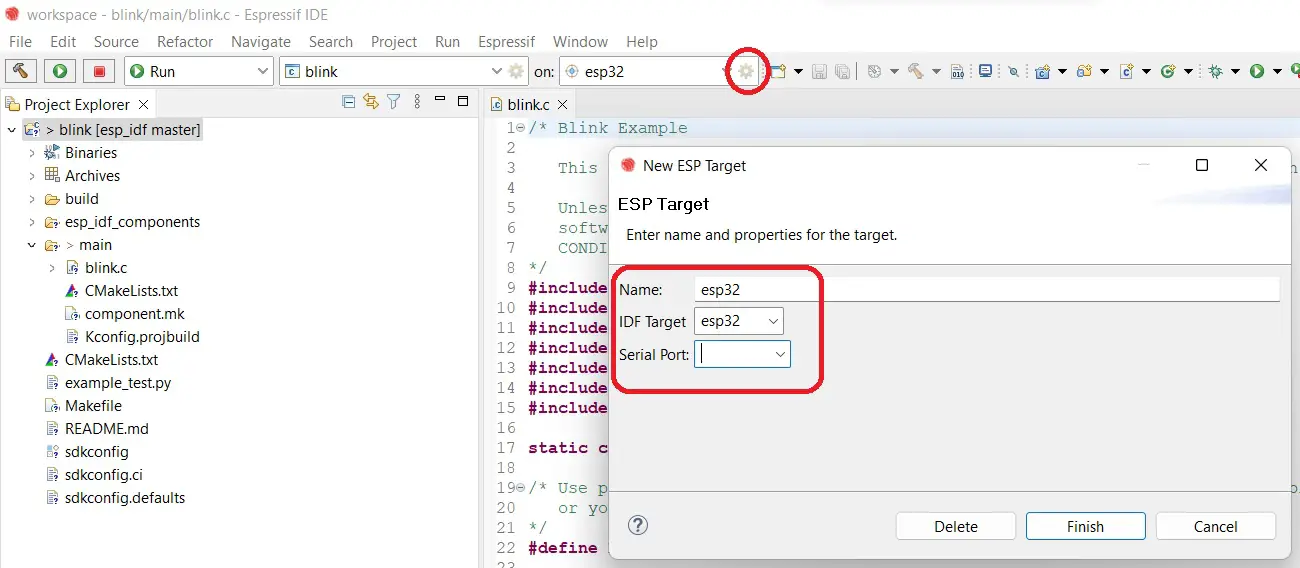
Now before we build the project, we must select the appropriate board that we are using. Click the setting icon, and choose the target and the com port.
The code generated at this point is very small, and we only need to make very little changes to get the LED blinking.
#define BLINK_GPIO GPIO_NUM_2

static uint8_t s_led_state = 0;- The on bioard LED in the ESP32 WROOM board is connected to the GPIO_2, and hence I have defined the BLINK_GPIO as GPIO_NUM_2
- Along with it we also have the
s_led_state, which will be later used to change the LED State.
static void configure_led(void)
{
    gpio_reset_pin(BLINK_GPIO);
    /* Set the GPIO as a push/pull output */
    gpio_set_direction(BLINK_GPIO, GPIO_MODE_OUTPUT);
}

static void blink_led(void)
{
    /* Set the GPIO level according to the state (LOW or HIGH)*/
    gpio_set_level(BLINK_GPIO, s_led_state);
}- The first function,
configure_led, configures the LED Pin (GPIO_2) as the output pin. - The second function,
blink_led, will be called in the main function, and it will be used for setting the level of the LED Pin.
void app_main(void)
{

    /* Configure the peripheral according to the LED type */
    configure_led();

    while (1) {
        blink_led();
        /* Toggle the LED state */
        s_led_state = !s_led_state;
        vTaskDelay(1000 / portTICK_PERIOD_MS);
    }
}- In the main function, we will first configure the LED Pin.
- Then in the while loop, we will blink the LED every 1000 ms.
- The
s_led_stateis changed after every call to the blink function, and it’s value will be either 0 or 1, depending on the last value.
Result
Below are the images of the on board LED in ON and OFF States.


2 Comments. Leave new
What Header files has been added in this example?
download the project, you will find out