Published: December 13, 2025
Last Updated: February 5, 2026
Last Updated: February 5, 2026
Introduction to FreeRTOS on Arduino: Multitasking Guide
FreeRTOS brings true multitasking to Arduino boards. In this tutorial, you will learn how to run multiple tasks at the same time without blocking code. We will compare the normal Arduino loop-based approach with real RTOS scheduling. You will also understand why FreeRTOS is useful when you want non-blocking code, smooth timing control, and cleaner project structure.
In this first part of the series, we start with the basics. You will learn what an RTOS is, how it works on small Arduino boards, and what its limits are. Then we install the FreeRTOS library and create simple tasks. Finally, we build a hands-on demo where an LED blinks at one speed while Serial messages print at another speed. This example will help you understand true multitasking in the easiest way.
Table Of Contents
What Is FreeRTOS and Why Use It on Arduino?
Before we start coding, it is important to understand what FreeRTOS is and how it changes the way your Arduino runs tasks. FreeRTOS adds real multitasking to your project. It helps your code run smoother, cleaner, and without long blocking delays. In this section, we look at the basics in simple words.
What Is an RTOS in Simple Terms?
An RTOS, or Real-Time Operating System, is software that manages how different tasks run on a microcontroller. In normal Arduino programs, only one task can run at a time. But with an RTOS, many tasks appear to run at the same time.
FreeRTOS creates small “tasks,” each with its own function. The scheduler quickly switches between these tasks. This switching happens so fast that it feels like true parallel execution, even though the processor is single-core.
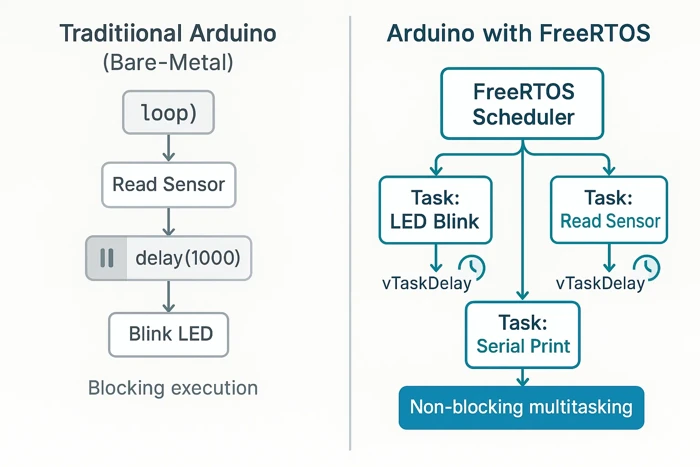
Bare-Metal Arduino Code vs. RTOS Multitasking
Traditional Arduino code uses a bare-metal style. Everything runs inside loop(). If you use commands like delay(), the microcontroller stops and waits, blocking every other action.
For example, if you delay for 1 second, nothing else can run during that time.
With FreeRTOS, you break your project into tasks. Each task runs independently. Instead of blocking delays, tasks use non-blocking functions like vTaskDelay(). The scheduler handles timing and switches tasks smoothly.
Practical Benefits of Using FreeRTOS on Arduino
Using FreeRTOS provides real advantages, even on small boards:
- Non-blocking multitasking: You can replace
delay()with proper task delays. - Run multiple tasks at once: Blink an LED, read sensors, and print on Serial at the same time.
- Better timing control: Tasks run at fixed intervals, which improves reliability.
- Cleaner project structure: Each feature stays in its own function, making complex projects easy to maintain.
- Good for IoT and real-time projects: Works well when you need stable timing, periodic updates, or asynchronous events.
Limitations of FreeRTOS on AVR-Based Boards
AVR boards like Arduino Uno and Nano have only 2 KB of RAM. Because of this, FreeRTOS has some limitations:
- Small task stacks: You can only create a few lightweight tasks.
- No advanced FreeRTOS features: Memory-hungry features like software timers, event groups or large queues may not fit.
- Simple multitasking only: Ideal for LED blinking, Serial printing, and basic sensor reading.
- Limited debugging: Stack overflow can happen if you use too much memory.
Key Concepts of FreeRTOS
Before writing any code with FreeRTOS on Arduino, it’s important to understand a few core concepts. These concepts define how FreeRTOS allows an Arduino to handle multiple operations in a structured and responsive way, something that is difficult to achieve with a traditional loop()based approach.
Tasks — Creating and Scheduling
In FreeRTOS, a task is an independent function that runs concurrently with other tasks. Each task is responsible for a specific job. For example:
- One task can blink an LED
- Another task can read an analog value from a potentiometer
- Another task can process or print data over Serial
On Arduino, tasks are created using the xTaskCreate() function. Each task requires:
- Task function – the code that will run as the task
- Stack size – how much memory the task can use
- Priority – determines how important the task is compared to others
FreeRTOS uses a preemptive scheduler. This means:
- The task with the highest priority gets the CPU first
- If multiple tasks have the same priority, FreeRTOS switches between them in a round-robin manner
This scheduling mechanism allows an Arduino to run multiple logical operations without blocking the entire program, making the system more responsive and better structured.
Delays — vTaskDelay() and vTaskDelayUntil()
In traditional Arduino code, using delay() blocks the CPU completely. While delay() is running, nothing else can execute. In a multitasking environment, this is highly inefficient.
FreeRTOS replaces delay() with task-friendly delay functions:
vTaskDelay()
Suspends the current task for a specified number of ticks. While the task is delayed, other tasks continue to run normally.
This is ideal for:
- LED blinking
- Periodic Serial printing
- Non-blocking waits
vTaskDelayUntil()
Used when a task must run at precise, fixed intervals, regardless of how long the task itself takes to execute.
This is especially useful for:
- Periodic sensor sampling
- Control loops
- Time-critical operations
Using these delay functions ensures that one task never blocks the entire Arduino.
Queues — Communication Between Tasks
When multiple tasks are running, they often need to exchange data. FreeRTOS provides queues to safely pass data between tasks without using shared global variables.
A common example:
- A task reads an analog sensor value and sends it to a queue
- Another task receives that value from the queue and prints it to Serial
Queues work as FIFO (First-In, First-Out) buffers and help prevent data corruption and timing issues that occur when multiple tasks access the same variable.
In Arduino FreeRTOS:
- Queues are created using
xQueueCreate() - Data is sent using
xQueueSend() - Data is received using
xQueueReceive()
Queues can also block a task until data becomes available, which helps keep CPU usage efficient.
Semaphores and Mutexes — Managing Shared Resources
When multiple tasks try to access the same resource—such as:
- Serial communication
- I²C or SPI bus
- A shared variable
there is a risk of conflicts and corrupted data. FreeRTOS solves this using semaphores and mutexes.
Binary Semaphores
Used mainly for task synchronization. One task can signal an event, and another task can wait for that signal before continuing.
Typical uses:
- Signaling between tasks
- Notifying a task that an event has occurred
Mutexes (Mutual Exclusion)
Used to protect shared resources. Only one task can own the mutex at a time. Other tasks must wait until it is released.
Mutexes are commonly used to:
- Protect Serial prints
- Safely access shared variables
By using semaphores and mutexes correctly, you ensure that tasks cooperate safely without interfering with each other.
Installing the Arduino FreeRTOS Library
To use FreeRTOS on Arduino, we first install the official Arduino_FreeRTOS_Library. This library makes it easy to run FreeRTOS tasks directly on the Arduino platform. The installation takes less than a minute and works through the Library Manager in the Arduino IDE.
Steps to Install FreeRTOS From Library Manager
Installing the library is simple and beginner-friendly:
- Open the Arduino IDE.
- Go to Tools → Manage Libraries…
- In the search bar, type “FreeRTOS”.
- Find FreeRTOS by Richard Barry and others.
- Click Install.

After the installation completes, the library is ready to use. You can include it in your sketch with:
#include <Arduino_FreeRTOS.h>Supported Arduino Boards and Notes
The FreeRTOS library works mainly on AVR-based boards, such as:
- Arduino Uno
- Arduino Nano
- Arduino Mega 2560
It also works on a few other boards with AVR architecture.
However, it does not support ARM-based boards like Arduino Due or ESP32. Those boards use different FreeRTOS ports.
Important notes:
- AVR boards have limited RAM, so keep tasks lightweight.
- Stack size must be small and carefully chosen.
- Some FreeRTOS features may be disabled to save memory.
Understanding Tasks in FreeRTOS
In FreeRTOS, a task is a small, independent program that runs inside your main application. Each task performs a specific job — for example, blinking an LED, reading a sensor, or sending data over Wi-Fi.
FreeRTOS allows the Arduino to handle multiple tasks at once. This is called multitasking. Instead of writing one long loop with delays, you split your code into several smaller tasks that run together without blocking each other.
Every task in FreeRTOS has its own stack, priority, and state. The scheduler manages these tasks and decides which one runs at any given time. It switches between tasks so quickly that it looks like they’re all running simultaneously.
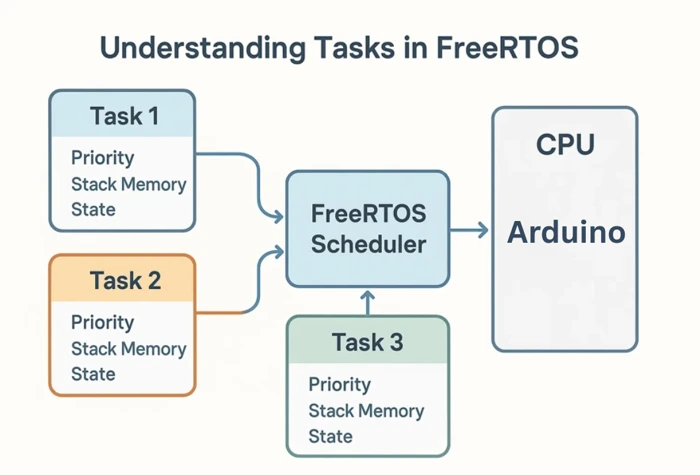
Here’s how you can think of it:
- Each task is like a worker focusing on one job.
- The scheduler is the manager who decides which worker should act next.
- Tasks don’t interfere with each other, they just wait for their turn to use the CPU.
By dividing your application into multiple tasks, you make it more organized, responsive, and real-time capable.
Creating Your First FreeRTOS Tasks on Arduino
Once FreeRTOS is installed, we can create our first tasks. In this part, we write simple task functions, set priorities, and start the FreeRTOS scheduler. These steps help you understand how multitasking actually works on Arduino boards.
How to Create a Basic FreeRTOS Task
In FreeRTOS, a task is simply a function that runs in a loop. Each task has its own timing, stack, and priority.
Here is the basic structure of a FreeRTOS task:
void TaskBlink(void *pvParameters) {
  while (1) {
    // Task code here
    vTaskDelay(1000 / portTICK_PERIOD_MS); // Non-blocking delay
  }
}To create this task, we use the xTaskCreate() function inside setup():
xTaskCreate(
  TaskBlink,      // Task function
  "BlinkTask",    // Name (for debugging)
  128,            // Stack size
  NULL,           // Task parameters
  1,              // Priority
  NULL            // Task handle
);This creates a dedicated task that will run independently of the main loop. Notice that we don’t use loop() anymore for FreeRTOS applications.
Setting Task Priorities the Right Way
FreeRTOS uses priorities to decide which task should run first. Higher numbers mean higher priority.
Some simple rules:
- Keep most tasks at priority 1.
- Use priority 2 or higher only for tasks that must run more frequently or handle time-critical actions.
- Avoid giving all tasks the same very high priority.
Example with two tasks:
xTaskCreate(TaskBlink, "Blink", 128, NULL, 1, NULL);
xTaskCreate(TaskSerial, "Serial", 128, NULL, 2, NULL);Here, the Serial task will run first when both tasks are ready. This helps maintain stable timing for important tasks.
Starting the FreeRTOS Scheduler
After all tasks are created inside the setup() function, the FreeRTOS scheduler starts automatically.
Unlike bare-metal FreeRTOS or ESP-IDF, you do not need to manually start the scheduler when using FreeRTOS with Arduino.
Once setup() finishes executing:
- FreeRTOS takes control of the CPU
- The scheduler begins switching between tasks
- Each task runs according to its priority and delay timing
What Happens to loop()?
When FreeRTOS is running:
- The
loop()function is no longer used - All application logic must be placed inside FreeRTOS tasks
- The scheduler handles task switching automatically
This is why loop() is typically left empty in FreeRTOS-based Arduino projects.
Important Notes About the Scheduler
- The scheduler never stops running once it starts
- Task switching happens continuously in the background
- Blocking calls like
delay()should be avoided inside tasks - Use
vTaskDelay()orvTaskDelayUntil()instead
Hands-On Demo: LED Blink Task + Serial Print Task
In this hands-on example, we will create a simple multitasking Arduino application using FreeRTOS.
Two independent tasks will run simultaneously:
- One task blinks the built-in LED at 1 Hz
- Another task prints a message on Serial every 700 ms
This example clearly demonstrates how FreeRTOS allows multiple tasks to run concurrently without blocking the processor.
Writing the LED Blink Task (1 Hz)
This task is responsible for toggling the built-in LED every second. Instead of using delay(), it uses vTaskDelay(), allowing other tasks to execute while it waits.
void TaskBlink(void *pvParameters)
{
  pinMode(LED_BUILTIN, OUTPUT);

  while (1)
  {
    digitalWrite(LED_BUILTIN, HIGH);
    vTaskDelay(500 / portTICK_PERIOD_MS);  // 0.5 second ON

    digitalWrite(LED_BUILTIN, LOW);
    vTaskDelay(500 / portTICK_PERIOD_MS);  // 0.5 second OFF
  }
}This creates a clean 1 Hz blink using a dedicated task. While this task is delayed, the CPU is free to execute other tasks.
Writing the Serial Print Task
This task prints a message to the Serial Monitor every 700 ms. Its timing is completely independent of the LED task.
void TaskSerial(void *pvParameters)
{
  Serial.begin(9600);
  vTaskDelay(100 / portTICK_PERIOD_MS);  // Small startup delay

  while (1)
  {
    Serial.println("FreeRTOS is running...");
    vTaskDelay(700 / portTICK_PERIOD_MS);
  }
}Even though the LED blinks at 1 Hz, this task continues to run at its own rate. You will notice that both the LED blinking and Serial messages remain smooth and consistent.
Creating Tasks in setup()
All FreeRTOS tasks are created inside the setup() function. Once setup() finishes, the FreeRTOS scheduler starts automatically, you do not need to start it manually in Arduino.
void setup()
{
  xTaskCreate(
    TaskBlink,        // Task function
    "LED Blink",      // Task name
    128,              // Stack size
    NULL,             // Parameters
    1,                // Priority
    NULL              // Task handle
  );

  xTaskCreate(
    TaskSerial,
    "Serial Print",
    256,
    NULL,
    1,
    NULL
  );
}

void loop()
{
  // Empty - FreeRTOS takes control
}Once the scheduler is running, the loop() function is no longer used.
Full Working Code
#include <Arduino_FreeRTOS.h>

void TaskBlink(void *pvParameters);
void TaskSerial(void *pvParameters);

void setup()
{
  xTaskCreate(TaskBlink, "LED Blink", 128, NULL, 1, NULL);
  xTaskCreate(TaskSerial, "Serial Print", 256, NULL, 1, NULL);
}

void loop()
{
  // Not used when FreeRTOS is running
}

void TaskBlink(void *pvParameters)
{
  pinMode(LED_BUILTIN, OUTPUT);

  while (1)
  {
    digitalWrite(LED_BUILTIN, HIGH);
    vTaskDelay(500 / portTICK_PERIOD_MS);

    digitalWrite(LED_BUILTIN, LOW);
    vTaskDelay(500 / portTICK_PERIOD_MS);
  }
}

void TaskSerial(void *pvParameters)
{
  Serial.begin(9600);
  vTaskDelay(100 / portTICK_PERIOD_MS);

  while (1)
  {
    Serial.println("FreeRTOS is running...");
    vTaskDelay(700 / portTICK_PERIOD_MS);
  }
}Explanation
- Two FreeRTOS tasks are created in
setup() - Each task runs inside an infinite
while(1)loop vTaskDelay()pauses only the current task, not the entire CPU- The scheduler automatically switches between tasks
- The Arduino
loop()function is unused
This example proves that FreeRTOS enables true multitasking on Arduino, even with simple hardware like LEDs and Serial output.
Output
When you upload the code, the LED will blink once every second, while the Serial monitor prints messages at a faster rate.
The video below shows the LED blinking and the data received on the serial monitor.
Common Mistakes and How to Fix Them
Beginners often run into a few common issues:
1. Using delay() instead of vTaskDelay()
delay() blocks the entire CPU.
Always use vTaskDelay() inside FreeRTOS tasks.
2. Not starting the scheduler
If you forget vTaskStartScheduler(), nothing will run.
Make sure it is the last line in setup().
3. Stack overflow due to small stack size
AVR boards have limited RAM.
Try increasing stack size from 128 to 150 or 200 if the task crashes.
4. Using Serial inside setup()
Serial may not be ready before tasks start.
Initialize Serial inside the Serial task as shown above.
5. Running too many tasks on Uno
Due to 2 KB RAM, keep tasks lightweight and avoid heavy variables.
Conclusion and What’s Coming Next
In this first part of the series, you built a solid foundation for using FreeRTOS on Arduino. You learned why a traditional loop()-based approach quickly becomes limiting and how FreeRTOS introduces true multitasking without blocking the processor. By creating independent LED and Serial tasks, you saw how timing-critical and background operations can run smoothly side by side—something that is essential for scalable, real-time Arduino projects.
You also gained practical insight into how FreeRTOS works on small AVR boards like the Arduino Uno, including task creation, priorities, delays, and the automatic scheduler. These fundamentals are critical, because efficient task design and correct timing decisions directly affect system stability when working with limited RAM and CPU resources.
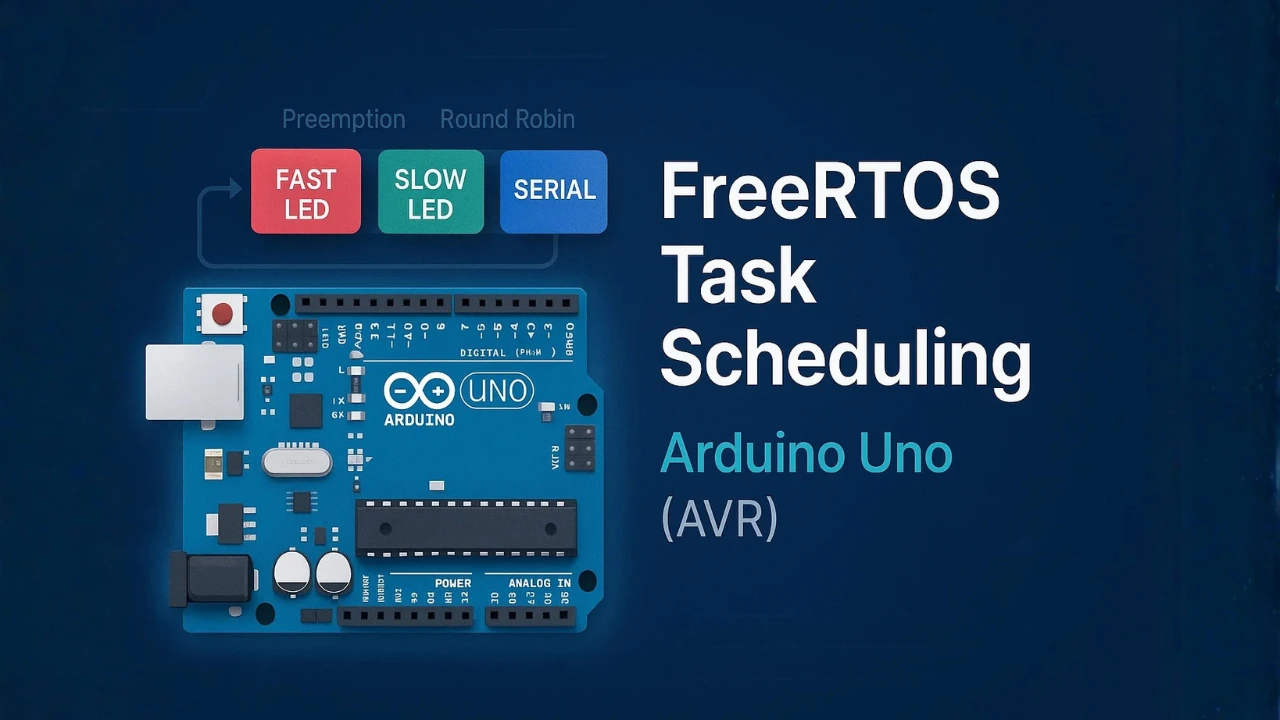
In Part 2, we will go deeper into how FreeRTOS actually schedules tasks on Arduino. You’ll explore the task state machine (Ready, Running, Blocked, and Suspended), understand how time slicing works in the Arduino_FreeRTOS environment, and learn how priorities influence execution. Through a hands-on demo with fast and slow LED tasks and a Serial logger, you’ll see real effects like preemption and starvation—and how to fix them by choosing priorities correctly. This next step will give you the confidence to design responsive and well-balanced multitasking systems on Arduino.
Browse More Arduino FreeRTOS Tutorials
FreeRTOS on Arduino (Part 3): vTaskDelay vs vTaskDelayUntil and Software Timers
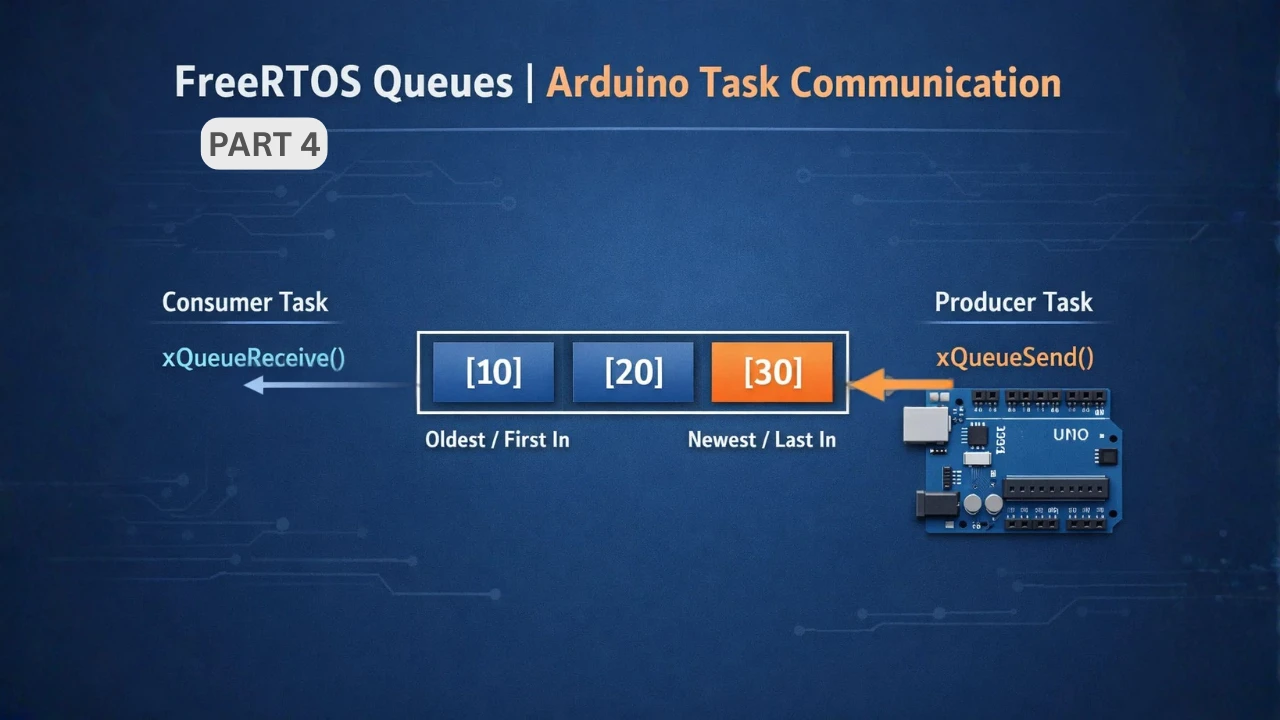
FreeRTOS on Arduino (Part 4): Inter Task Communication with Queues
FreeRTOS on Arduino (Part 5): Semaphores and Mutex Explained with Practical Examples
FreeRTOS on Arduino (Part 6): Using Interrupts in FreeRTOS
FreeRTOS Tutorial on Arduino (Part 7): Event Groups | Multi-Event Synchronization
Arduino FreeRTOS Project Download
FAQs – FreeRTOS Basics on Arduino
Subscribe
Login
0 Comments
Newest
