Updated On: March 23, 2026
STM32 W5500 TCP Server with FreeRTOS (Non-Blocking Multi-Tasking Setup)
In this tutorial, we’ll learn how to create a FreeRTOS-based TCP server using the STM32 and W5500 Ethernet module. This is the next part of our STM32 Ethernet series, following the previous TCP Server tutorial.
In the earlier project, we built a TCP server that could receive data from a client and control an LED connected to the STM32. However, that server used blocking mode, which meant the CPU had to wait for client data before doing anything else.
In this tutorial, we’ll solve that problem by integrating FreeRTOS. The STM32 can perform multiple tasks at once, like waiting for client data, controlling LEDs, or running background operations, without blocking the processor.
We’ll go step-by-step through the FreeRTOS configuration, task creation, and TCP server integration. You’ll also learn how to use task notifications to communicate between different tasks efficiently.
We’ll use the same hardware connections from the previous tutorial, so if you haven’t read that one yet, it’s best to go through it first before continuing.
Project Setup in STM32CubeIDE
Before we start writing the code, let’s prepare the project in STM32CubeIDE using CubeMX. In this section, we’ll enable FreeRTOS, create multiple tasks and queues, and set up their priorities and stack sizes properly.
This setup will allow our STM32 board to handle Ethernet communication and LED control tasks at the same time using the W5500 module.
Enabling FreeRTOS in CubeMX
Open your project in STM32CubeIDE, which you created in the previous TCP server tutorial. Go to the Middleware section and click on FreeRTOS.
Now, enable it and make sure CMSIS_V2 is selected.
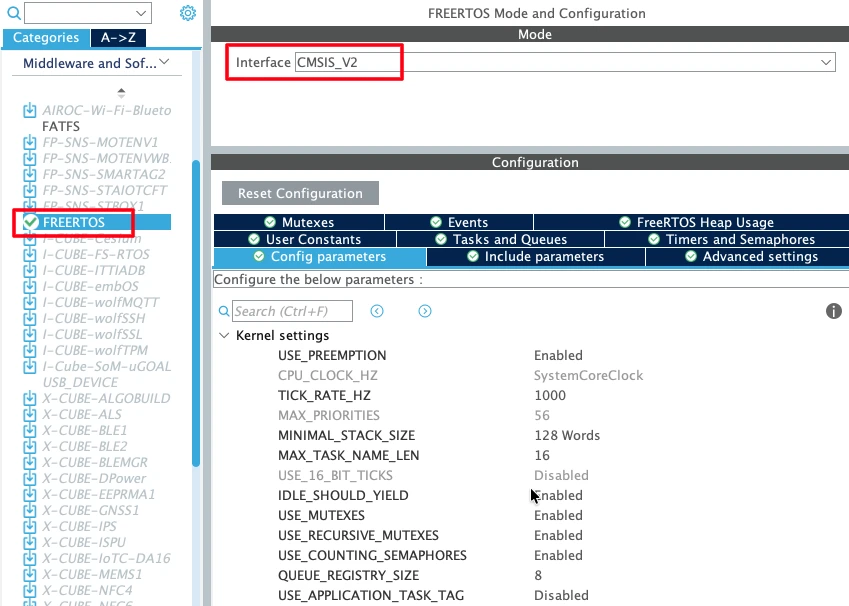
Leave most of the FreeRTOS configuration as default for now — it works fine for this setup.
Creating and Configuring Tasks
Next, open the Tasks and Queues tab. You’ll notice a Default Task is already created by CubeMX. Let’s rename the Default Task to tcpRcvTask.
This task will handle all the incoming data from the TCP client.
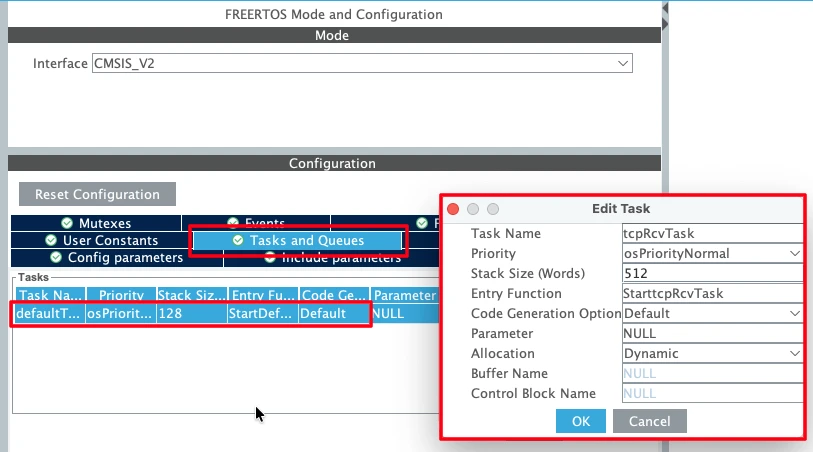
Since this task will be using functions like recv() and some printf() statements, it will need more stack memory. So, increase the stack size of this task to at least 512 words.
The task priority should be kept at Normal, which is the default setting. This allows it to wait for data in the background without blocking higher-priority tasks.
Now, let’s create another task for LED control. Click Add New Task, and name it ledControlTask. This task will manage turning the LED ON and OFF based on the data received from the client.
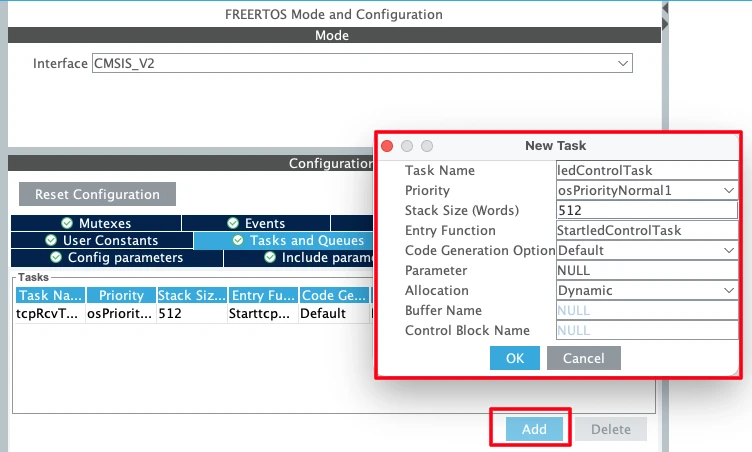
The LED control task will also send data back to the client, confirming the LED status. Since it needs to complete the data-sending process without being interrupted, we’ll give it a higher priority than the receive task.
This way, when the LED control task is running, it won’t get preempted by the TCP receive task — ensuring stable data transmission.
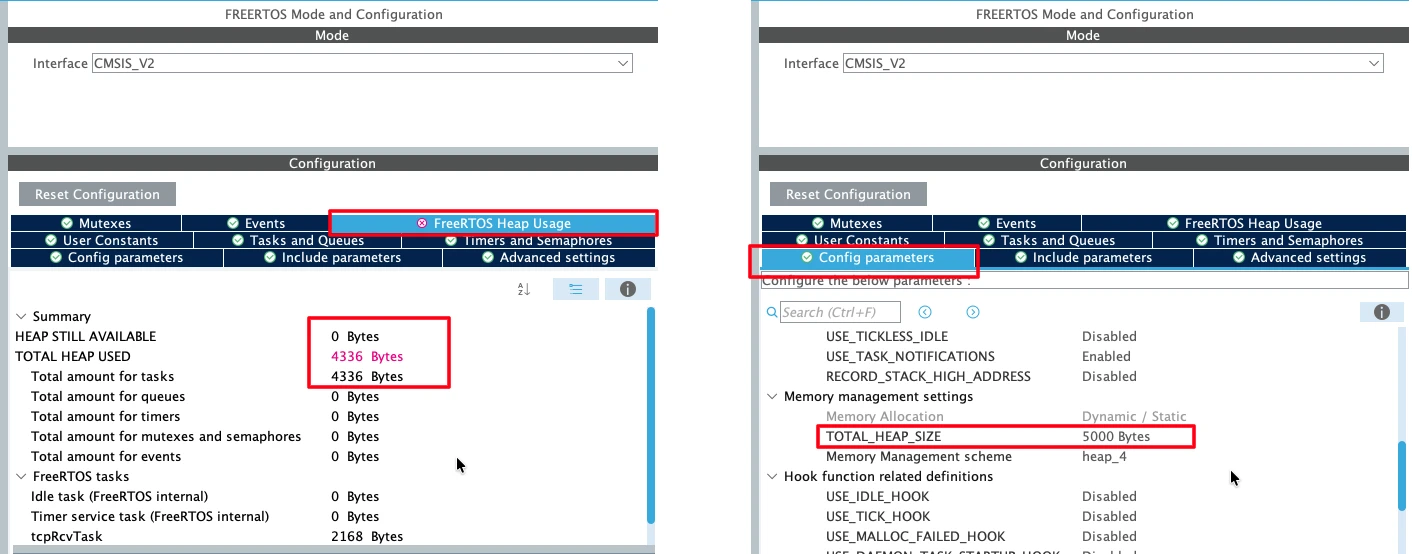
If your FreeRTOS heap usage goes beyond the limit, open the Parameter Settings tab and increase the heap size accordingly. This step is important to avoid memory issues during runtime.
Once done, go to Advanced Settings and enable Use Newlib Reentrancy.
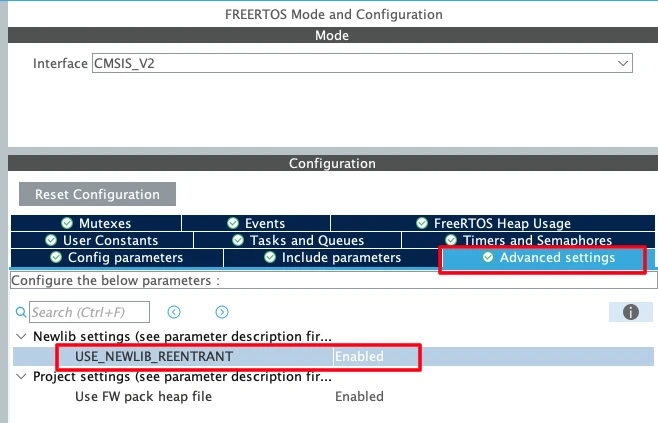
This makes standard library functions like printf() safe to use in multiple RTOS tasks.
Setting Task Priorities and Stack Sizes
Task priorities are critical when running multiple processes under FreeRTOS. If set incorrectly, tasks can interrupt each other and cause unexpected behavior.
Here’s the ideal setup for this project:
- ledControlTask → Higher Priority (to send responses without interruption)
- tcpRcvTask → Normal Priority (to receive client data in the background)
Make sure the stack size of both tasks is sufficient.
For example:
- tcpRcvTask: 512 words (since it handles network data)
- ledControlTask: 256–384 words (enough for LED control and message handling)
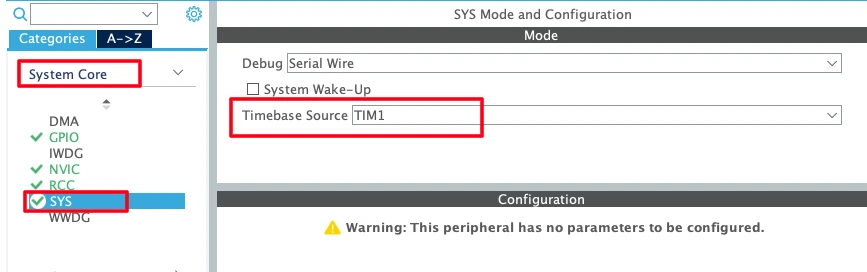
Also, go to System Core → SYS and change the Timebase Source to any available timer (for example, TIM6). This ensures smooth timing for FreeRTOS ticks, separate from the SysTick timer.
Once everything is set, click Save to generate the updated project files. You’re now ready to write the code for the FreeRTOS-based TCP server using the STM32 and W5500 Ethernet module.
Writing the TCP Server Code in FreeRTOS
In this section, we’ll write the actual code for the TCP server that runs under FreeRTOS on the STM32 using the W5500 Ethernet module. We’ll see where to place each part of the code, such as opening the socket, putting it in listen mode, and receiving data from the client.
Defining the Socket and Port
Define the TCP socket and port number at the beginning of your main.c file.
#define TCP_SERVER_SOCKET   0
#define TCP_SERVER_PORT 5000Here,
TCP_SERVER_SOCKETrepresents the socket number (you can use 0–7 for W5500).TCP_SERVER_PORTdefines the port on which the server will listen for incoming connections.
This setup makes it easier to manage and modify the socket configuration later.
Opening the Socket and Listening for Connections
After initializing the W5500 module in the main function, we’ll open the socket and make the server listen for clients.
Add the following code after the W5500 initialization inside the main() function, before the FreeRTOS Kernel initializes.
socket(TCP_SERVER_SOCKET, Sn_MR_TCP, TCP_SERVER_PORT, 0);
listen(TCP_SERVER_SOCKET);Here’s what happens in this part:
- The
socket()function opens a socket using the TCP protocol on the defined port. - The
listen()function puts that socket into listening mode, waiting for a client to connect.
This part needs to run only once, right after the Ethernet module is initialized.
Checking Socket Status (getSn_SR)
Inside the loop, we frequently check the socket status using the getSn_SR() function:
uint8_t status = getSn_SR(SOCKET_NUMBER);This function returns the current state of the socket, which helps us decide what action to take next.
Some common status codes are:
- 0x13 (SOCK_LISTEN) – the server is waiting for a client connection.
- 0x17 (SOCK_ESTABLISHED) – a client has successfully connected.
- 0x1C (SOCK_CLOSE_WAIT) – the client has closed its side of the connection.
- 0x00 (SOCK_CLOSED) – the socket is fully closed.
When getSn_SR() returns 0x17, it means a TCP connection is active and the server can start exchanging data.
We can also check the interrupt register using getSn_IR() to identify specific events like connection established, data received, or connection closed. Once a connection event is detected, we clear the interrupt flag to prevent duplicate triggers.
Receiving Data in the FreeRTOS Task
Now, open the file where tcpRcvTask (the Receive Task) is created. Inside its infinite loop, we’ll write the code that receives data from the connected client.
Here’s a simple cropped example:
uint8_t rx_buf[64];

for(;;)
{
    int32_t ret = recv(TCP_SERVER_SOCKET, rx_buf, sizeof(rx_buf));
    if (ret > 0)
    {
        rx_buf[ret] = '\0';
        printf("Received: %s\n", rx_buf);
        // Process the received command here
    }
    osDelay(1);
}Let’s understand what this does:
- The
recv()function waits for data from the client. - Since it’s inside an RTOS task, the CPU isn’t completely blocked; other tasks can still run.
- If data is received, it prints the message and processes it.
- The small delay (
osDelay(1)) gives time for other tasks to execute, keeping the system responsive.
Processing Commands (ON/OFF Control)
After receiving data, we can check whether the message is “ON” or “OFF” and control the LED accordingly.
if (strcmp((char*)rx_buf, "ON") == 0)
{
    osThreadFlagsSet(ledControlTaskHandle, 0x01);
}
else if (strcmp((char*)rx_buf, "OFF") == 0)
{
    osThreadFlagsSet(ledControlTaskHandle, 0x02);
}Here’s what’s happening:
- When the server receives “ON”, it sends a notification (
0x01) to the LED Control Task. - When it receives “OFF”, it sends a different notification (
0x02).
This way, both tasks communicate efficiently without using global variables or blocking calls.
Handling Client Disconnects
If the client closes the connection, the socket status changes to 0x1C (SOCK_CLOSE_WAIT). In this case, the server should close its own connection properly using the disconnect() function:
disconnect(SOCKET_NUMBER);Once the disconnection is complete, the socket status becomes 0x00 (SOCK_CLOSED). At this point, the server can either stop or reopen the socket to accept a new client connection automatically.
In this tutorial, we reopen the socket inside the main loop. This keeps the TCP server always running, ready to accept new connections without needing a microcontroller reset.
case SOCK_CLOSED:
printf("Socket closed, reopening...\r\n");
if (socket(TCP_SERVER_SOCKET, Sn_MR_TCP, TCP_SERVER_PORT, 0) == TCP_SERVER_SOCKET){
listen(TCP_SERVER_SOCKET);
printf("TCP Server listening on port %d\r\n", TCP_SERVER_PORT);
}
break;This ensures the server automatically restarts and stays available for future connections.
The complete TCP Receive Task
Below is the complete tcpRcvTask. This FreeRTOS receive task handles all TCP communication between the STM32 and the client. It continuously monitors the socket status using getSn_SR(), and when a connection is established, it waits for incoming data through the recv() function.
void StarttcpRcvTask(void *argument)
{
/* USER CODE BEGIN 5 */
uint8_t rx_buf[64];
/* Infinite loop */
for(;;)
{
uint8_t status = getSn_SR(TCP_SERVER_SOCKET);
switch (status) {
case SOCK_ESTABLISHED:
if (getSn_IR(TCP_SERVER_SOCKET) & Sn_IR_CON) {
printf("Client connected!\r\n");
setSn_IR(TCP_SERVER_SOCKET, Sn_IR_CON); // clear flag
}
// Step 4: Receive data
int32_t ret = recv(TCP_SERVER_SOCKET, rx_buf, sizeof(rx_buf));
if (ret > 0) {
rx_buf[ret] = '\0';
printf("Received (%ld bytes): %s\r\n", ret, rx_buf);
if (strcmp((char*)rx_buf, "ON") == 0)
{
    osThreadFlagsSet(ledControlTaskHandle, 0x01);
}
else if (strcmp((char*)rx_buf, "OFF") == 0)
{
    osThreadFlagsSet(ledControlTaskHandle, 0x02);
}
}
break;
case SOCK_CLOSE_WAIT:
printf("Client disconnected\r\n");
disconnect(TCP_SERVER_SOCKET);
break;
        case SOCK_CLOSED:
            printf("Socket closed, reopening...\r\n");
            if (socket(TCP_SERVER_SOCKET, Sn_MR_TCP, TCP_SERVER_PORT, 0) == TCP_SERVER_SOCKET){
                listen(TCP_SERVER_SOCKET);
                printf("TCP Server listening on port %d\r\n", TCP_SERVER_PORT);
            }
            break;
default:
break;
}
}
/* USER CODE END 5 */
}Whenever the client sends the commands “ON” or “OFF”, the task sends a corresponding notification flag to the LED Control Task, telling it to turn the LED on or off.
If the client disconnects or the socket closes, the task automatically disconnects, reopens, and starts listening again — keeping the TCP server always ready for new connections.
Implementing LED Control Task
Now that the TCP Receive Task is ready and capable of sending notifications, let’s create the LED Control Task. This task is responsible for turning the LED ON or OFF based on the commands received from the client and sending the updated LED state back to the client through the W5500 Ethernet module.
Waiting for Notifications from the Receive Task
Inside the ledControlTask, we’ll use FreeRTOS thread flags (or task notifications) to receive signals from the tcpRcvTask. The LED task will remain idle most of the time and only execute when a notification arrives.
Here’s an example structure for the task:
void StartledControlTask(void *argument)
{
  uint32_t flags;

  for(;;)
  {
    // Wait indefinitely for a flag (0x01 or 0x02)
    flags = osThreadFlagsWait(0x01 | 0x02, osFlagsWaitAny, osWaitForever);

    if (flags != 0)
    {
      // Process the received flag
      if (flags & 0x01)
      {
        // Turn LED ON
      }
      else if (flags & 0x02)
      {
        // Turn LED OFF
      }
    }
  }
}In this code:
- The task uses
osThreadFlagsWait()to wait indefinitely for a signal. - It listens for two possible flags —
0x01and0x02. - The task only wakes up when one of these flags is set by the Receive Task.
This approach keeps the CPU usage low and makes the LED task completely event-driven, not time-driven.
Controlling the LED Based on Client Commands
Once the LED Control Task receives the flag, it checks which one is set and performs the corresponding LED operation.
if (flags & 0x01)
{
  HAL_GPIO_WritePin(GPIOC, GPIO_PIN_13, GPIO_PIN_RESET); // LED ON
}
else if (flags & 0x02)
{
  HAL_GPIO_WritePin(GPIOC, GPIO_PIN_13, GPIO_PIN_SET); // LED OFF
}Here’s what happens:
- When the client sends
“ON”, the Receive Task sets the flag0x01, and the LED task turns the LED ON. - When the client sends
“OFF”, the flag0x02is triggered, and the LED turns OFF.
Since this task has a higher priority than the receive task, it runs without being interrupted, ensuring smooth LED control and reliable communication.
Sending LED State Back to the Client
After updating the LED state, we can send a confirmation message back to the client through the W5500 module.
Add the following code right after the LED control logic:
char tx_buf[32];

if (flags & 0x01)
{
  strcpy(tx_buf, "LED is ON\r\n");
}
else if (flags & 0x02)
{
  strcpy(tx_buf, "LED is OFF\r\n");
}

send(TCP_SERVER_SOCKET, (uint8_t*)tx_buf, strlen(tx_buf));
This part performs three actions:
- Prepares a small text message describing the LED state.
- Uses the
send()function to transmit it to the connected TCP client. - Allows the client to confirm that the command was received and executed correctly.
Since the LED task runs with a higher priority, it ensures that the send operation completes without being preempted by the receive task — preventing data corruption.
The Complete LED Control Task
Below is the complete ledControltask. This FreeRTOS task handles the LED related code and transmits the status to the client.
void StartledControlTask(void *argument)
{
  /* USER CODE BEGIN StartledControlTask */
	uint32_t flags;
	char tx_buf[32];
  /* Infinite loop */
  for(;;)
  {
	  flags = osThreadFlagsWait(0x01 | 0x02, osFlagsWaitAny, osWaitForever);
	  if (flags & 0x01)
	  {
	    HAL_GPIO_WritePin(GPIOC, GPIO_PIN_13, GPIO_PIN_RESET); // LED ON
	    strcpy(tx_buf, "LED is ON\r\n");
	  }
	  else if (flags & 0x02)
	  {
	    HAL_GPIO_WritePin(GPIOC, GPIO_PIN_13, GPIO_PIN_SET); // LED OFF
	    strcpy(tx_buf, "LED is ON\r\n");
	  }
	  send(TCP_SERVER_SOCKET, (uint8_t*)tx_buf, strlen(tx_buf));
    osDelay(1);
  }
  /* USER CODE END StartledControlTask */
}The Receive Task waits for commands, and the LED Task responds instantly, giving you a clean, non-blocking, and event-driven TCP server using W5500 and FreeRTOS.
Final Testing and Results
After implementing the FreeRTOS-based TCP server with the W5500 Ethernet module, it’s time to build, flash, and test the project. In this section, we’ll go through the final steps to make sure everything is working as expected.
Building and Flashing the Project
Once all the tasks are configured and the code is complete, click on Build Project in STM32CubeIDE. You might see a few warnings, but as long as there are no errors, you’re good to go.
Now, flash the firmware to your STM32 board. Open the serial terminal software to see the logs.
You should see the message:
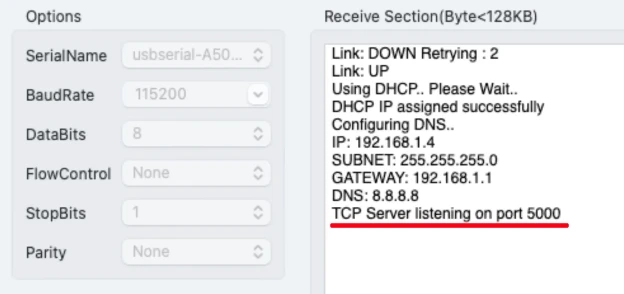
This indicates that your server is up and running successfully under FreeRTOS.
Testing Client Commands
After flashing, open your preferred TCP client tool (like Hercules or YAT) and connect to the STM32 using the correct IP address and TCP port configured in your code. With the server ready and the client connected, start by sending commands.
- Type OFF and press Send → The LED should turn OFF instantly.
- Type ON and press Send → The LED should turn ON immediately.
This is shown in the video below.
You can see the LED is responding to the commands sent by the client. Also note the confirmation messages in the client window:
LED is ON
LED is OFFIf you send any other message (for example, “HELLO”), nothing will happen. Only the valid commands (ON and OFF) trigger the LED action.
With everything running perfectly, your FreeRTOS-based TCP Server using W5500 is now fully functional. It can handle multiple real-time tasks, manage communication efficiently, and respond instantly to client commands, all while keeping the CPU free for other operations.
Observing Task Synchronization with FreeRTOS
Now, let’s look at how FreeRTOS helps in synchronizing tasks effectively.
- The Receive Task continuously checks for client data using
recv().
When it detects a valid command, it sends a task notification to the LED Control Task. - The LED Control Task, which has a higher priority, immediately wakes up, updates the LED state, and sends a confirmation message to the client.
This process happens seamlessly because of proper task priority configuration. If the LED task had a lower priority than the receive task, the receive task could preempt it, causing data corruption during the send() function call.
By giving the LED task a higher priority, we ensure that it completes sending data before any other task interrupts it — resulting in stable, synchronized operation.
Video Tutorial
STM32 FreeRTOS TCP Server with W5500 Video Tutorial
This video builds upon the previous STM32 W5500 TCP Server tutorial and shows how to run it under FreeRTOS.
You’ll learn how to create RTOS tasks, handle client communication using recv() and send(), and control an LED through task notifications — all inside STM32CubeIDE.
Watch the full video below and follow this guide to implement a multitasking TCP Server on your STM32 board using the W5500 Ethernet module.
Conclusion
In this tutorial, we learned how to create a TCP Server using STM32 and the W5500 Ethernet module, this time running under FreeRTOS. We started by enabling FreeRTOS in STM32CubeMX, creating multiple tasks, and assigning priorities based on their importance. Then we modified our previous blocking TCP server code to work within the RTOS environment, allowing the CPU to manage other tasks while waiting for incoming data.
We also implemented a dedicated LED Control Task that responds to notifications from the receive task, turning the LED ON or OFF based on client commands. Through this, we explored how task synchronization and inter-task communication work using task notifications in FreeRTOS. Finally, by testing the project, we confirmed that the server can handle communication efficiently without blocking the system, resulting in smoother multitasking and reliable data handling.
This setup can be expanded for more advanced applications — such as controlling multiple peripherals over Ethernet, building IoT devices, or integrating real-time monitoring systems. By combining the power of STM32, W5500, and FreeRTOS, you now have a strong foundation to develop scalable, responsive, and network-enabled embedded systems.
Browse More STM32 W5500 Tutorials
STM32 W5500 Ethernet Tutorial (Part 2): Create a TCP Server to Receive and Process Data
STM32 W5500 Ethernet Tutorial (Part 4): Connect STM32 to TCP Server Using DNS and Static IP
STM32 W5500 Ethernet Tutorial (Part 5): HTTP Webserver on STM32
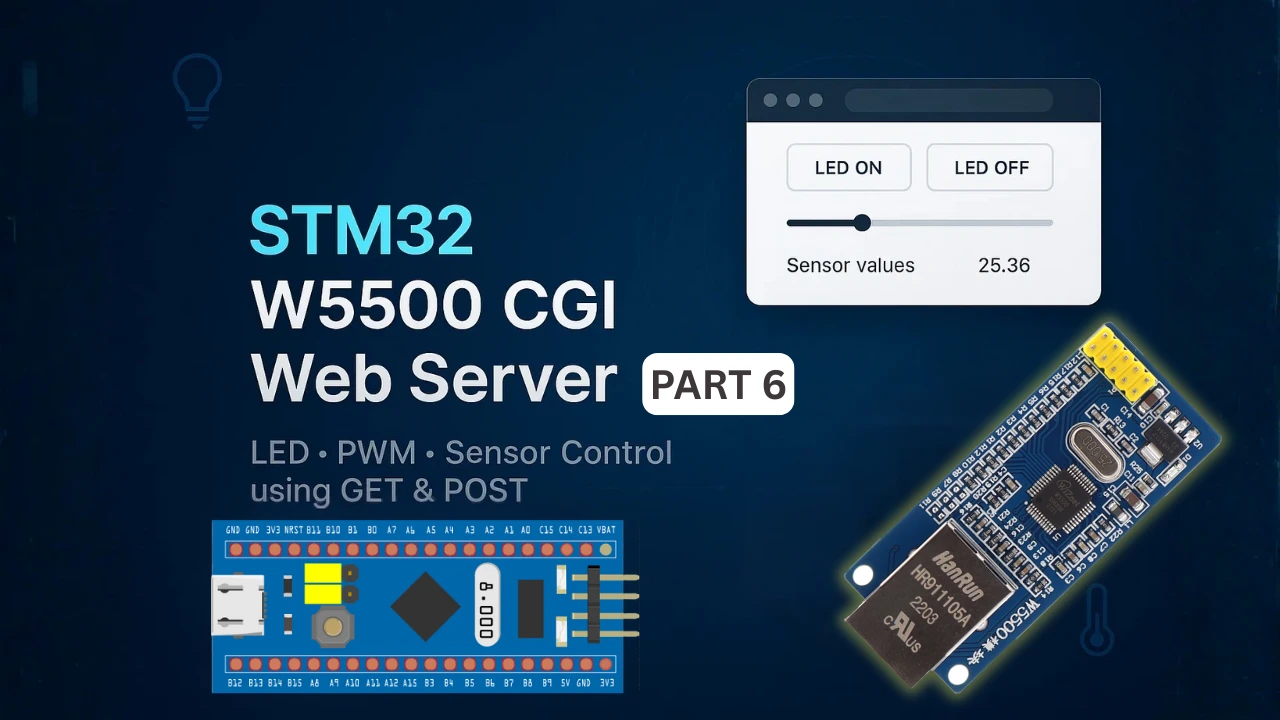
STM32 W5500 Ethernet Tutorial (Part 6): Dynamic HTTP Webserver using CGI
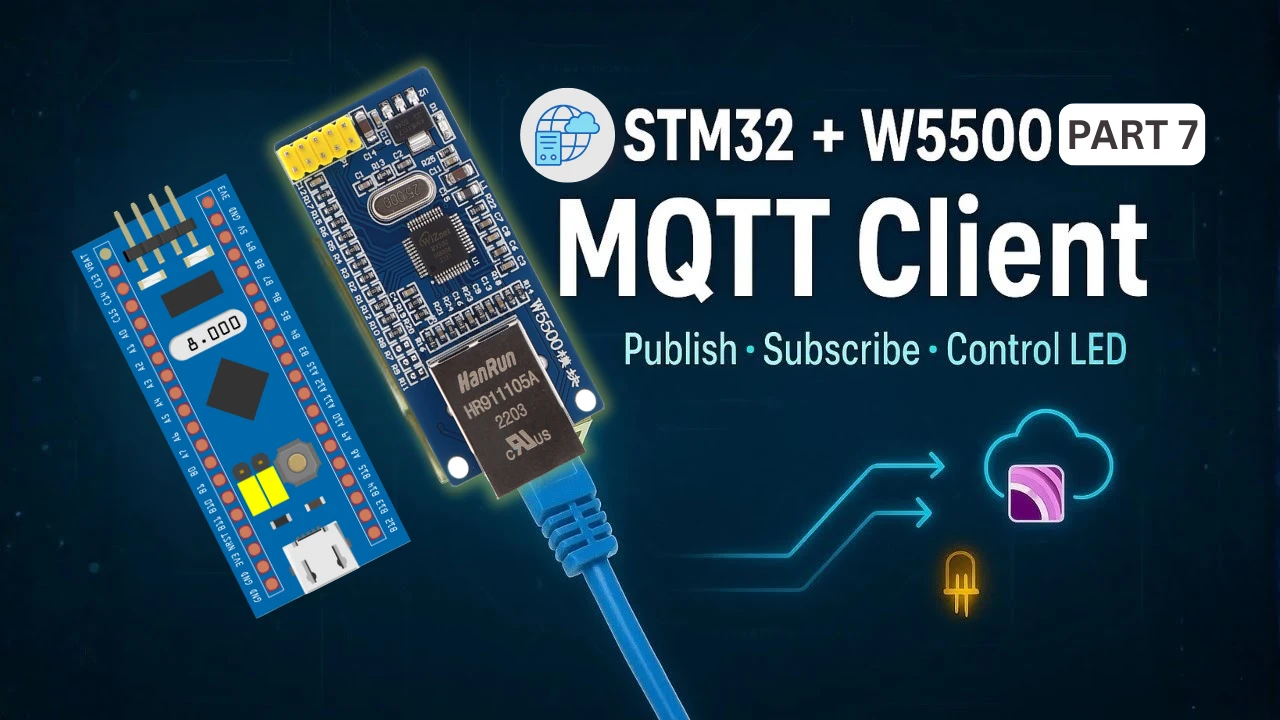
STM32 W5500 Ethernet Tutorial (Part 7): STM32 as MQTT Client
STM32 W5500 TCP Server Project Download
STM32 W5500 TCP Server FAQs

Subscribe
Login
0 Comments
Newest
